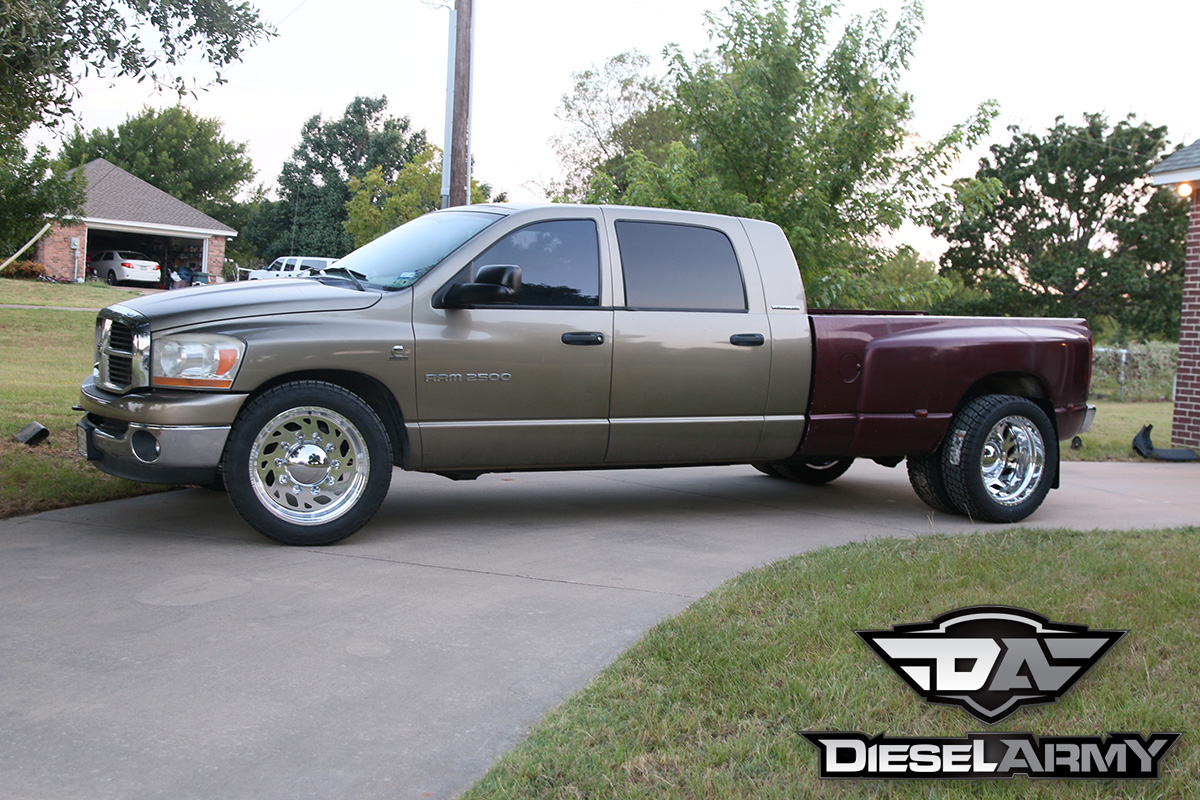
 [1]As a fitting finale to our project MCLB Heavy Hauler [2], one of the last things to install is a proper tow hitch. After all, what good is a heavy-haulin’ pickup if it’s not set up for big-time towing?
The system we put in is the B&W Turnoverball Gooseneck Hitch [3]. It’s a pretty straightforward deal and doesn’t clutter up the cargo area, as Crede Young, owner of Diesel Dynamics points out. “We install a lot of these kits,” he notes. “They are extremely simple to install and work very well. We never have any problems with these hitches and the owner still has full use of the bed.”
Befitting its name, the Turnoverball hitch can be inverted for storing below the surface of the truck bed when not need for towing, thus providing a smooth, unobstructed surface for cargo. It’s important, though, that the ball location fits with this design feature, and also the truck geometry. So, be sure to allow for plenty of turning clearance between the nose of the trailer and the truck cab. Cab clearance on short-bed trucks is more limited, but that’s not a problem with our long-bed MCLB.
Before getting started, you’ll need to make sure you have some common shop tools, along with a few specialized ones. These include either an impact wrench or ratchet, and box-end wrenches as well (3/4 and 9/16 inches sizes). Other items include heavy-duty snips for cutting sheetmetal, a four-inch hole sole, flashlight, drill, torque wrench, adjustable wrench, tape measure, and a lifting device.
For safety purposes, be sure to use both eye and ear protection as well, and exercise care when doing the installation to avoid any potential hazards. Also, since this hitch is designed for handling heavy trailers, it’s essential to use the correct size of coupler (for a 2 5/16-inch ball), as a larger coupler could result in loss of attachment. Do not modify the product, nor exceed the tow or tongue ratings of the truck and trailer.
 [4]
[4]
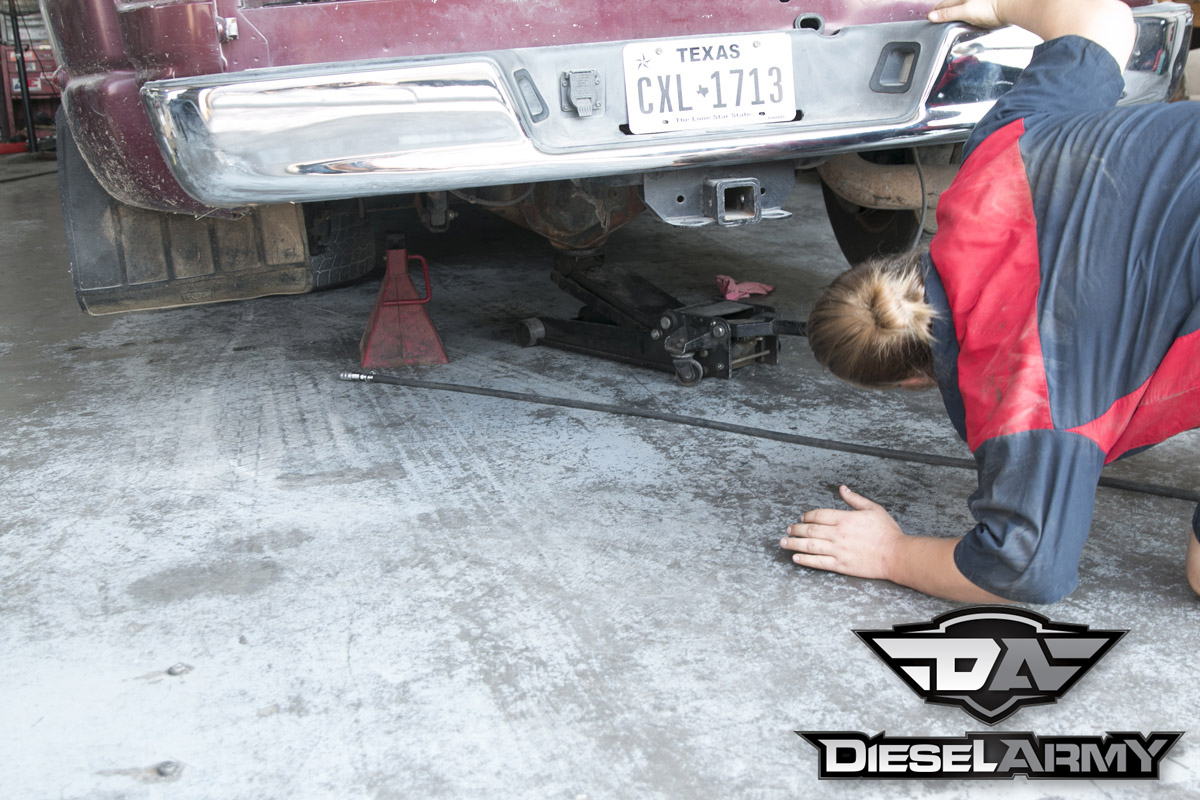
Begin by removing the spare tire, and lifting the truck. Use only proper lifting equipment designed for vehicles being serviced. To make the job easier, also use a hook on a chain for holding the hitch in position from above during installation.
Next, remove or modify fender liners if they get in the way of access to the opening between the bed and frame, just over the axle, where the hitch cross members will be installed.
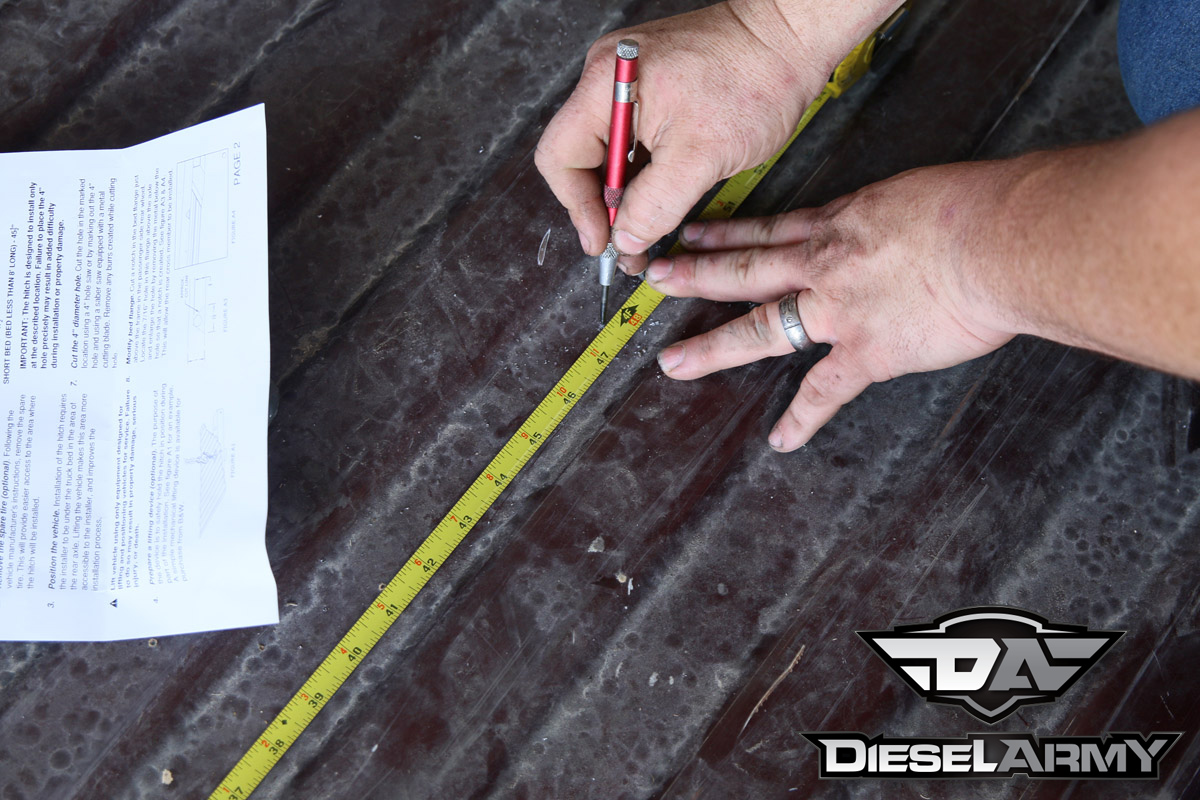 [5]Then, measure from the back of the bed to the hole location. On a eight-foot long-bed, the distance is 47 1/2 inches, and for a short-bed less than eight feet long, it’s a 45 1/2 inches. Then measure between the wheelwells and divide by two to get the exact centerline of the bed. The center of the hole must be at the intersection of length and width measurements. Note that the hitch is designed for installation at only this location, and any other position could result in a more difficult installation and/or damage to either the truck or the trailer.
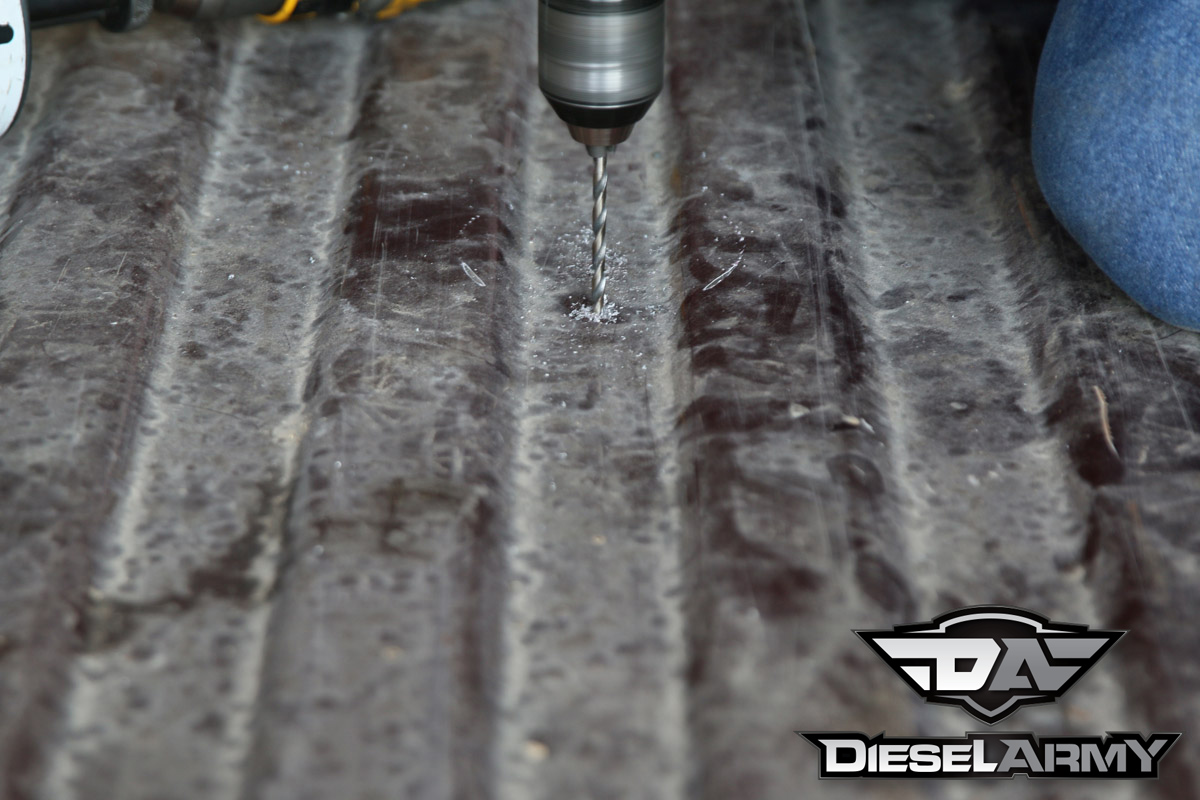
After cutting the hole in the marked location, remove any burrs on the edges. Then cut a notch in the bed flange just above the frame in the passenger-side rear wheelwell. The notch should be located with a 7/16-inch hole above the axle. Enlarge the hole before removing metal in order to create the notch (the instruction manual provides a diagram showing how to do this), and allow the rear crossmember to be installed.
 [6]
[6] [7]
[7]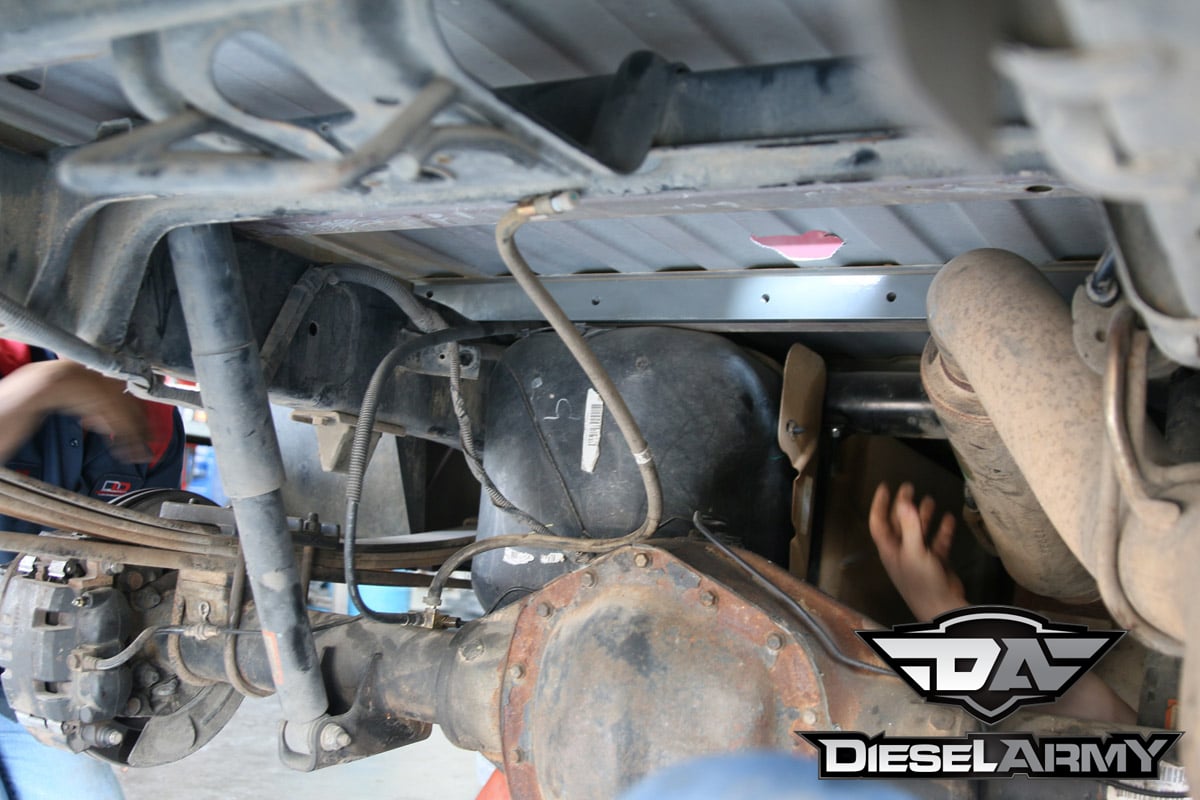 [8]
[8] [9]
[9]
Before proceeding, however, check for any fuel or brake lines, along with wiring or other components, that might interfere with the hitch installation. Keep in mind that Turnoverball hitch components are heavy and not easily mounted in place, so use proper lifting techniques, preferably recruiting an extra pair of hands.
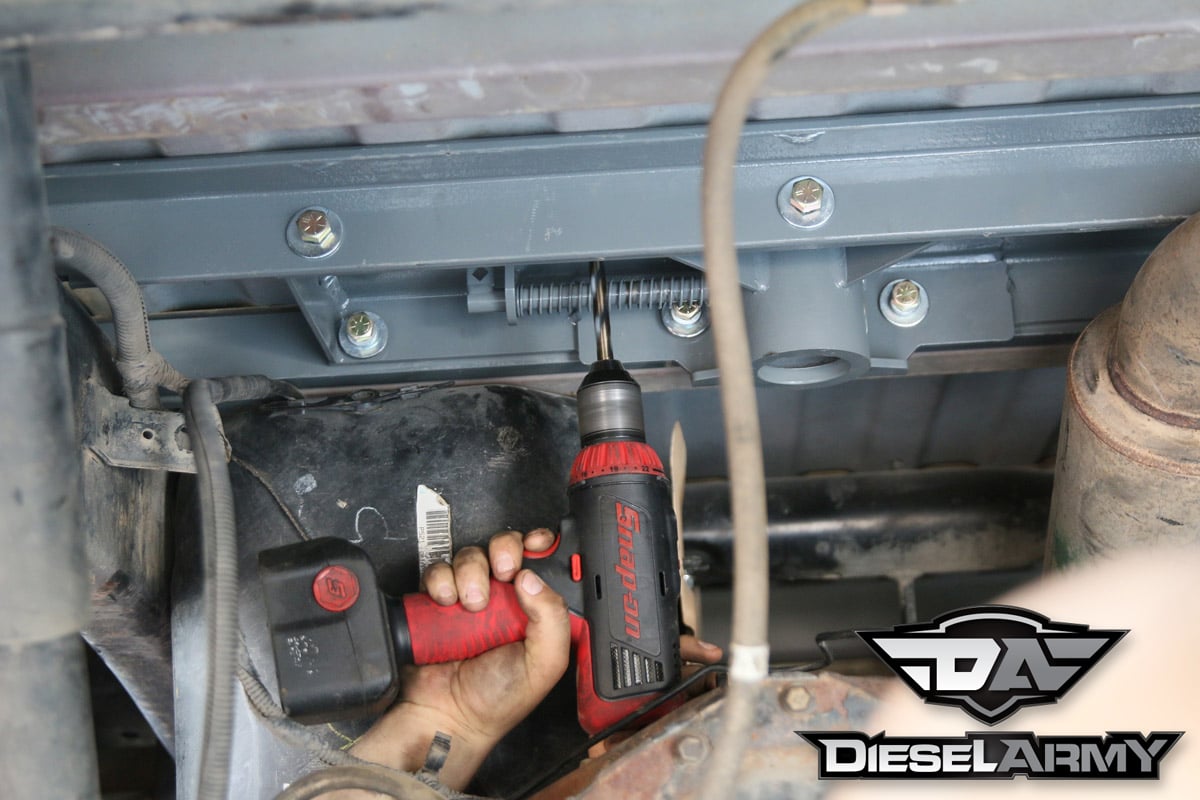
Place the crossmembers by sliding them across the frame at the notch inside the passenger-side wheelwell, until they span both frame rails. Rotate the front crossmember so the holes on the ends are closest to the bed floor, and push it forward against the bed crossmember.
When installing the rear crossmember, orient it so the side with the slotted holes is facing the front of the truck. It will have to be rotated and angled in order to fit in place (again, diagrams in the instructions demonstrate this). There should be about 10 inches of space between the two crossmembers.
 [10]
[10] [11]
[11]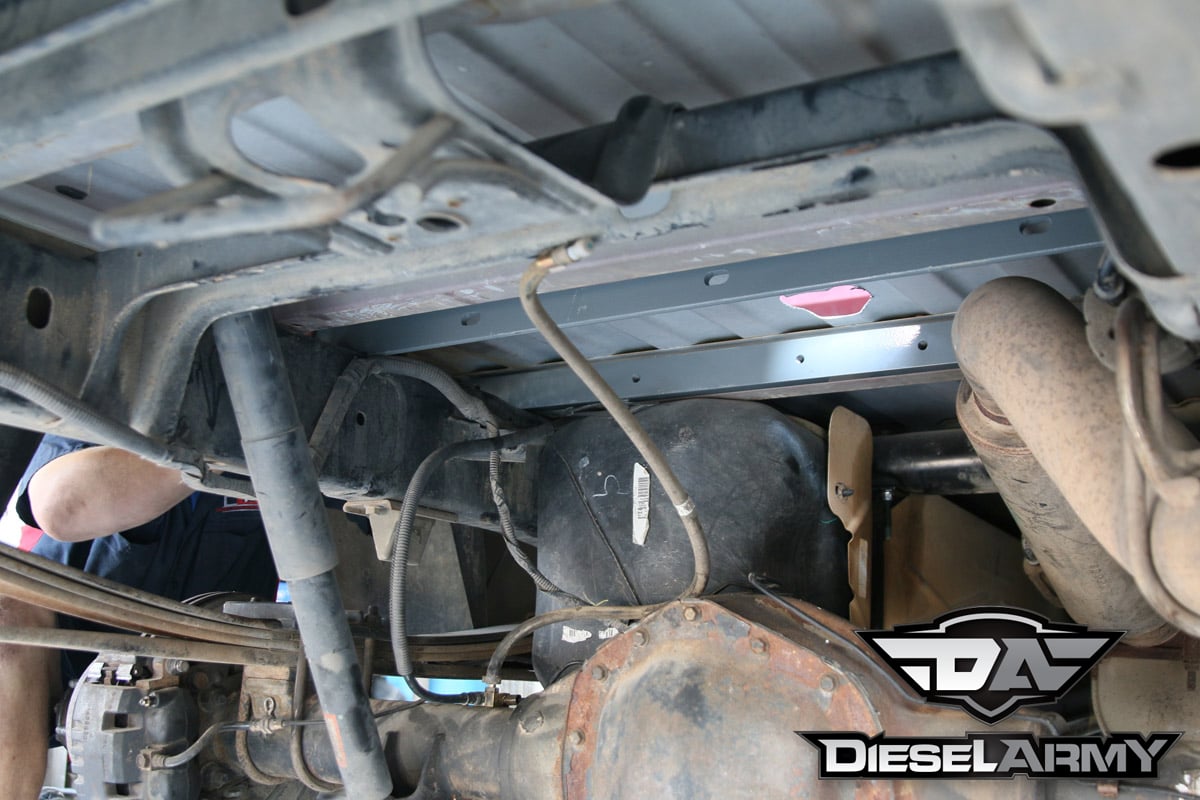 [12]
[12]
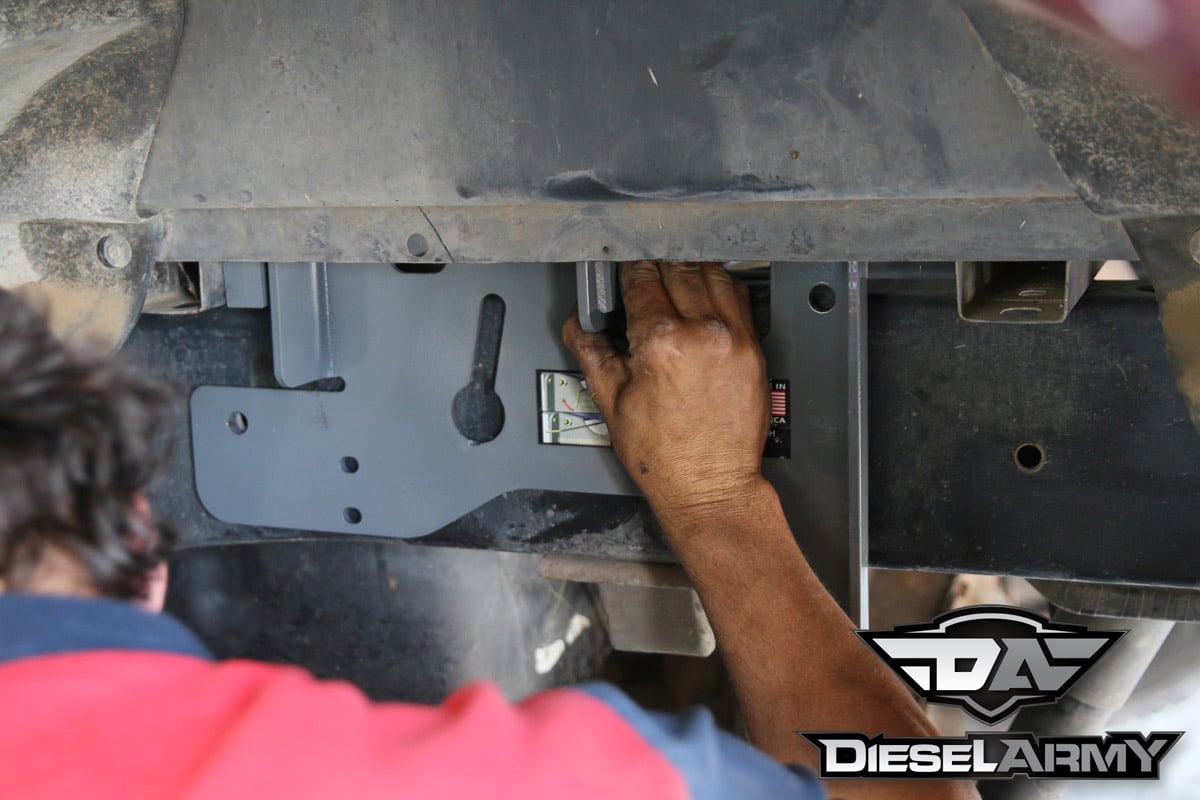
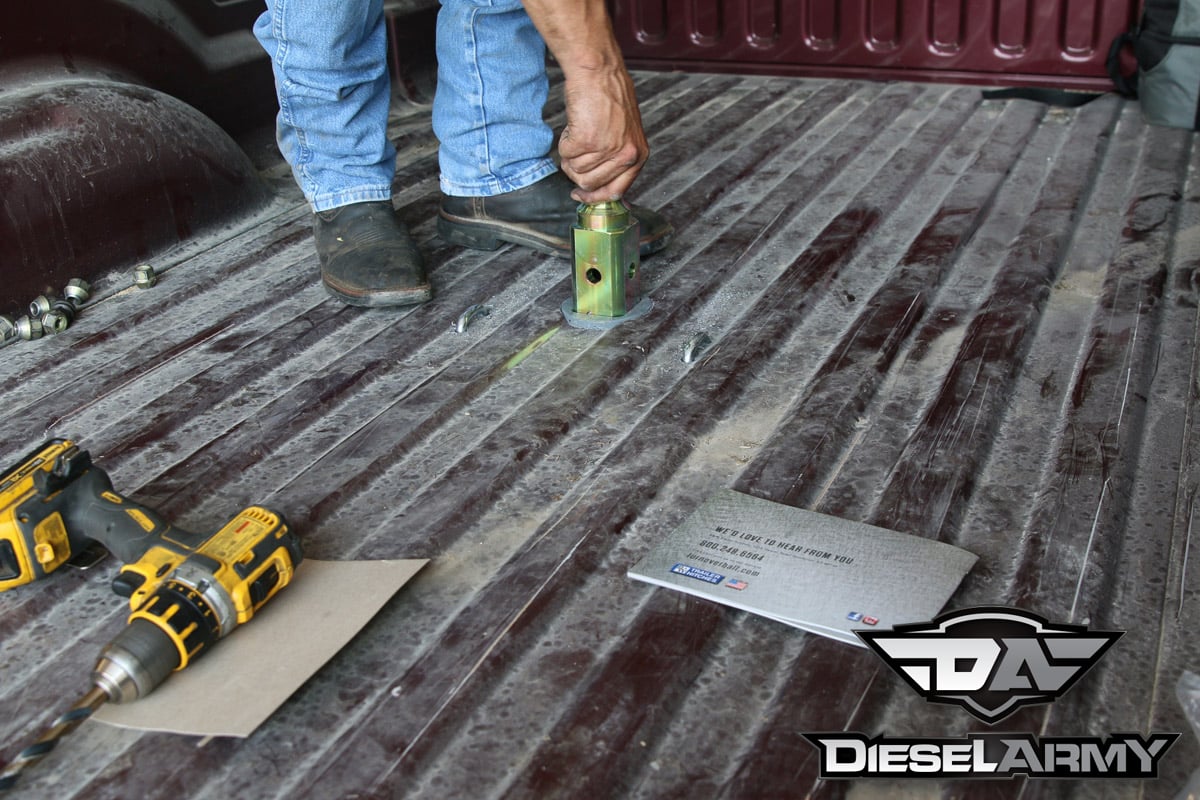
Next, install the center section with the latch pin located on the driver’s side. You’ll need to raise this section over the differential and exhaust. Guide the raised four-inch circle on top of the center into the four-inch hole in the bed floor. Then secure the center section loosely to the crossmembers.
Prior to installing the side plates, remove a bracket for a brake cable on the driver’s side of the frame. Then, fish carriage bolts through frame, and attach locking straps so the attachment hardware can be secured. When installing U-bolts, make sure to remove any wiring that’s in the way, and reattach in a safe location. On some truck models a small wire plug will have to be removed in order to install the U-bolt.
 [13]
[13]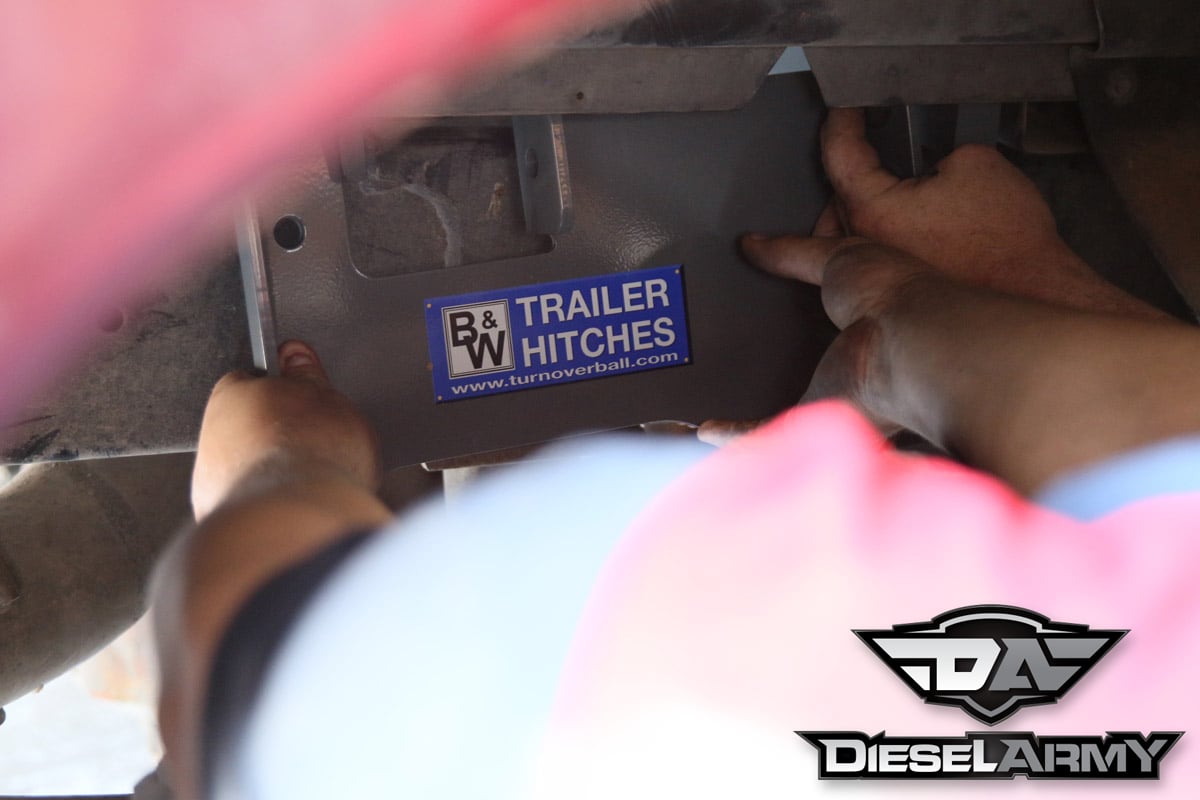 [14]
[14]
With the U-bolts loosely installed and straddling the frame, tighten the center section bolts that secure the two cross members. Square the hitch by checking distances between the hitch and bed crossmember. Adjust the hitch as needed so it’s centered properly, and then tighten side plate bolts and torque all fasteners to 80 ft-lb. If you used a lifting device to hold the center section in place, it can now be disconnected.
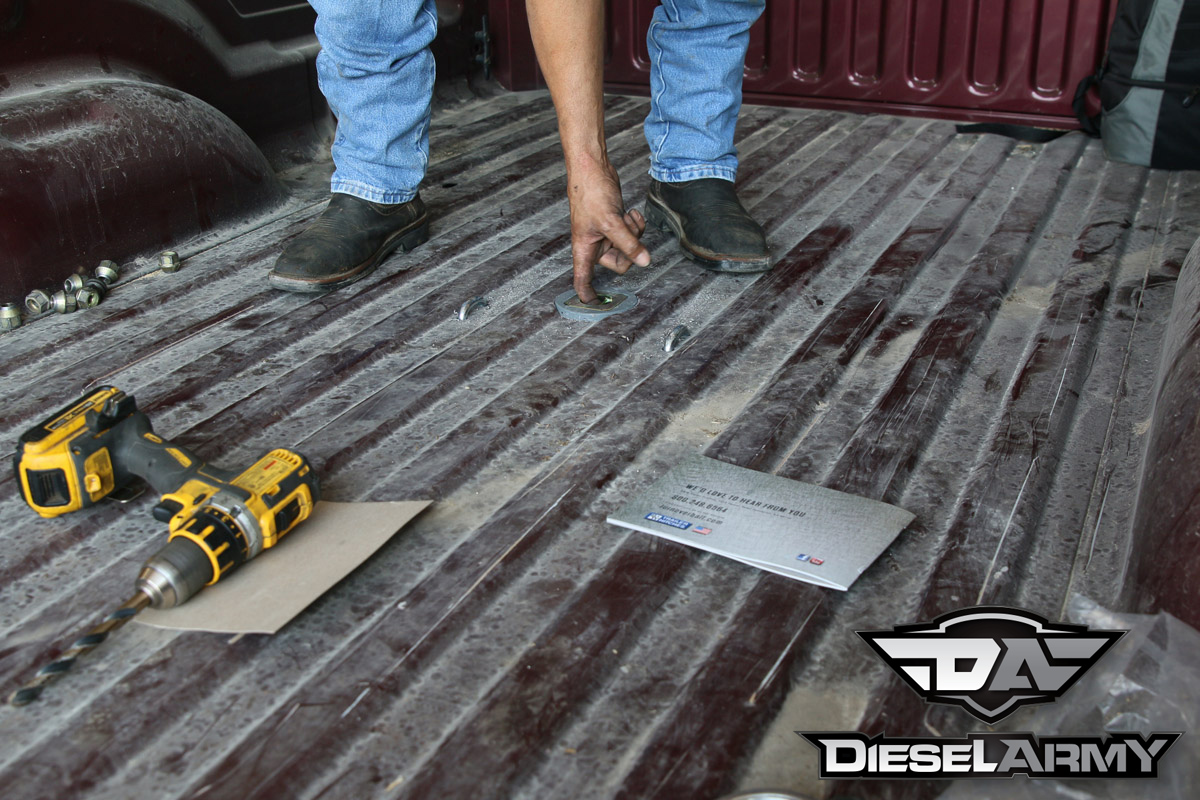
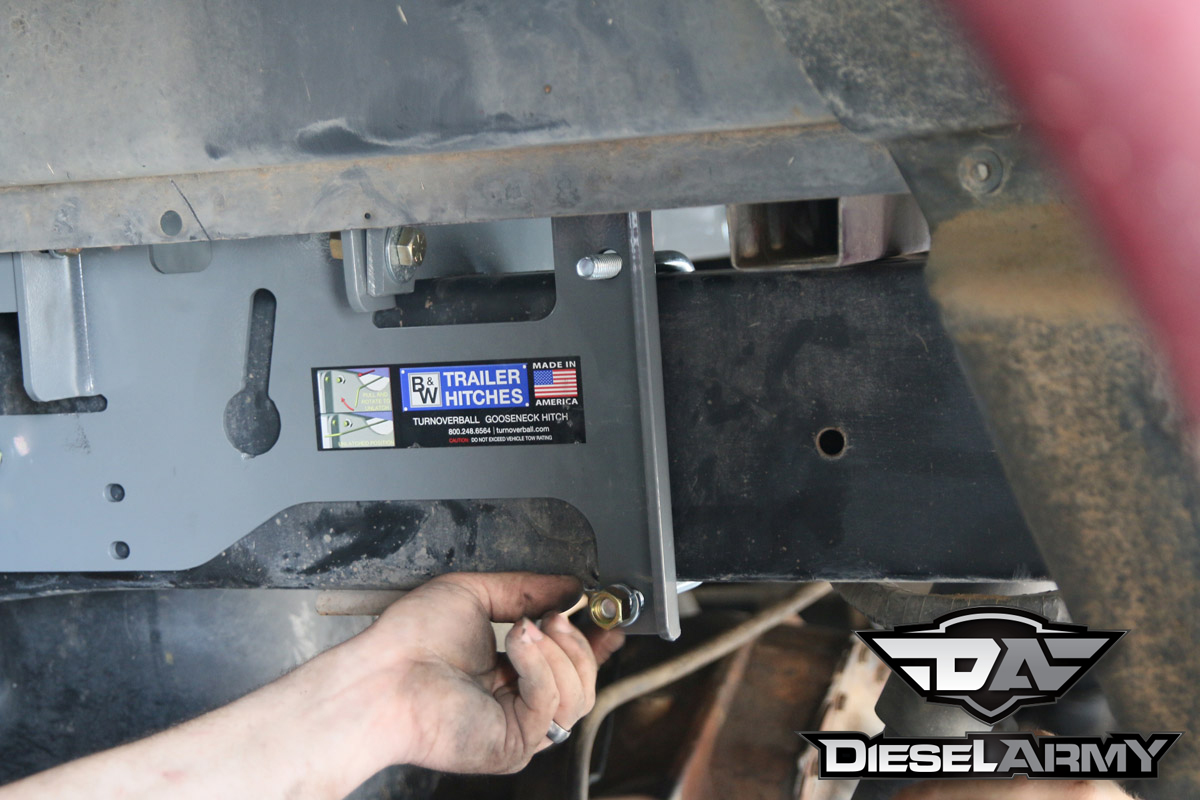 [15]Install the latch pin release handle by inserting it through the slot on the driver’s side, and aligning the handle eyelet with the square hole in the latch pin. Secure the handle to the pin with a carriage bolt and locking flange.
Don’t forget to install the safety chain U-bolts. You’ll need to drill holes under the bed, using the four holes that match up with a low rib in the bed as a guide. When installing these U-bolts from the top side, place a conical spring over each leg before securing with a lock nut.
 [16]
[16]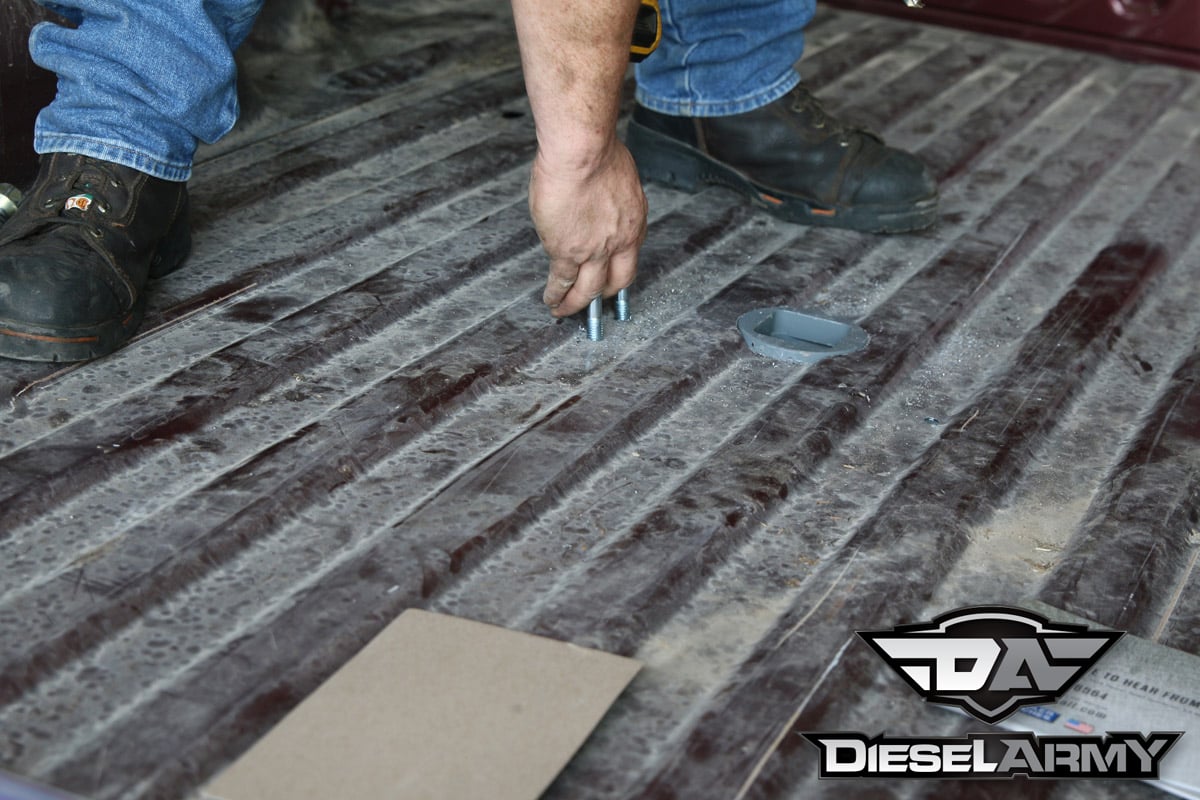 [17]
[17]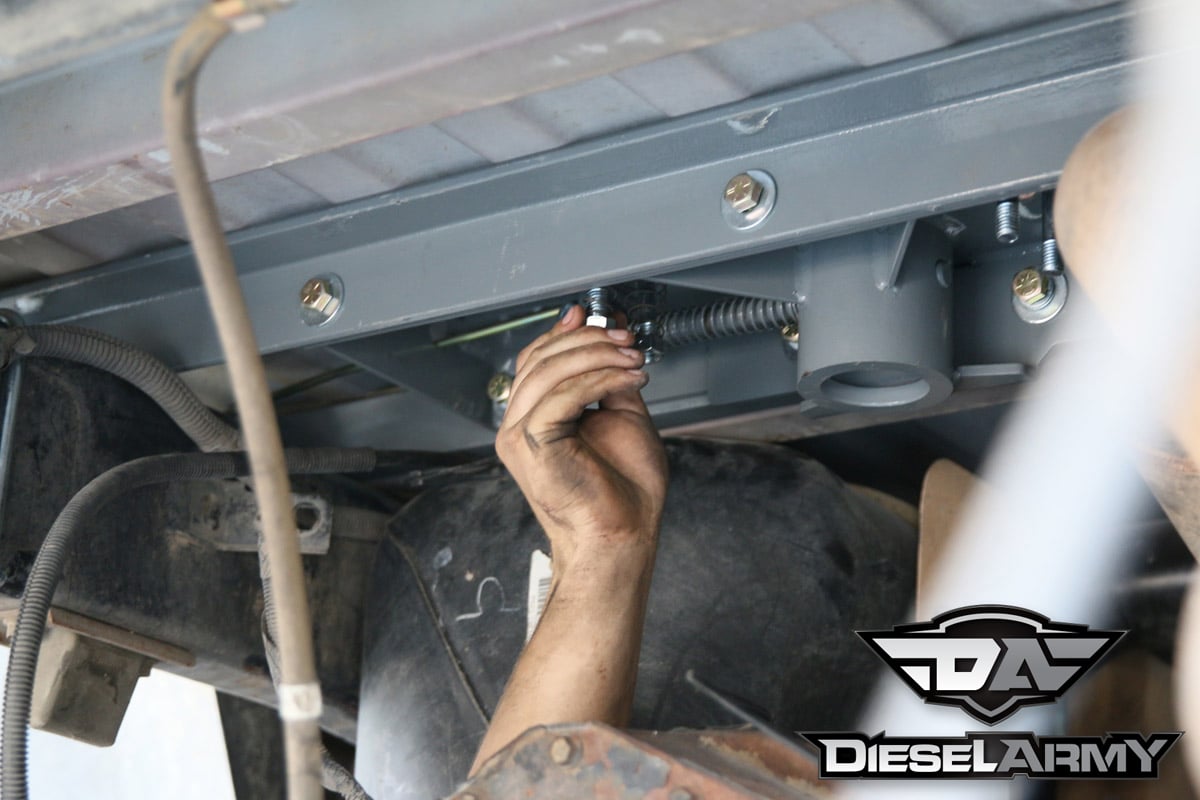 [18]
[18]
Before towing, replace the spare tire and the fender liner. The latter item might need some modification for the handle to operate freely, typically by cutting a slot or hole.
When retracting the pin, pull the handle out all the way, and then turn it clockwise until it stays in this open position. Note that operating your tow vehicle with the latch in the open position can allow the handle to contact the rear tire, resulting in serious injury and/or an accident. So don’t do that.
After lubricating the ball with a light coating of grease on all four corners of the shank, engage the pin by rotating the handle counter clockwise. When properly installed, the latch pin will pass through the ball and through both walls of the hitch receiver. If that doesn’t happen, your trailer could come loose, so make sure the connection is solid and secure.
 [19]
[19]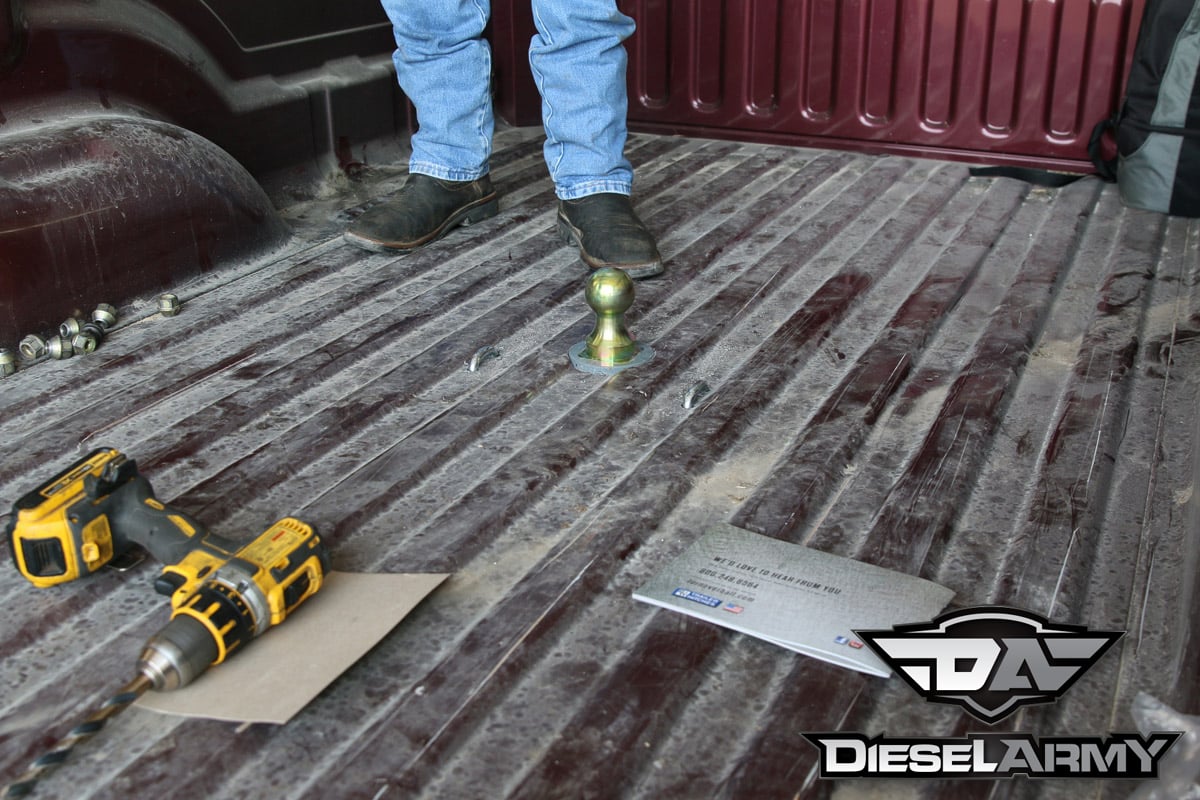 [20]
[20]
Once the hitch is securely installed, follow a few basic tips for safe operation and proper maintenance. Always be sure that the latch pin is fully engaged in the socket before towing (we’ve witnessed seasoned towers overlook this basic item, so think of it like a pilot’s safety checklist).
 [21]Be sure to regularly inspect hardware connections before towing, and when using an unfamiliar trailer, check the turning clearance. The corners on the square shank of the ball simply need to be greased as needed, which will vary depending on use and conditions.
When inverting the ball (when not towing), make sure there’s sufficient clearance with the differential and driveline, especially if the bed is going to be heavily loaded. Do not invert the ball when hauling heavy loads on two-wheel drive trucks. A plug for the socket is available so the ball may be removed if necessary.
That’s just about covers the installation of a B&W [22] Turnoverball Gooseneck Hitch on your truck. Happy towing to you!
 [23]
[23]