
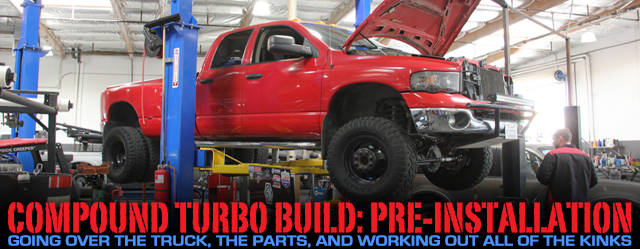
If you’ve been following our recent outpouring of Spotted In The Shop articles, then you have definitely picked up on a big thing coming soon to Diesel Army – a Pusher Intakes Hi-Mount Compound Turbo System is due to be installed on a 24-valve 2003 Cummins dually.
However, you might have been miffed to never get the big picture, only understanding the project in bits and pieces. What we’d like to do now is reveal the grand plan of the project, and lay out what has happened so far.

Suffice it to say, we’re on our way to getting the big red Dodge dually ready to handle truly heavy-duty tasks. We’re pretty excited to see just how the parts we have received will come together in the coming weeks, but in the meantime, let’s take a quick moment to look over said parts and see what they can contribute to the build.
The Parts

First and foremost is Pusher’s compound turbo system. As the center of the build, it has received a great deal of attention around the shop, and for good reason.

The Truck
The truck we’ve used for this install is a 2003 Dodge Ram 3500 dually, owned by Rob Blanton of Warfighter Made in nearby Temecula, California.
Warfighter Made is a local charity that makes a mission of improving the lives of wounded veterans in several ways. One of the ways involves creating one-off vehicles that allow the veterans to continue doing what they love, and another is by inviting ill, injured, and combat-wounded veterans in recreational trips with UTVs.
The latter is where the dually does most of its work, towing around a trailer full of the side-by-sides.
As you can imagine, hauling the trailer to and from remote off-road locations has cut down on the efficacy of the Cummins. This was why we felt it was such a perfect candidate for the Pusher Intakes high-mount compound turbo system. We look forward to seeing how it all turns out in the end!
Another thing that makes this kit stand out is its inclusion of all necessary mechanical pieces. From the intermediate tube to the two-piece downpipe to the turbo mount to the hardware, the Pusher system offers the ability to feasibly and securely mount a second turbocharger to the engine and get it connected and ready for tuning.
Speaking of the second turbocharger, ours is the BorgWarner S400SX, complete with the 71mm compressor wheel inducer and 87mm turbine wheel. Paired with the stock Holset HY35W turbocharger, we expect to see the truck really ramp up its torque, horsepower, and pick-up.

That’s partially due to the S400SX’s construction, which features a compressor cover recirculation groove. This groove allows the S400SX to stand up to additional mods better, when compared with a normal turbocharger.
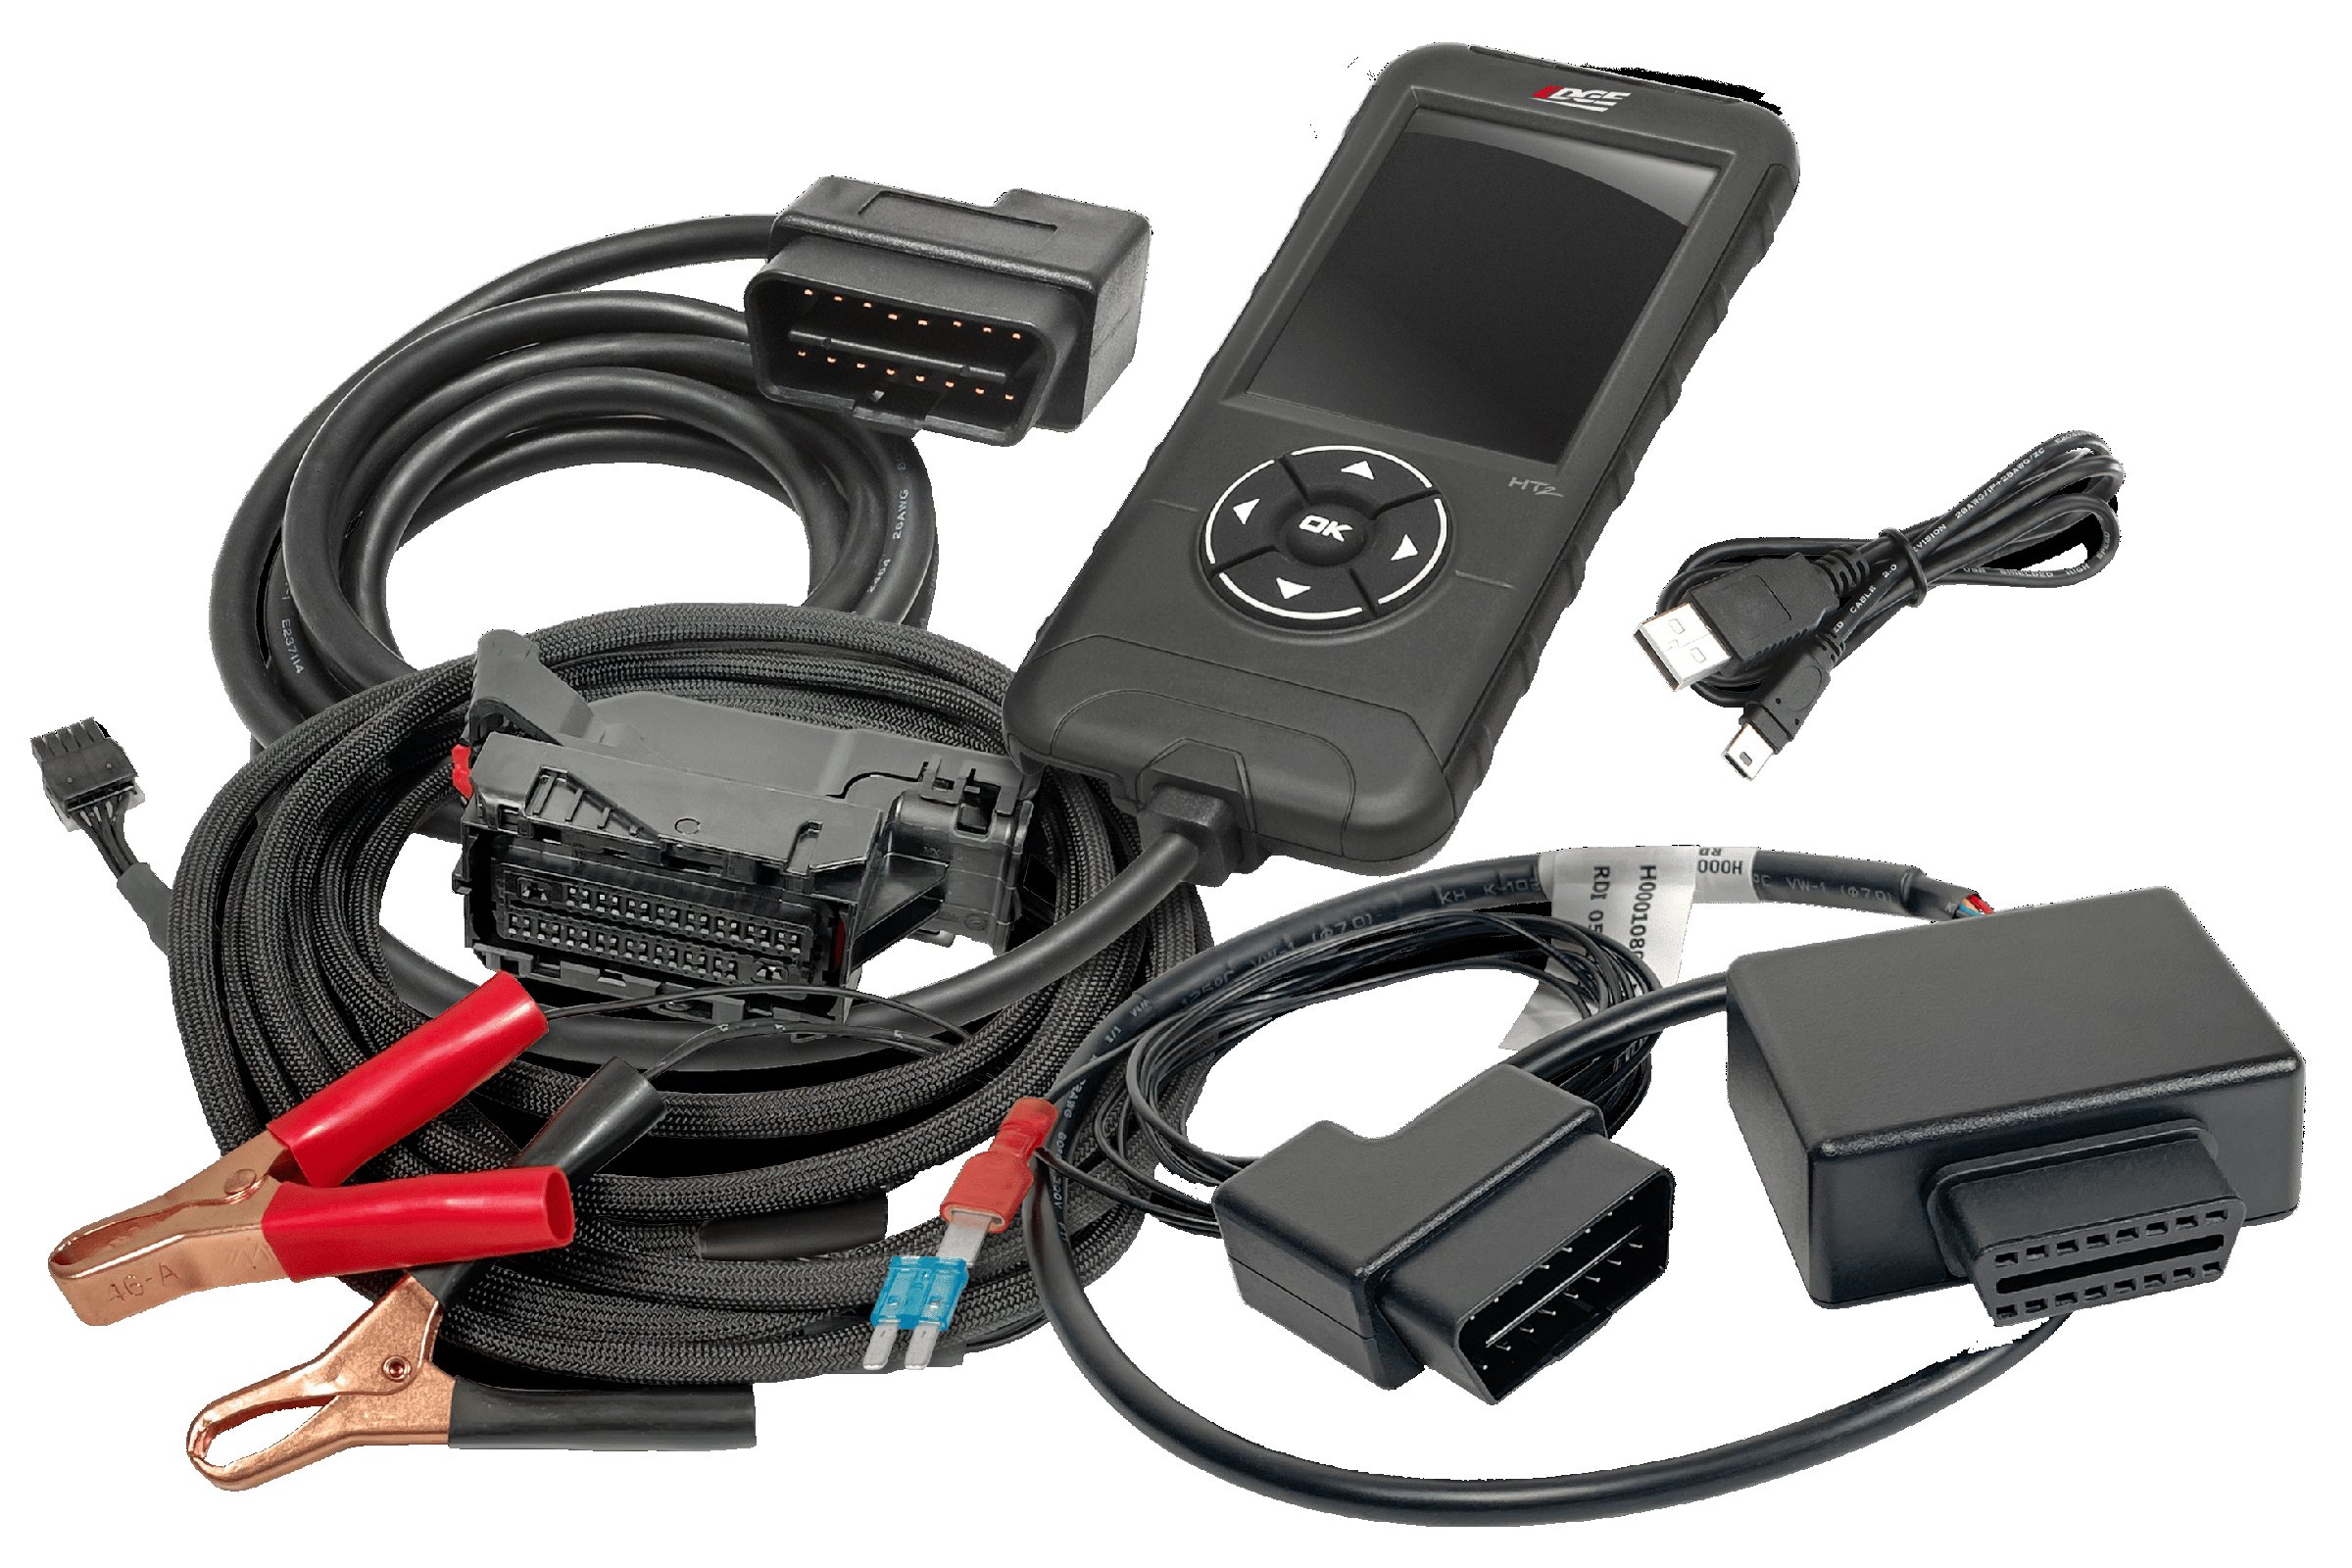
With double the turbochargers forcing more air into the motor, we’re clearly going to need a tuner and some diagnostic tools at the ready. That’s where Edge Products stepped in and offered its Insight Pro CTS2 and EAS Data Logging Kit, a tandem add-on to the truck that offers us not just the ability to apply sweet tunes, but also to monitor what they do to the truck.

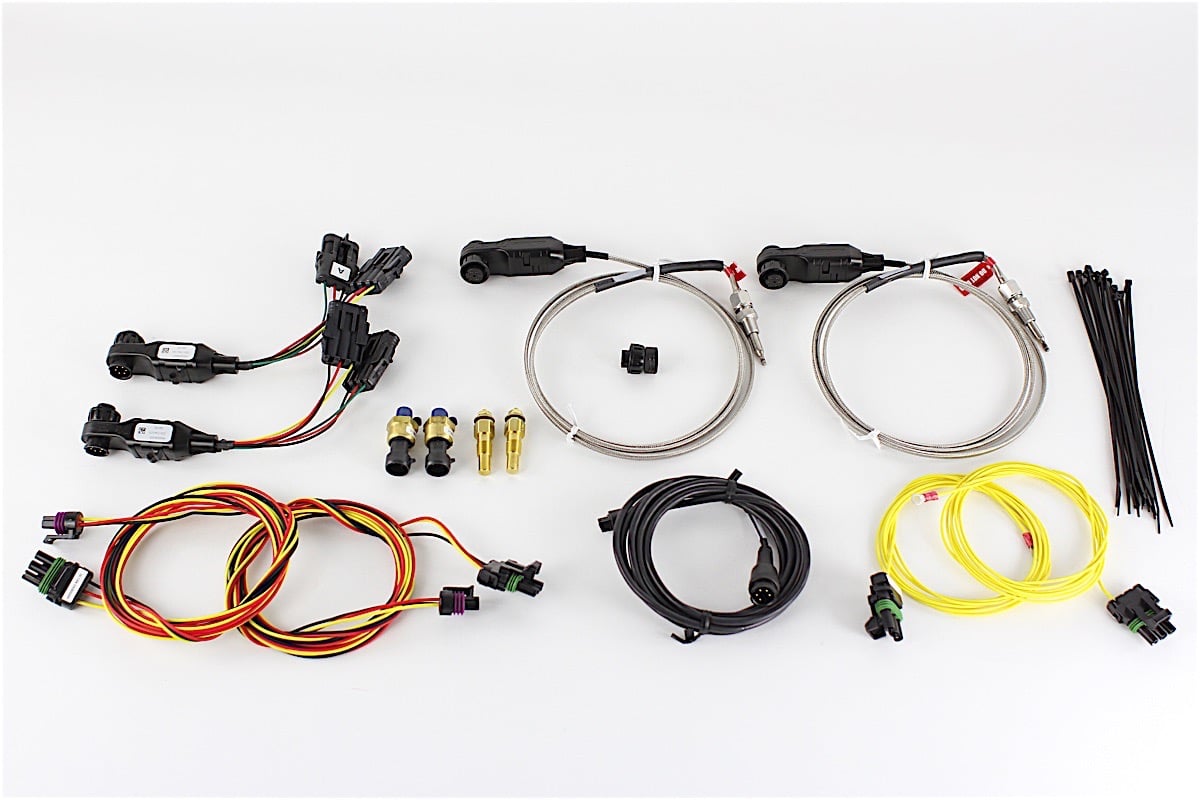
The Edge Insight Pro CTS2 (left) and EAS Data Logging Kit (right), which will help us tune and monitor the truck going forward.
The Insight Pro CTS2 comes with the special ability to take on HP Tuner-generated tune files, allowing for true custom-made tunes to be applied to the engine. Meanwhile, the EAS Data Logging Kit comes with EGT probe sensors, two boost sensors, and two -40 to 300º Fahrenheit temperature sensors for the ultimate in data analysis capability.
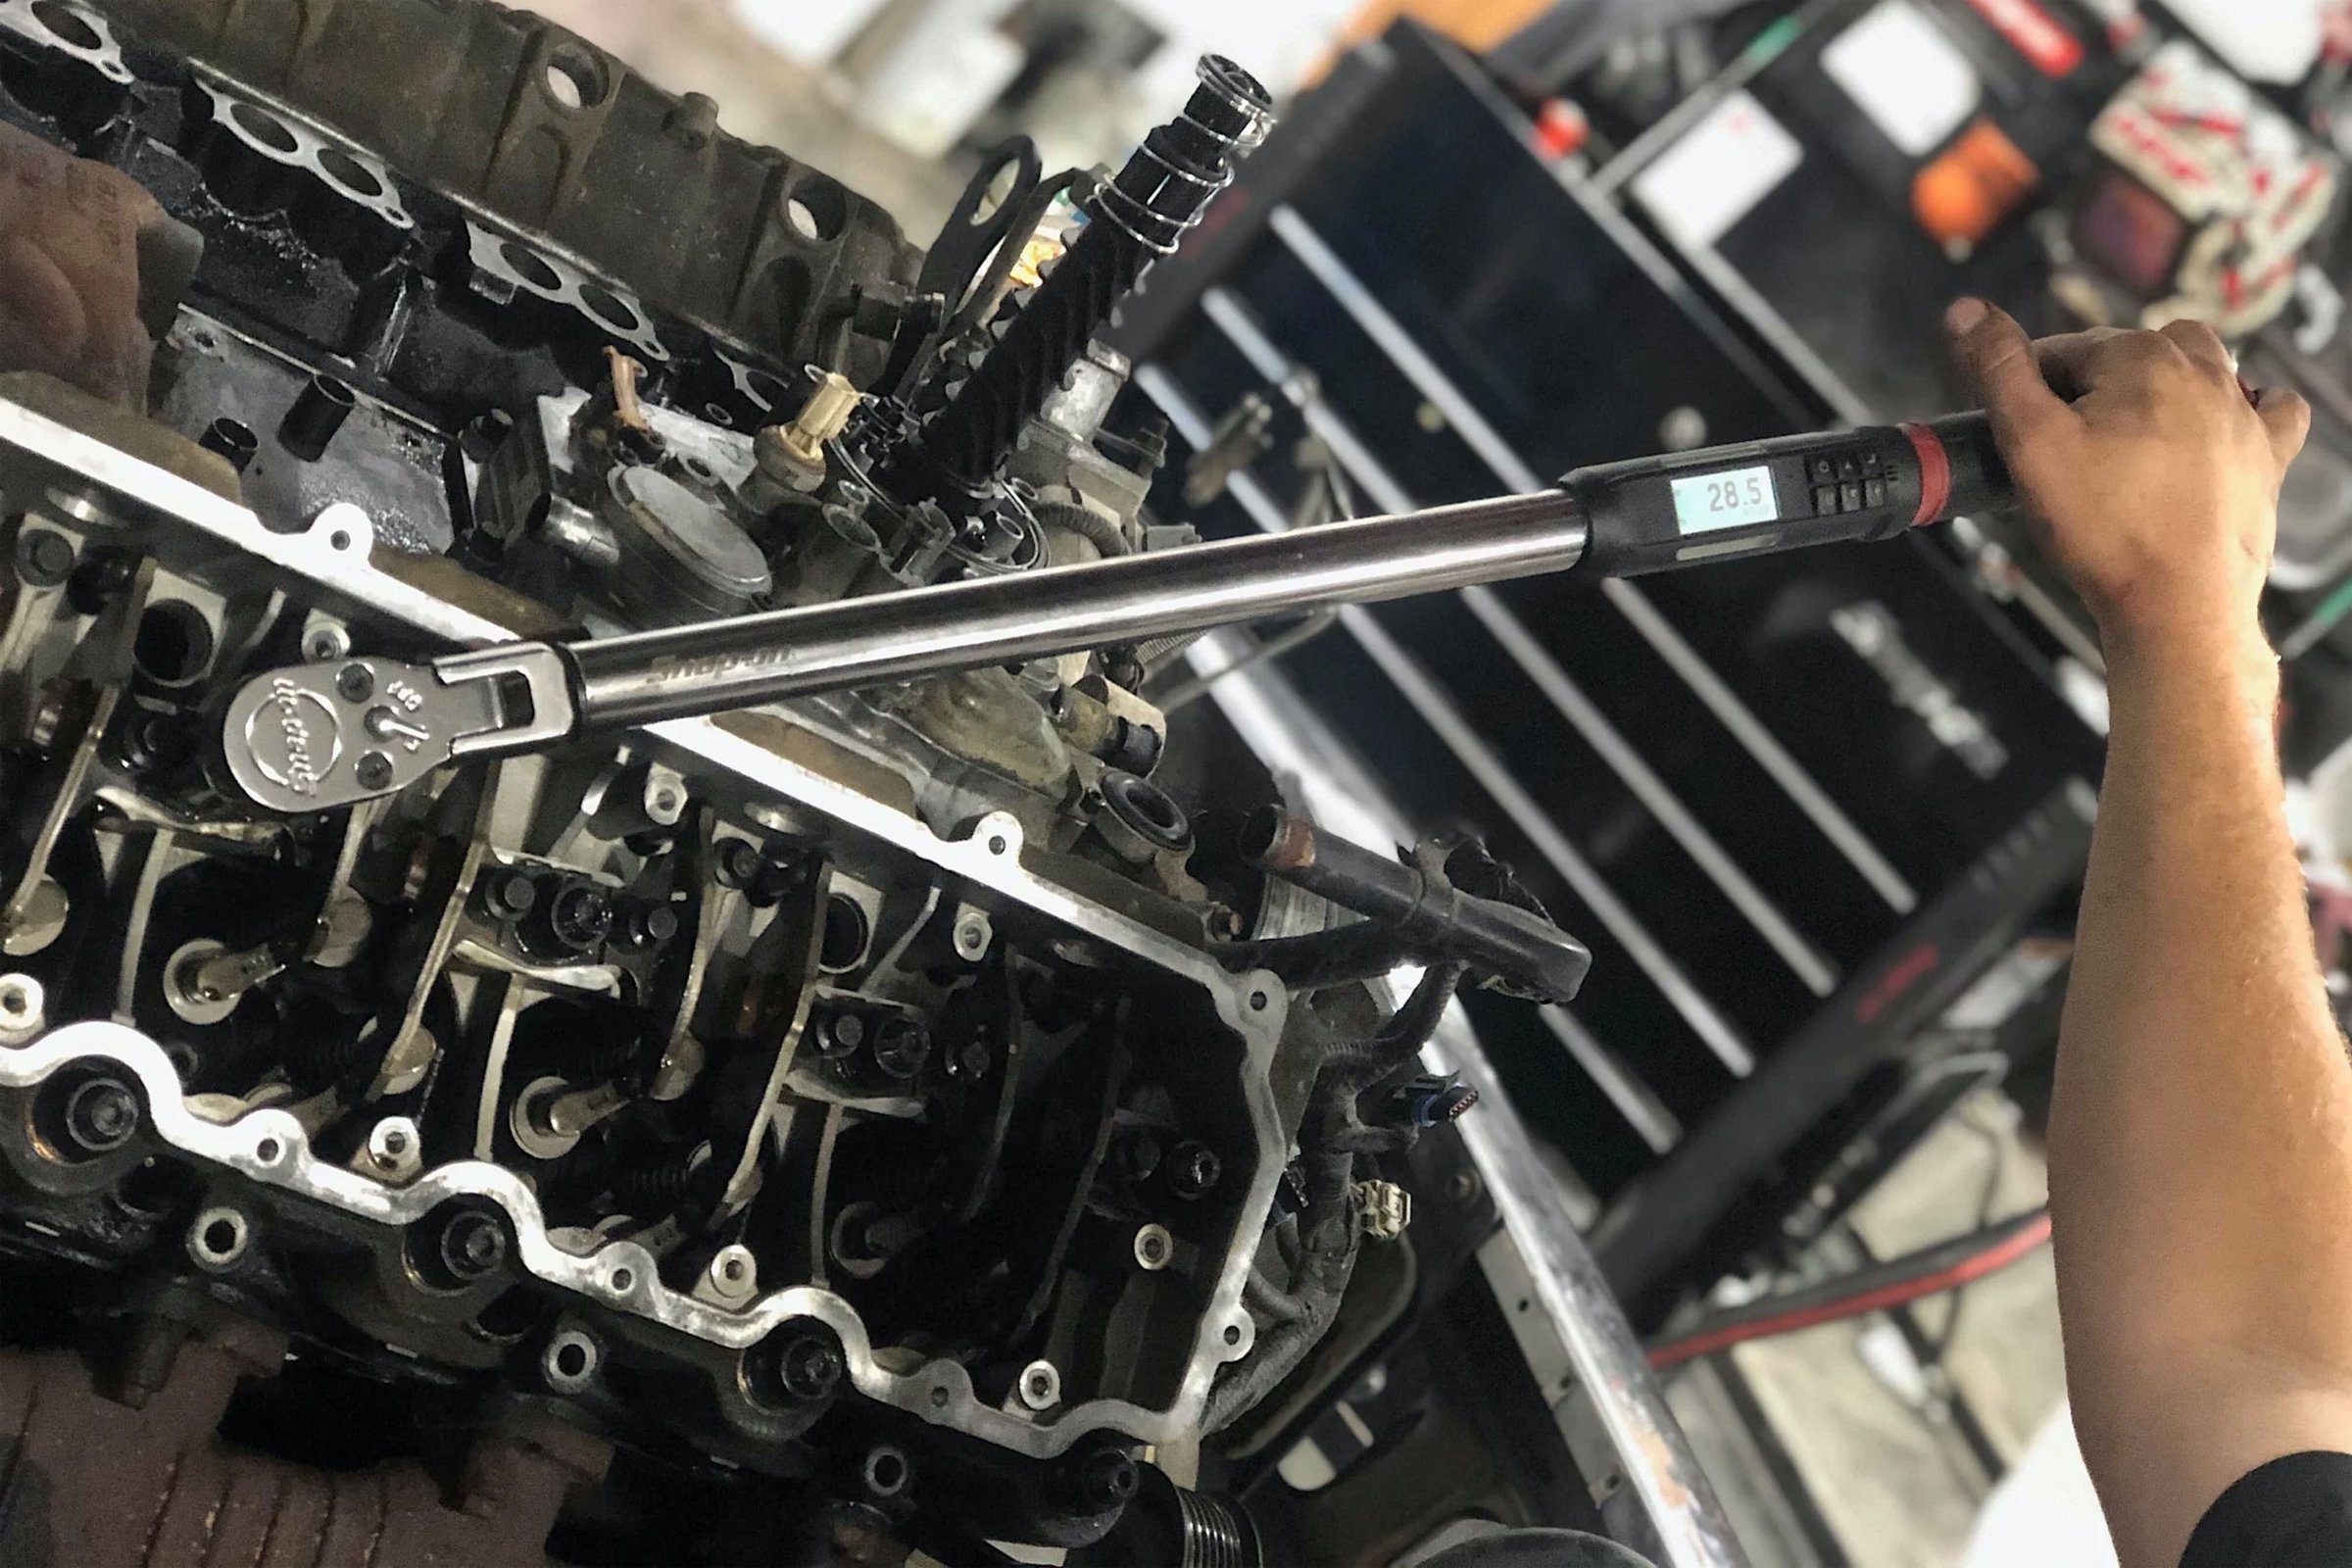
Air would also upset the engine’s ability to withstand the extra pressure. For that, we went with ARP and its 625+ head stud kit for the 5.9-liter 24-valve Cummins. These fasteners are some of the most serious out there, packing a tensile strength of 260,000 psi. “Our Custom Age 625 Plus has a very high fatigue cycle life and toughness, and is highly resistant to atmospheric corrosion and oxidation,” said ARP’s Chris Raschke.

Now, these parts would be enough to get the job done on the Cummins and make it able to run two turbochargers, but not for the life of the vehicle. EGTs would definitely start to ramp up, indicating wear and tear on the motor, so, at the beginning of this project, we devised a second phase wherein we give the truck some much-needed fueling upgrades, courtesy of FASS and Exergy Performance. Unfortunately, fate had a different plan, but we’ll get into that later.
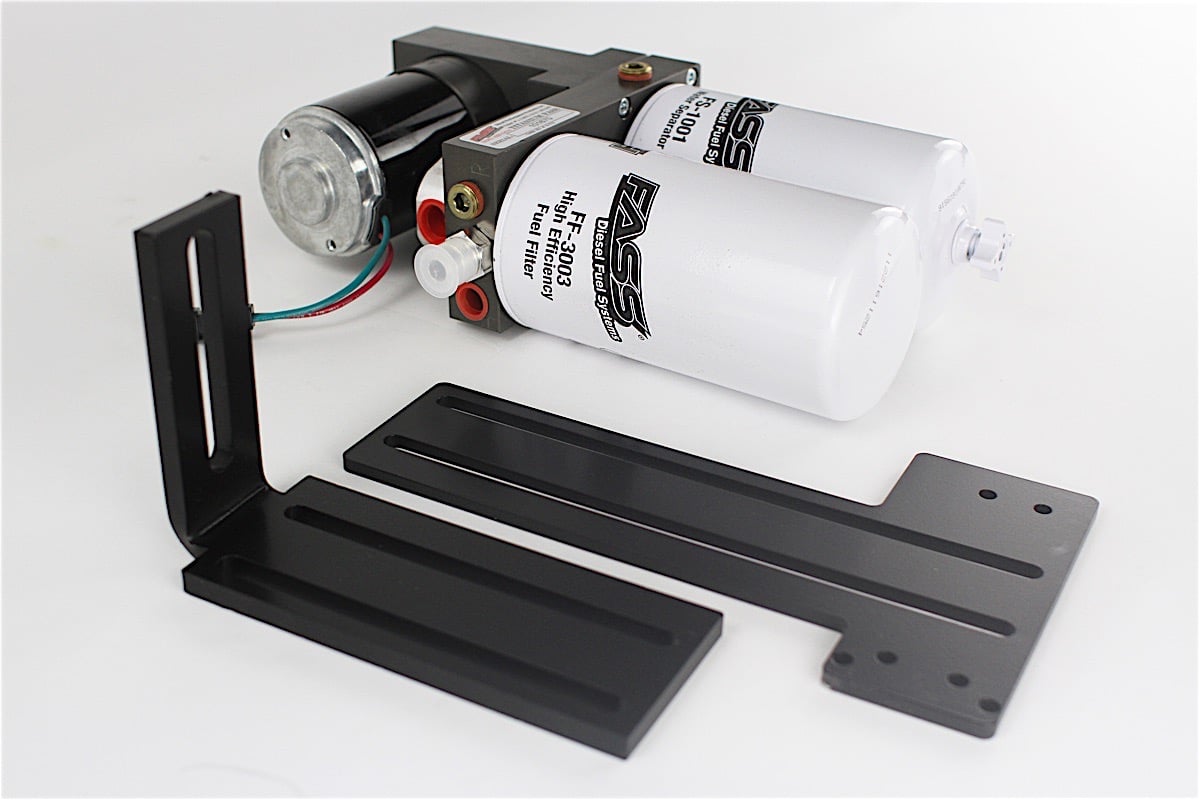
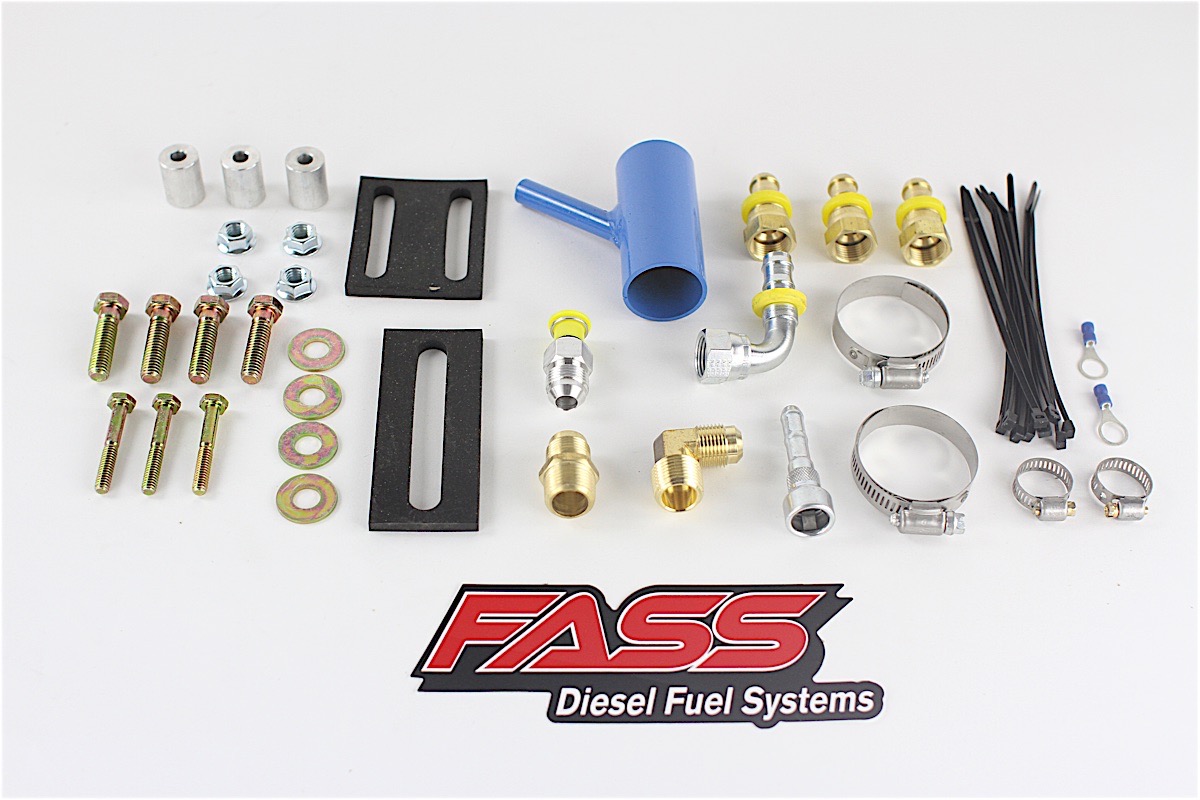
The FASS Titanium Series lift pump (left) will help supply copious amounts of fuel to the motor, and comes with all the necessary hoses and hardware (middle, right) to get the job done.
For its part, FASS donated a Titanium Series lift pump. With its ability to separate air from fuel in the system, as well as supply enough volume to the motor and support up to 900 hp, this part was definitely a great choice for our build.
Exergy, meanwhile, supplied us with a CP3 fuel pump, brand new 100 hp injectors, and feed tubes. These parts would give the Cummins a new lease on life, as well as making it capable of supporting the extra power generated by the turbochargers.
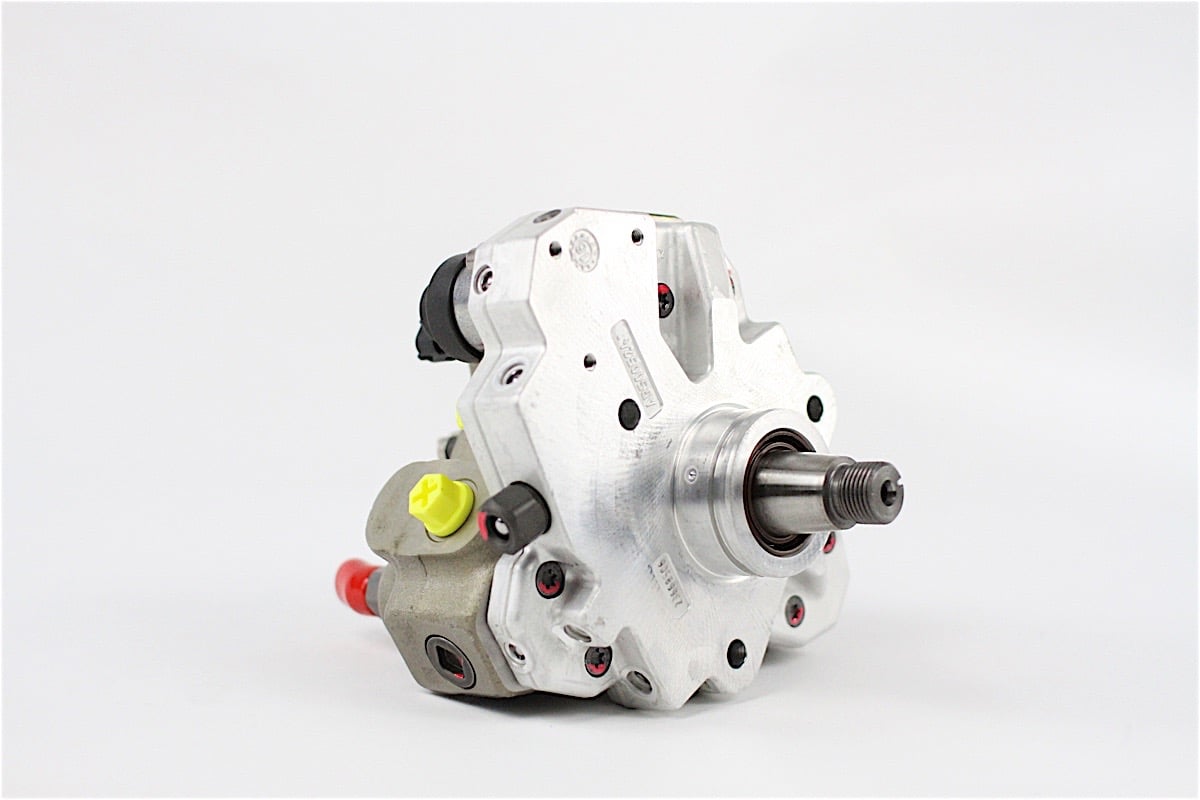

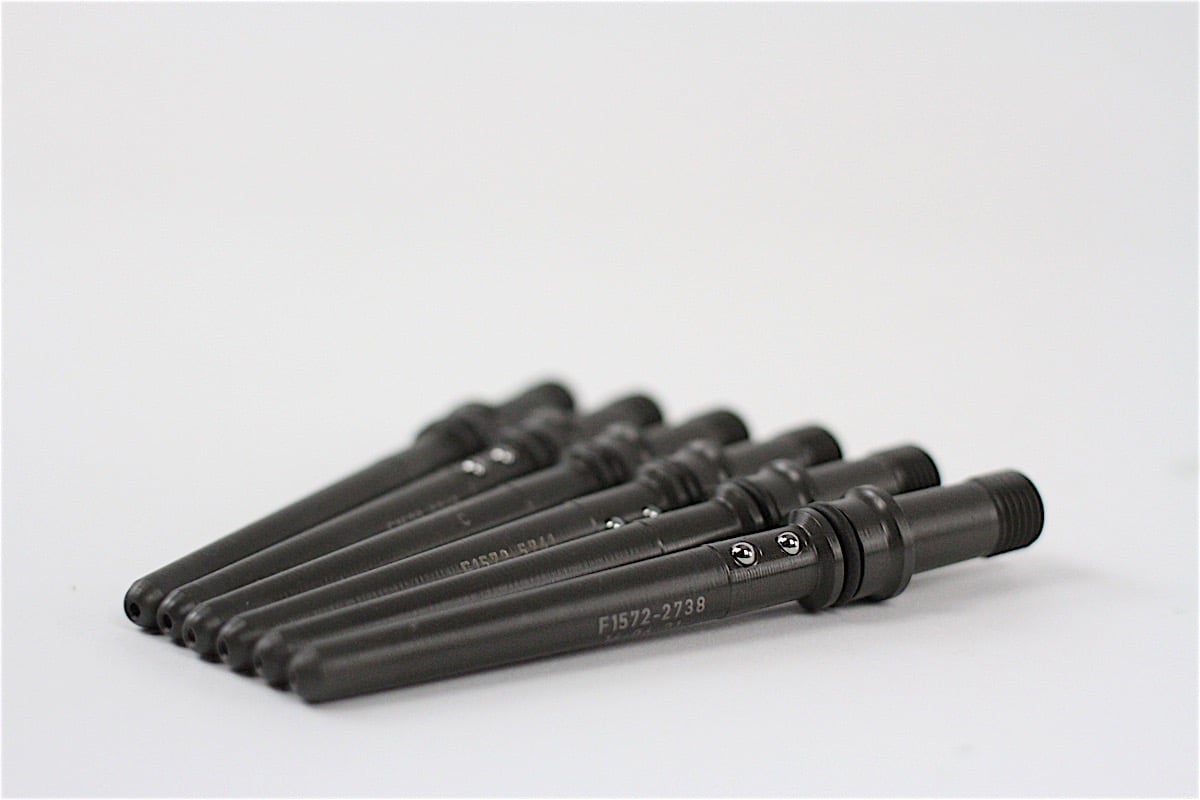
In the engine bay, Exergy's CP3 (left), 100 hp injectors (middle), and feed tubes (right) will go a long way towards providing sufficient fueling for a compound turbo setup.
Preliminary Dyno Run, Session 1
As much as we wanted to dive right in and get to installing the kit, we first had to make sure that the truck was running smoothly and didn’t need any immediate repairs. To that end, we did have to get the Edge Insight Pro CTS2 and EAS Data Logging kit installed.
We approached our friends at American Diesel, a nearby shop specializing in diesels and far more familiar with Cummins motors than our own shop techs. Graciously, they accepted to install not just our Edge electronics, but also all other components when the time came.

We grabbed the Edge gear and headed over to American Diesel. Rob had gotten the ECU reflashed at a Dodge dealership the weekend prior, ensuring there would be a clean slate to work with for the CTS2.
We hooked up the CTS2 to the computer and let it update as we went to work installing EAS gear onto the Cummins. First was the EGT probe, which would go into the exhaust manifold.
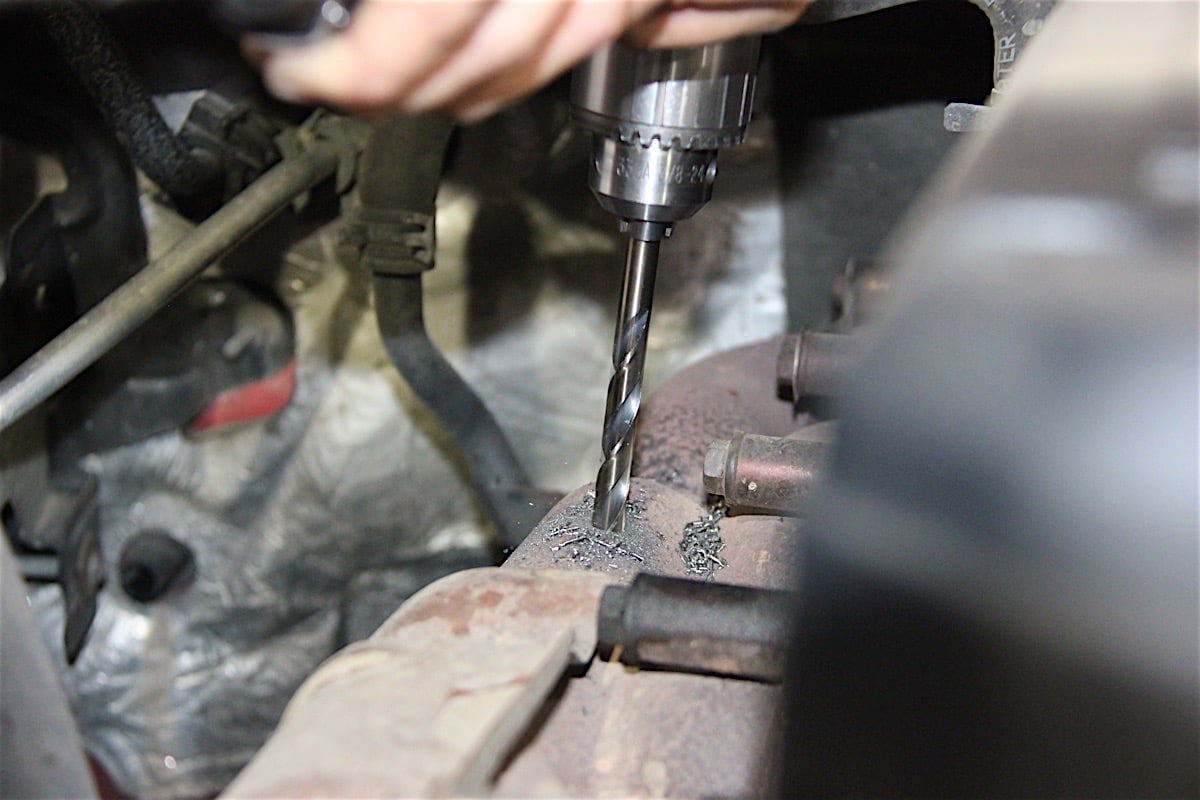

The exhaust manifold was drilled, tapped, and then given the EGT probe.
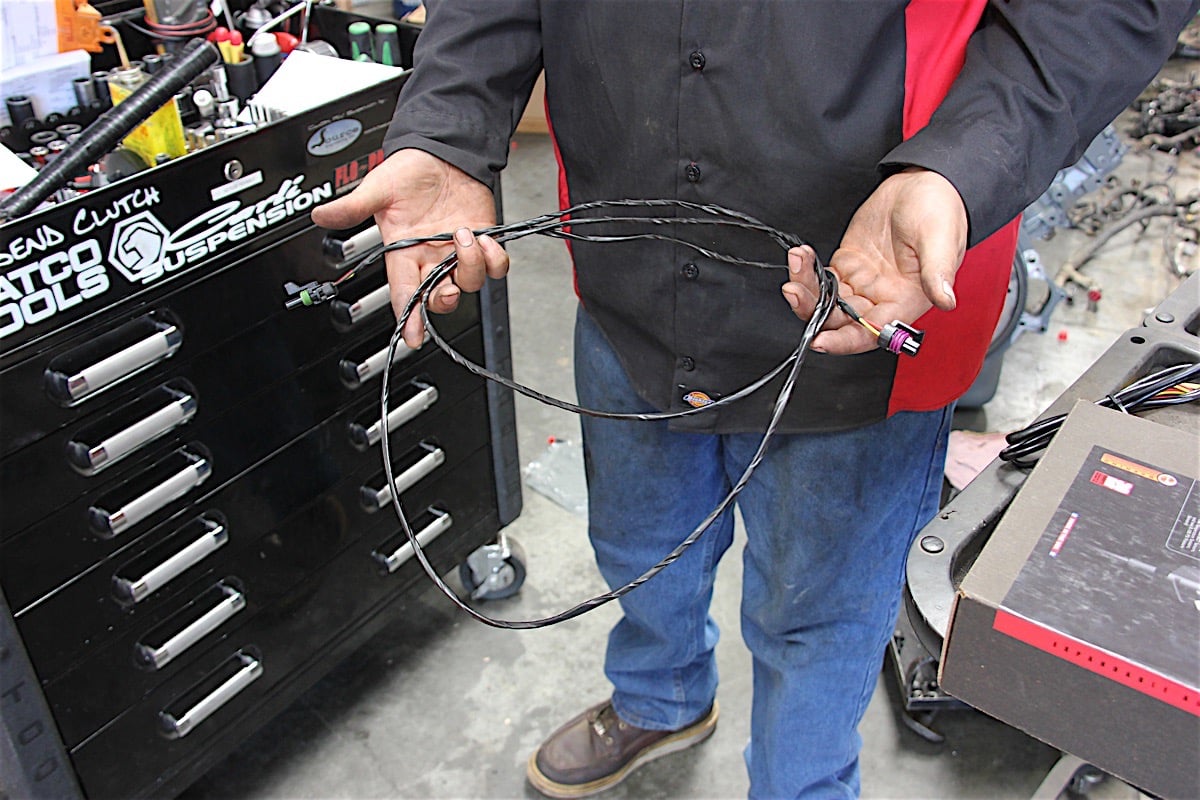
We used an air tool to drill into the manifold, and then tapped it to suit the threads of the EGT probe. The EGT probe was installed and its wiring was routed up against the firewall, where it would run toward the driver’s side of the engine bay.
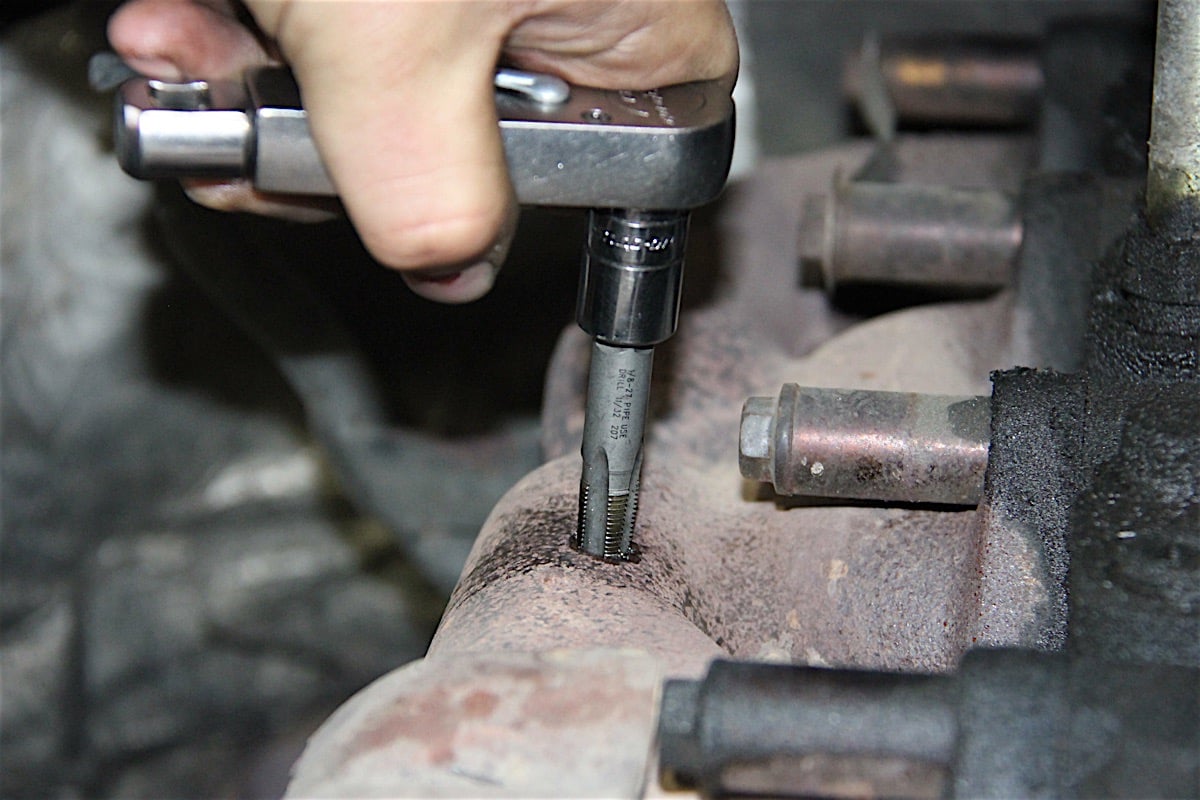
While we were tinkering underhood, we also wanted to have a boost sensor installed. We uninstalled the intake tube and got it free. Marking the spot with a marker, we once again did some drilling and tapping to fit the boost sensor, and ran its wiring in the same fashion as the EGT probe.


It was easier to install the boost sensor with the tube removed from the engine bay. Once again, drilling and tapping were required to get the sensor inserted.
The cool thing about the EAS gear was its piggybacking connectors, which we finally hooked up together behind the driver’s side battery tray. Our CTS2 was done updating and we had our custom tunes – courtesy of Adam Pela at Pela Motorsports – loaded up and ready to run. Everything was running smoothly, so it was time to head over to the dyno and see how the truck performed.
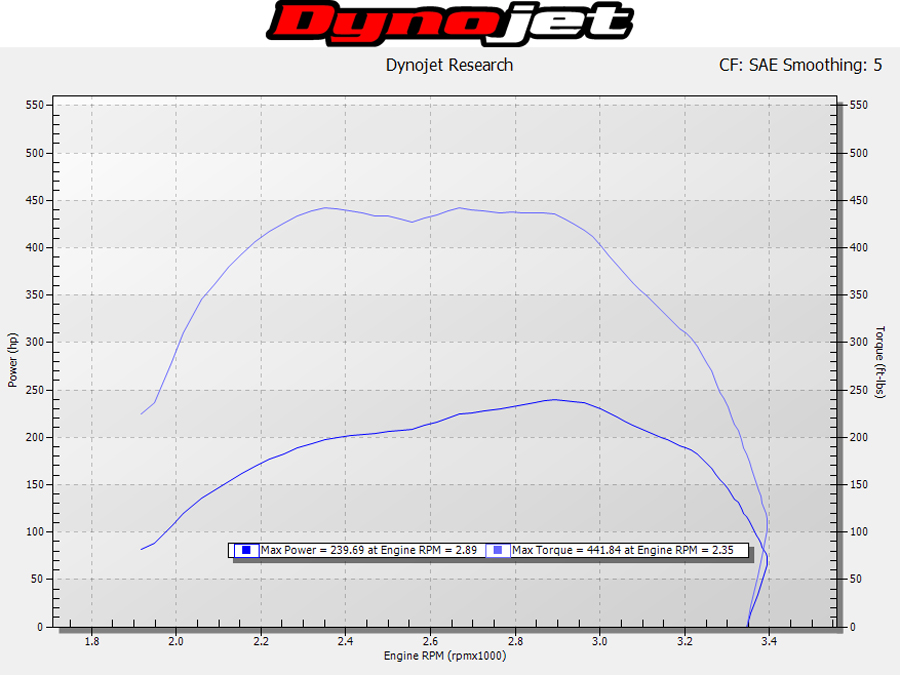
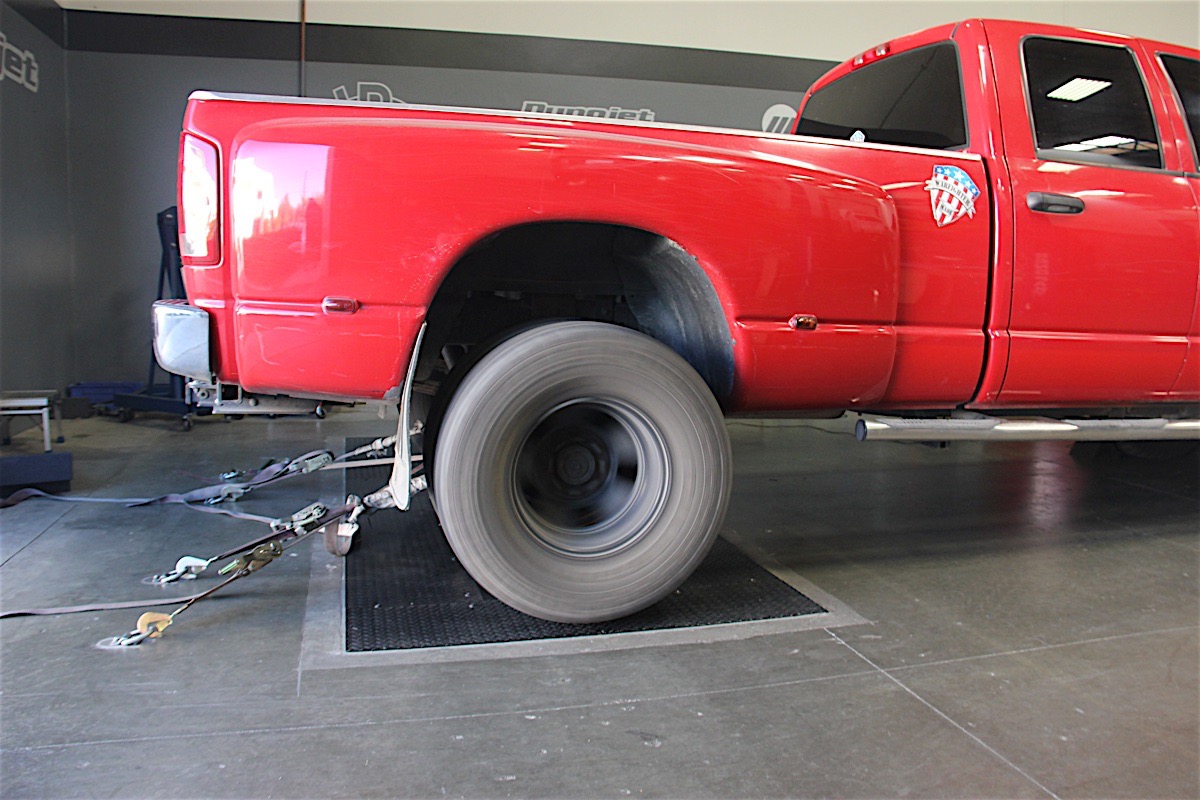
Our initial dyno run showed the truck dipping between 2500-2550 RPM. We had to figure out what was causing this dip before we went ahead and installed the compound turbo system, or else we would have trouble later on.
While there was a good amount of data to parse, we were most concerned with seeing if the truck could make a clean, complete pass. Unfortunately, that wasn’t the case, as we found a dip between 2500-2550 RPM. This indicated something was wrong, and needed to be taken care of long before we installed the compound turbo system.
We had a discussion with Adam, Jacob, and our own shop techs. We arrived at the conclusion that the problem had to be the fuel system not keeping up with the demands of the motor, and decided to change up our original plan.

Harley went an extra step and wrapped the boost sensor wiring with electrical tape to better protect it.
The original plan involved installing the kit sans fueling upgrades as our first phase, and then installing the fueling upgrades as the second phase. Now, the plan was to install a couple of fueling upgrades – the FASS pump and Exergy CP3 – and install the injectors and feed tubes after the compound turbo system was put on.

The EAS gear has a wonderful piggybacking ability that makes the various sensors a breeze to connect to each other.
Installing the FASS Pump And New Exergy CP3
Once again, we were over at American Diesel with parts in hand to get installed onto the truck. We began by putting the fittings into the proper places on the FASS pump, and assembling the mounting bracket.
Next, we went to the driver’s side frame rail and found the location where the FASS pump would go, and mounted it in place. Once it was installed, we took the fuel filter and water separator and applied a small amount of grease to make them seal nicely, and then screwed them back into place.
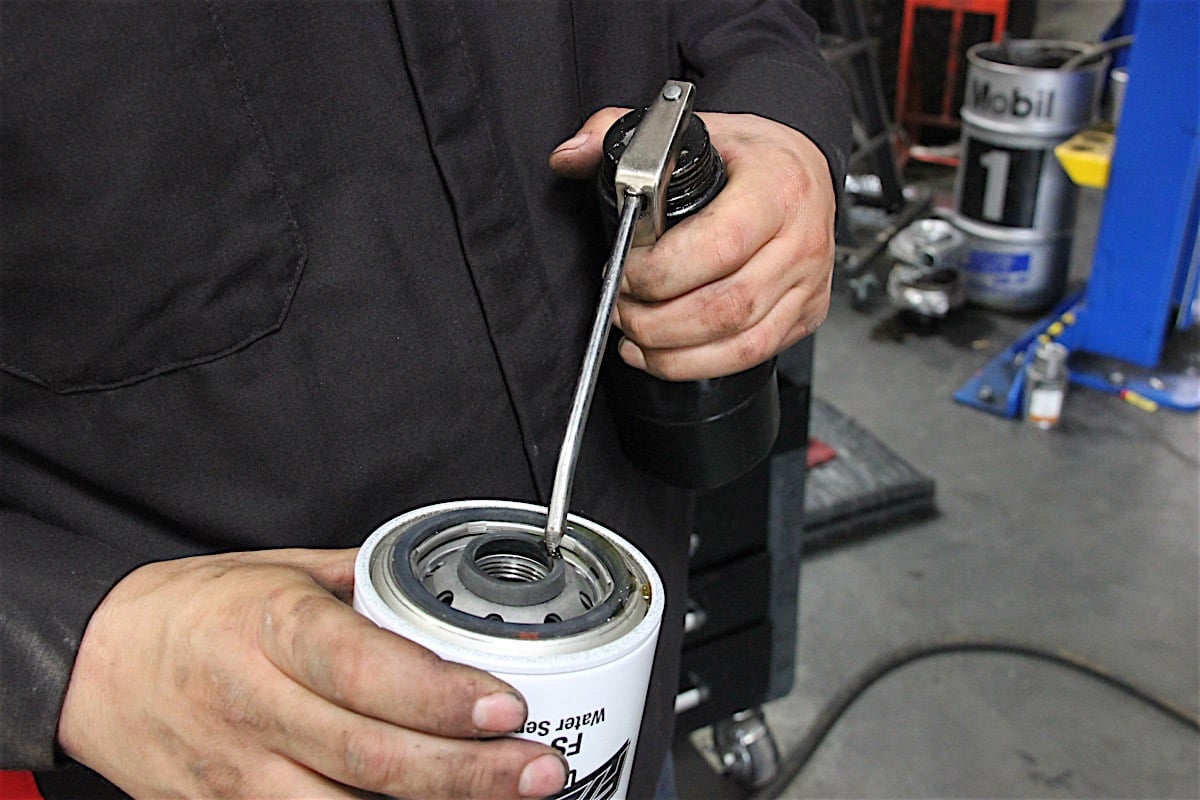
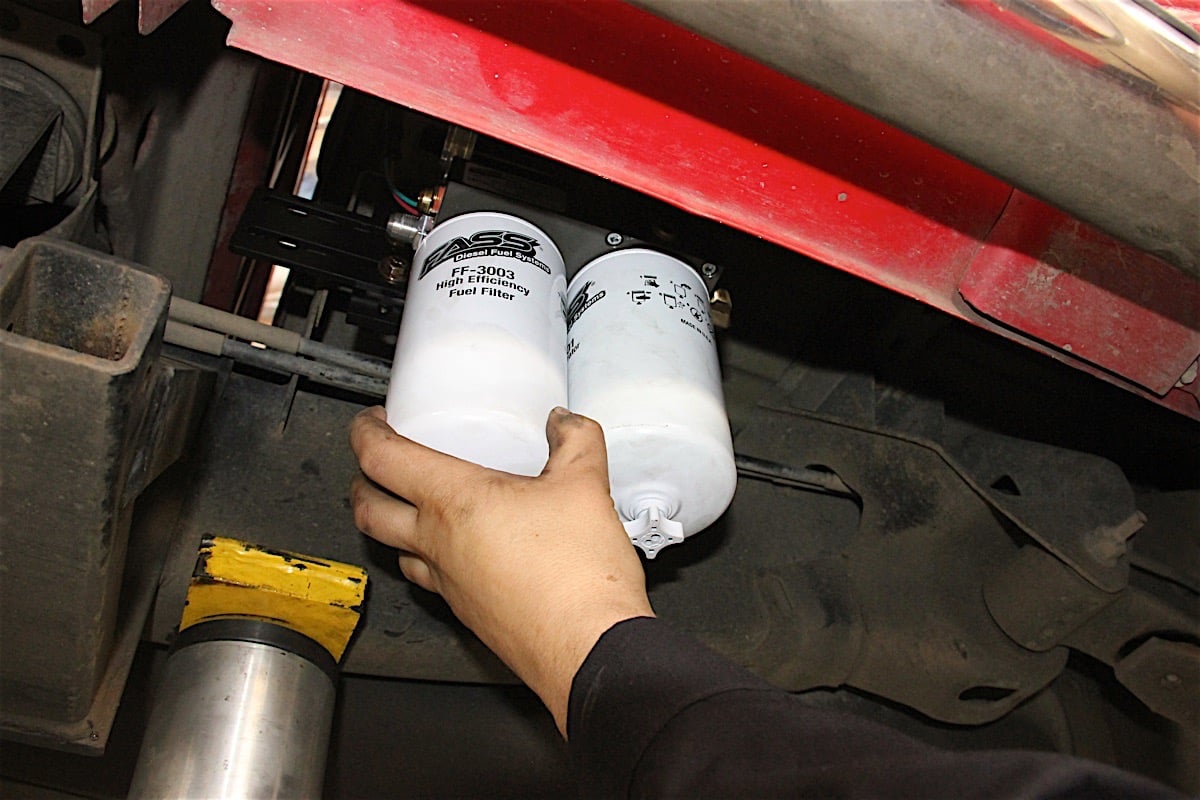
The filters for the FASS pump were given a small dose of grease to help them seal better, and were then screwed back into their home.
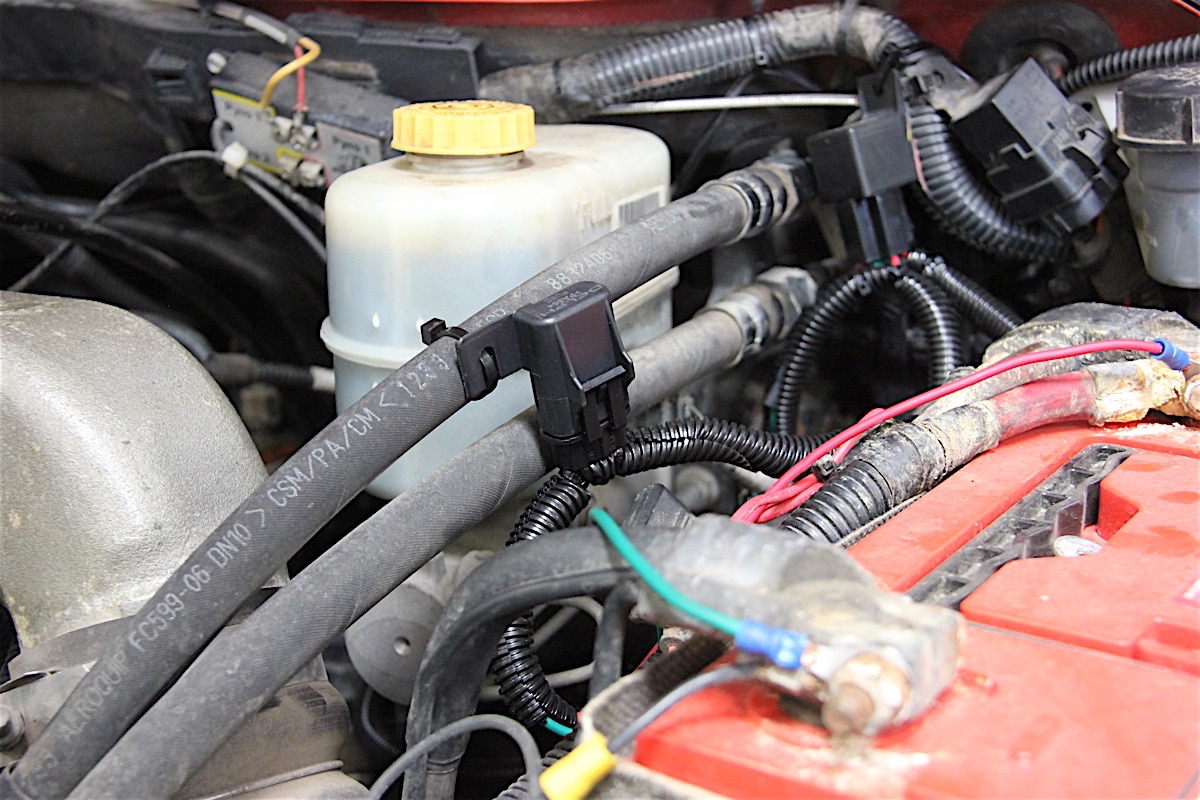
Afterwards, we ran the wiring from the relay in the engine bay to the inner side of the driver’s side frame rail, attaching zipties in strategic places to keep it from hanging down. The stock fuel pump had its power source removed, too. The green and red wires were connected to the negative and positive battery terminals, respectively, and the system would now have power.
FASS built in a fuse for the pump’s wiring. This added a layer of safety to the system, as it would break the fuse and prevent a surge of electricity from damaging the pump.
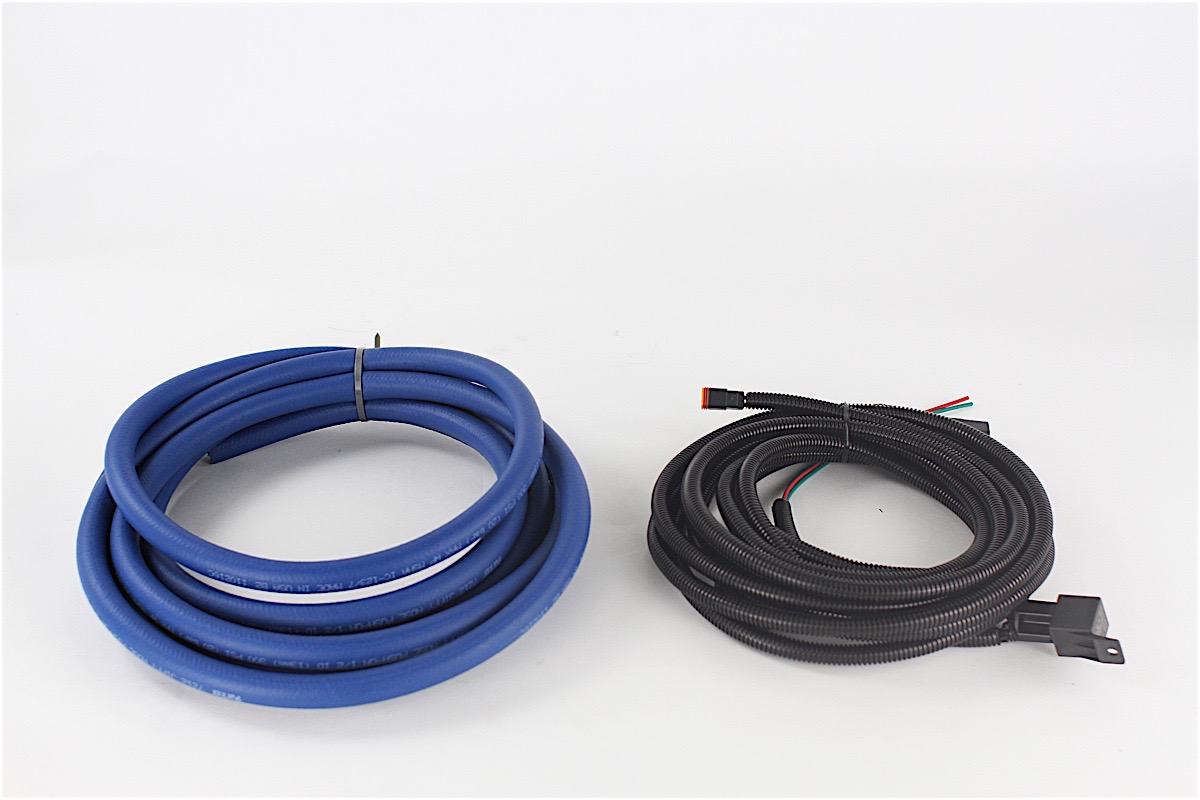
Now came time to attach the hose lines for the fuel. The included hose line in the FASS kit is a half-inch diameter product measuring 17 feet in length, which would be cut up for use in various places.
The first length of hose to be measured and cut was the one running from the CP3 to the FASS pump. Once that was cut, we ziptied it in the same fashion as the wiring: strategically, and along the inside of the driver’s side frame rail.


FASS's half-inch hose line was routed up, down, and all around the back of the truck. All of this was to ensure the FASS pump could receive the fuel it demanded, and return whatever fuel was left over to the fuel tank.
The hose was given Push-Lok fittings and cut up to route to various spots, as the FASS pump had to be able to not only send fuel to the CP3 pump in the engine bay, but also send unused fuel back to the fuel tank. The filler neck was cut and given a Y-shaped return manifold, which was then clamped securely to prevent leaking.
Up front, the stock fuel pump had to be removed to make way for the Exergy CP3. Space was tight, but we found a way to remove the four bolts holding it in place, as well as the nut cover that required a special tool to get off.

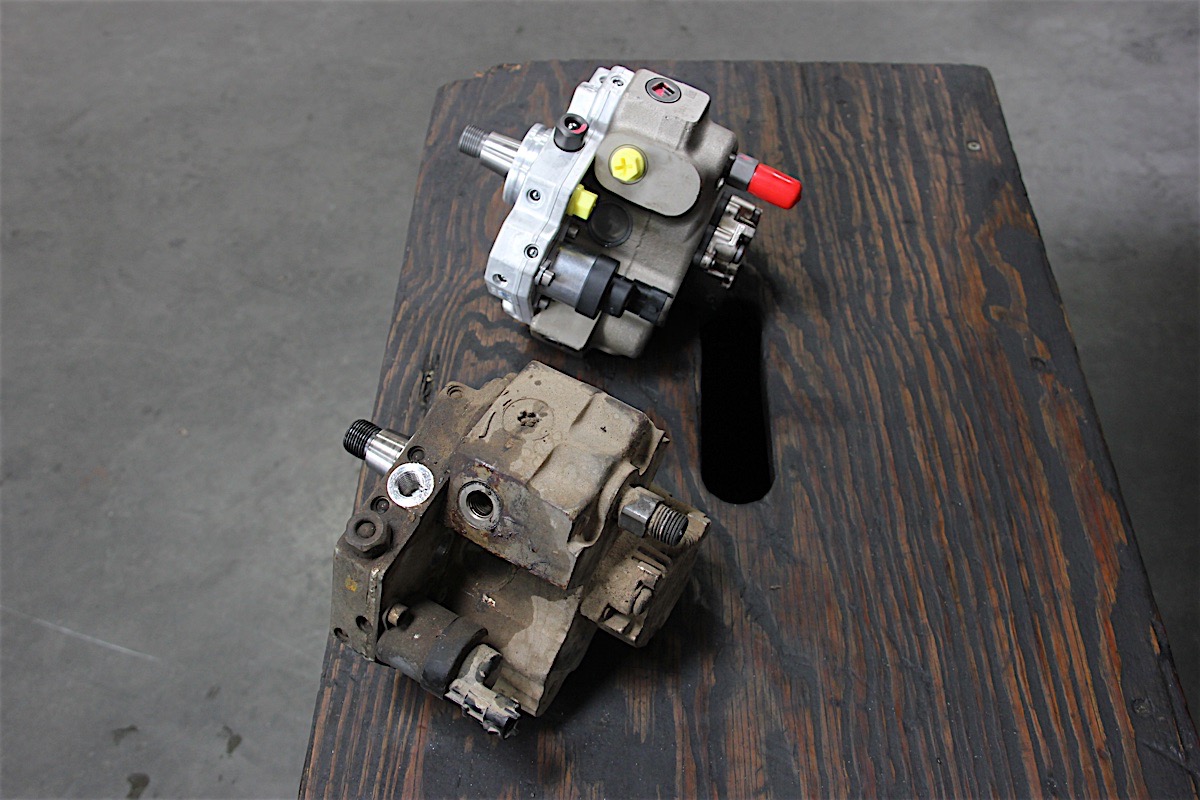
The Exergy CP3 was gleaming and pure compared to the stock version, which looked like it had seen better days.
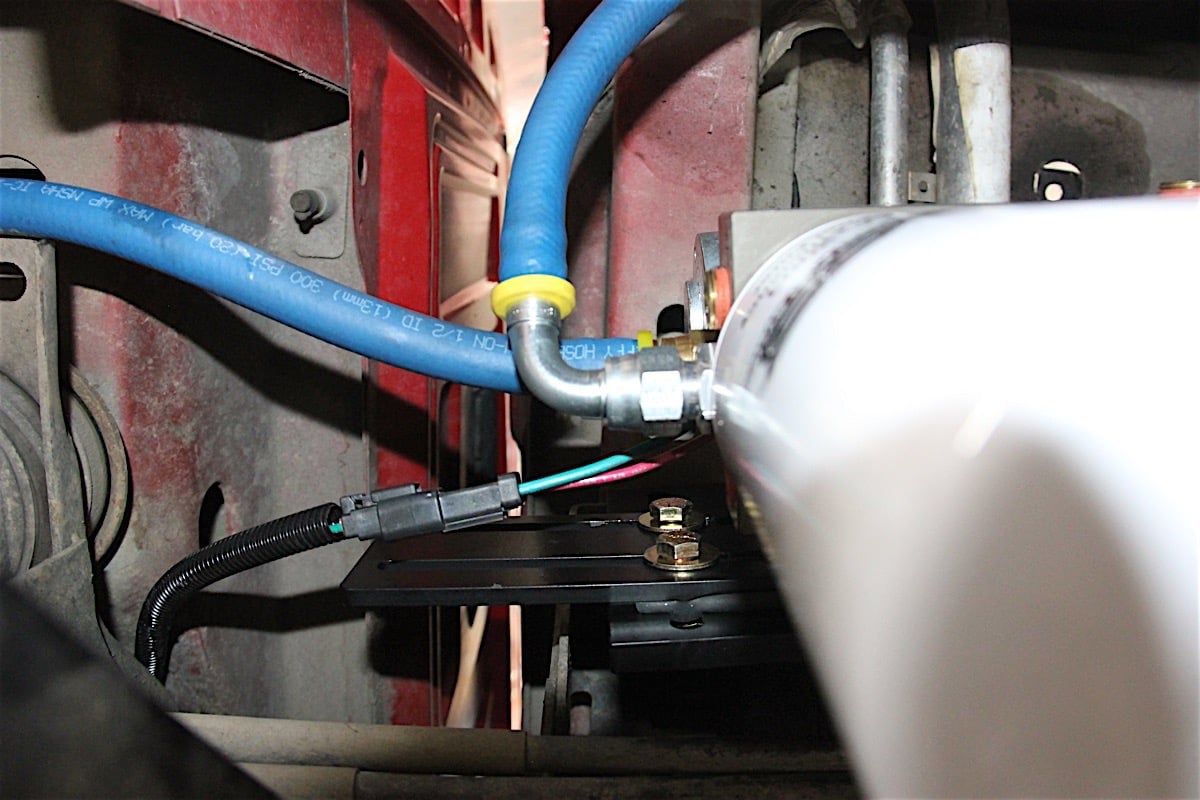
We installed the correct fittings to the new CP3 and maneuvered it back into place in the engine bay. The stock fuel lines were attached in their proper places, and finally the blue line routing to the FASS pump was installed.
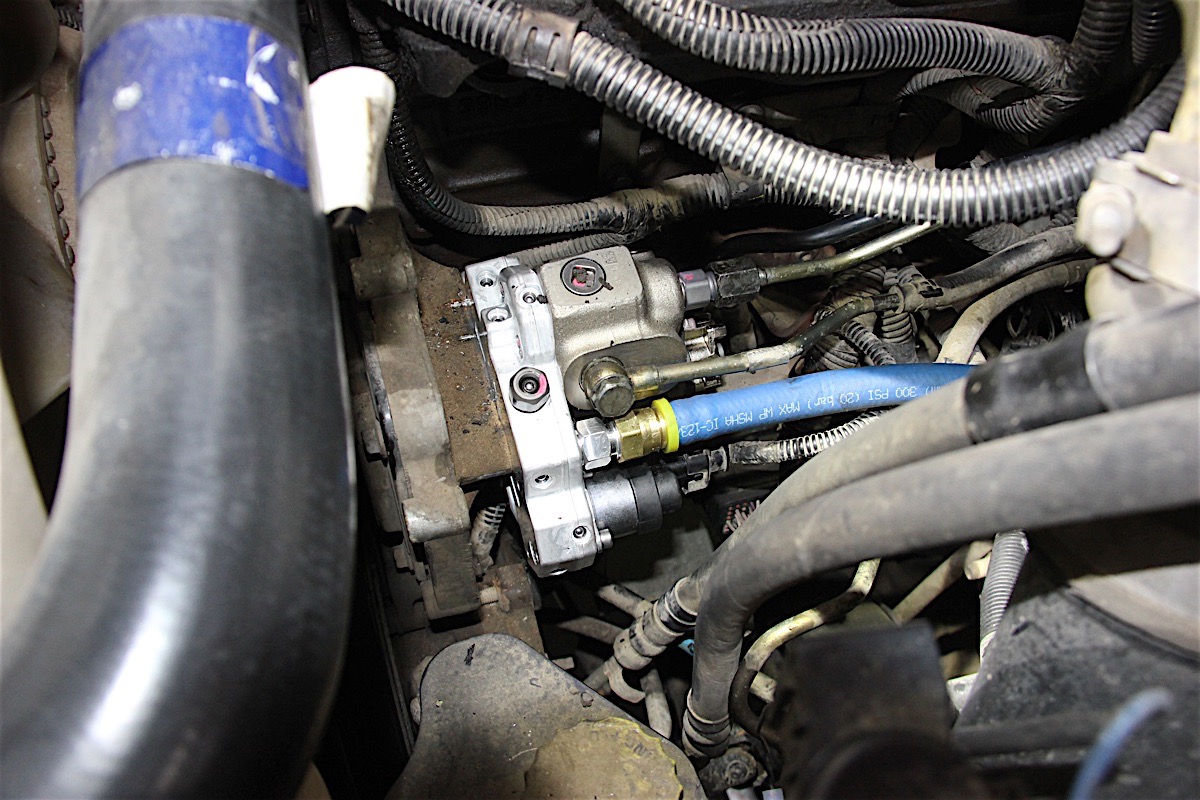
The Exergy CP3 is all hooked up and ready to go.
The fueling system was once again fully installed and ready to begin pumping fuel. “Begin” was a hopeful thought, however, as we had to get the system primed with several consecutive starting attempts. Over the course of probably 20 minutes, we had to crank the starter for spurts of 10-15 seconds until finally, the fuel was fully circulating: the tank, the FASS pump, over to the Exergy CP3, then to the fuel rail, the injectors, and finally the engine.

Our only issue was the nut cover on the CP3, which cracked as we tried to reinstall it. A quick call to a local Dodge dealership got the part over to us the next morning, and once installed, our work was complete.
Preliminary Dyno Session, Session 2
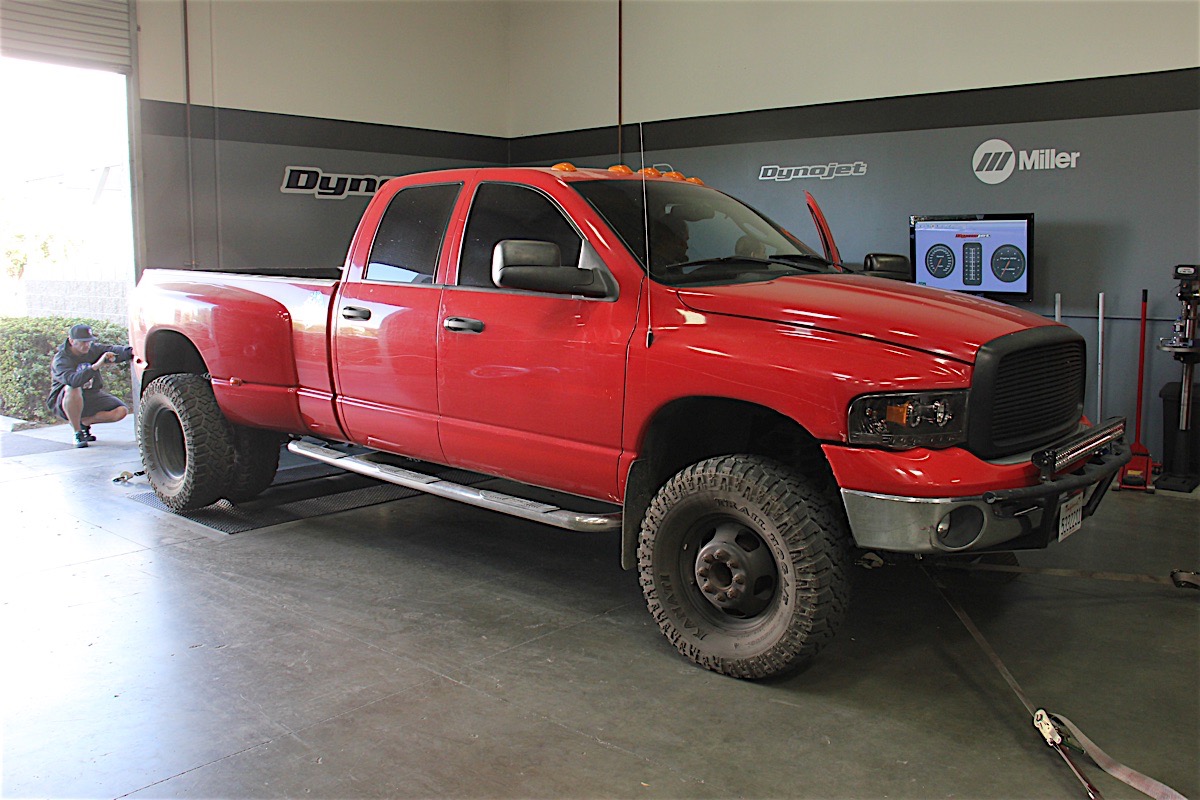
Our hopes high, we took the truck from American Diesel back to our shop. We had more confidence that it would be able to make a clean pass on the dyno this time, and if our fortunes held, we would even be able to try out some of the cool tunes that Adam had made for us over at Pela Motorsports.
However, our hopes were soon dashed. A run on the stock tune showed us that the truck was still having trouble making power.

Tragedy followed disappointment – midway through attempting to load the Level 1 tune and see if it made a difference in how the truck performed, the batteries died. This caused the ECU and the tuner to stop being “friends,” so to speak, and the truck was kaputt.
We got on the phone with Edge Products and were offered a solution: uninstall the ECU and CTS2, send them to Edge for a respective reflash and evaluation, and have them returned to us by overnight shipping. The whole process would take three days, but that was pretty quick for what was going to be done; so we did it.
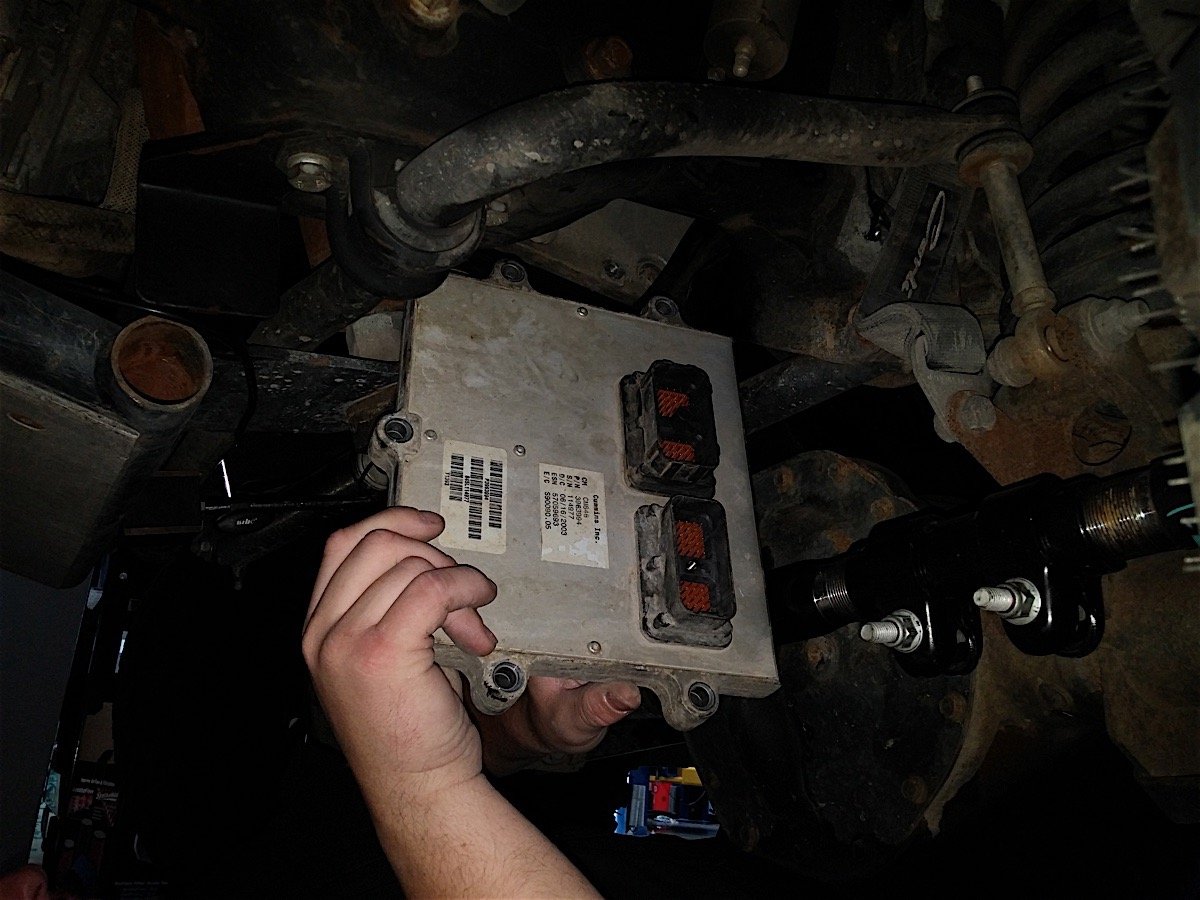

After the CTS2 and ECU lost voltage halfway through loading up a new tune, the two stopped cooperating with each other. Thankfully, Edge offered to take care of the problem. We uninstalled the ECU and packaged it with the CTS2, sending it overnight to Edge for them to do a reflash.
Our latest activity has seen the ECU reinstalled, but it seems we were sent a brand new CTS2, as it behaved like the first one did the first time we got it going (asking for a stock tune file, needing an internet update, etc.). This meant that Adam would have to start over with generating our tunes for the truck, since he couldn’t tell what Edge’s concept of a reflash entailed.
So, we started from square one. We downloaded the stock tune file from the truck, plugged the CTS2 into a computer with Ignition software, and got the update downloaded while simultaneously (we hope) uploading the stock tune file to the cloud for Adam to access and build tunes from.
And that brings us up to this now – waiting to hear if the stock tune file was uploaded, and waiting to hear if the new tunes are ready to load up and test out on the dyno.
Despite some setbacks and disappointments, we’re still hopeful that this dually will win in the end. Stay tuned as we get ready for the new tunes to come in, more dyno pulls, and then a glorious compound turbo system!
