
We love diesels for many reasons. Probably one of the most prominent is longevity. Numerous truck owners like to brag or show pictures of their odometer ticking past 200,000, then 300,000 and beyond. You’ll easily get into an argument if you try to argue your preferred brand is the best at lifespan.
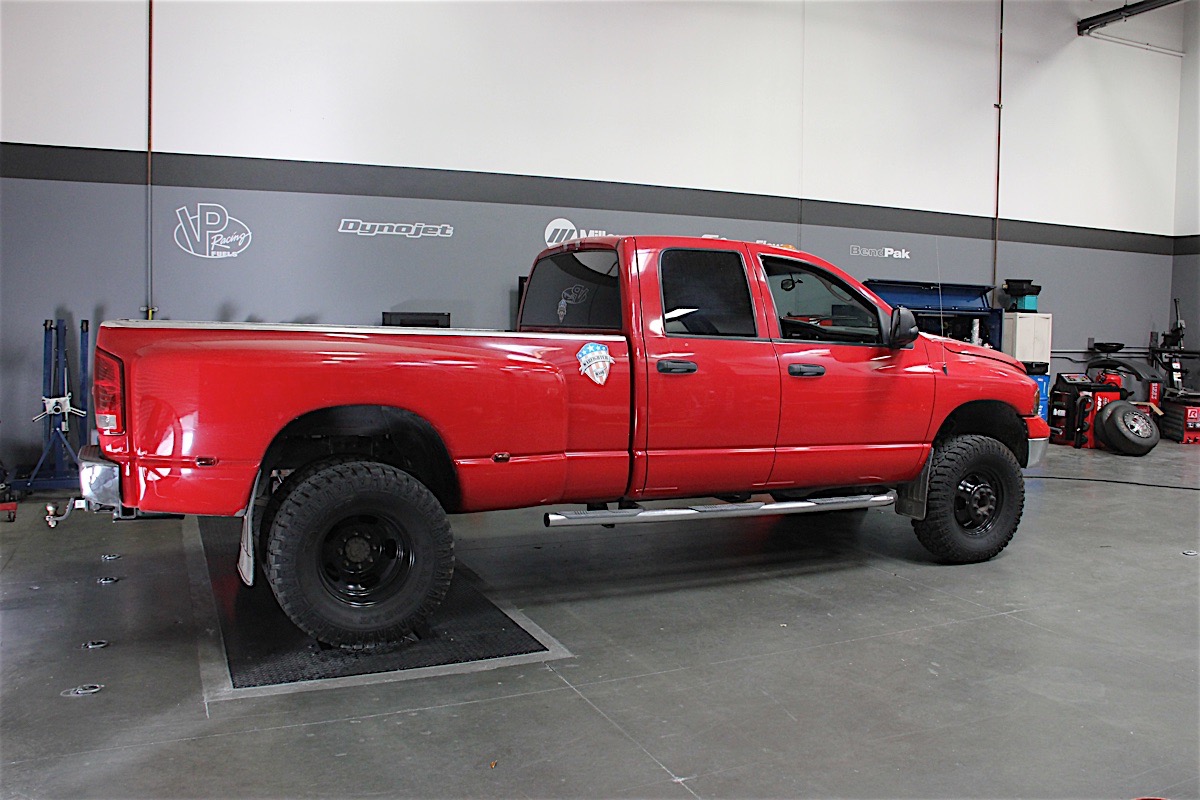
However, for as long as diesel engines can keep on chugging, it’s a different situation for the transmission. In the case of our soon-to-be compound-turbo 2003 Dodge Ram dually, its NV5600 has served the owner well for over 200,000 miles. However, recent dyno testing made us concerned that the transmission was throwing up some red flags. We eventually looked to Valair to address the root of the problem.
After hundreds of hauls like this one, we were concerned that the truck’s gearbox was in need of some TLC.
As we showed you in our project overview article, the dyno graph showed a dip between 2,000-2,500 rpm. Initially, we thought this was based on a tuning issue. However, after running the truck on multiple tune levels and having it still show the dip, we knew it had to be something else.
We discussed the problem at length and decided it had to be drivetrain-related. Specifically, the clutch and its hydraulics, which hadn’t been inspected for a long time.
The Valair Solution
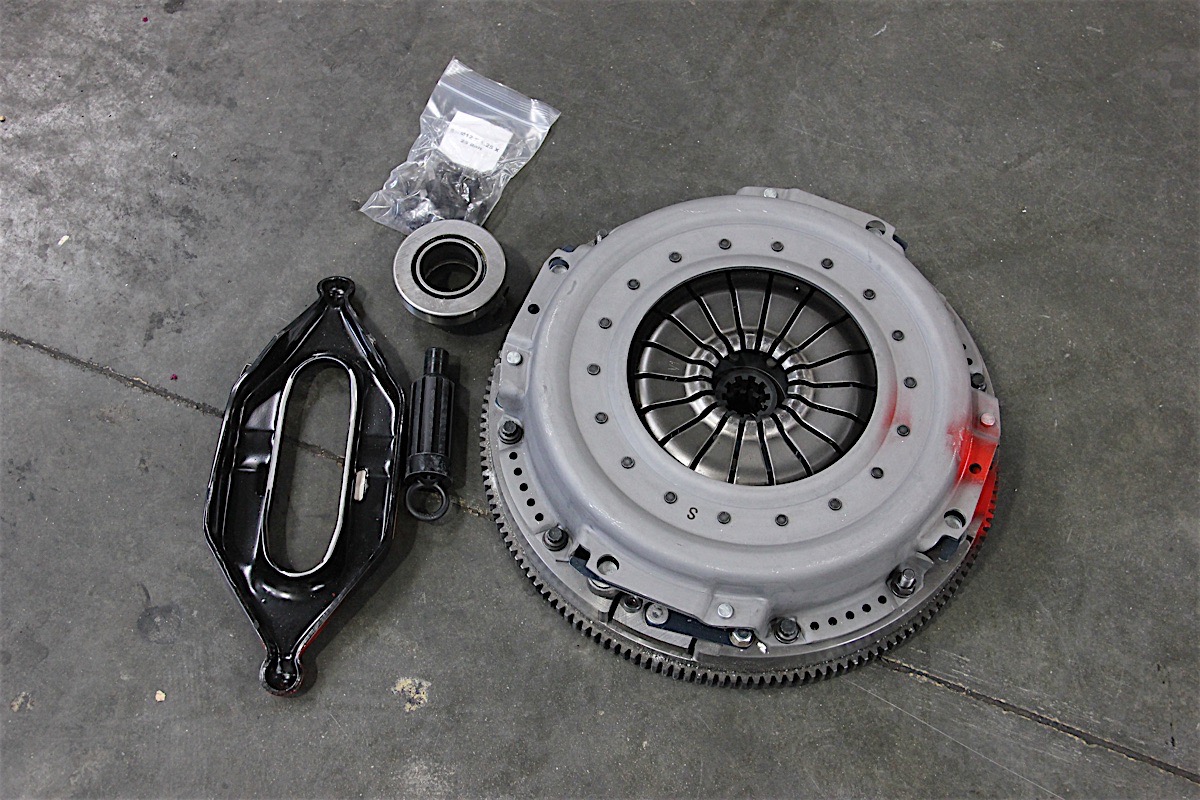
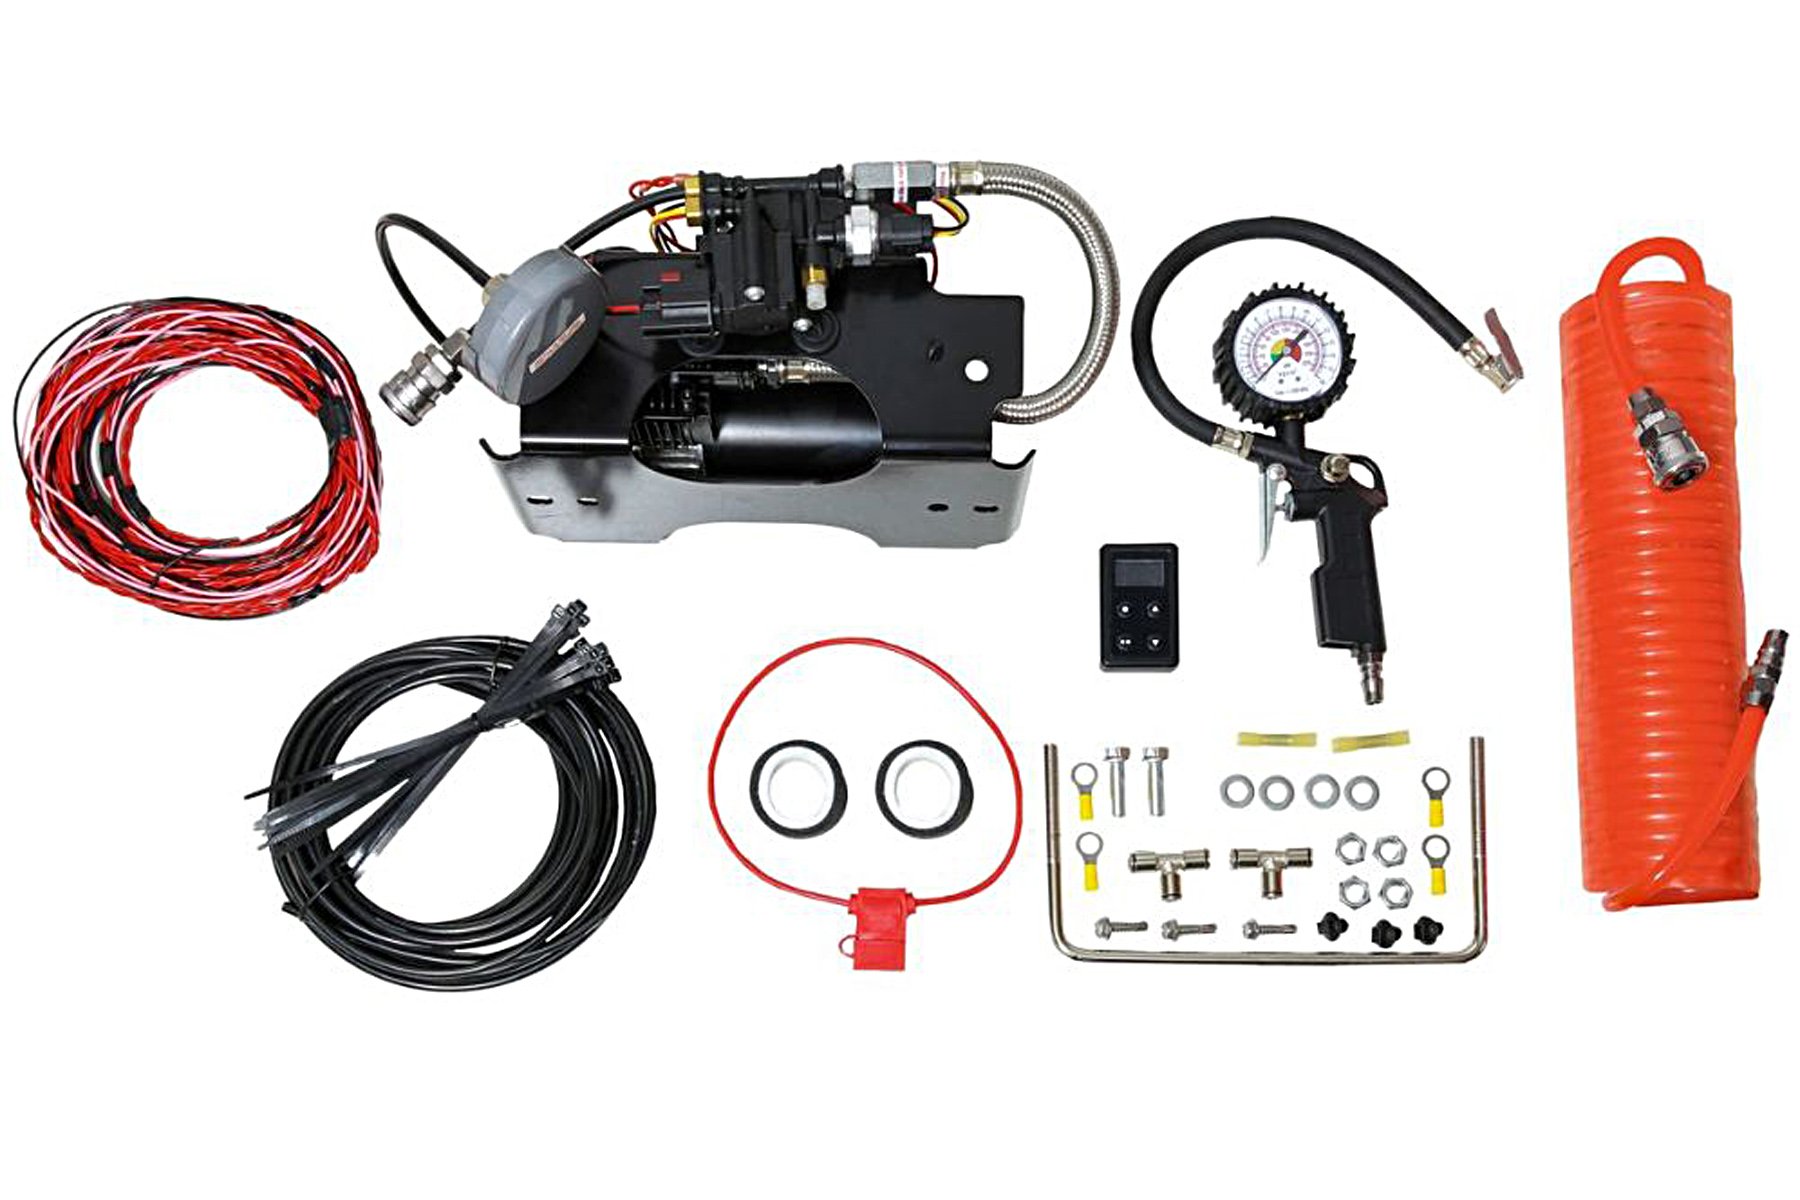
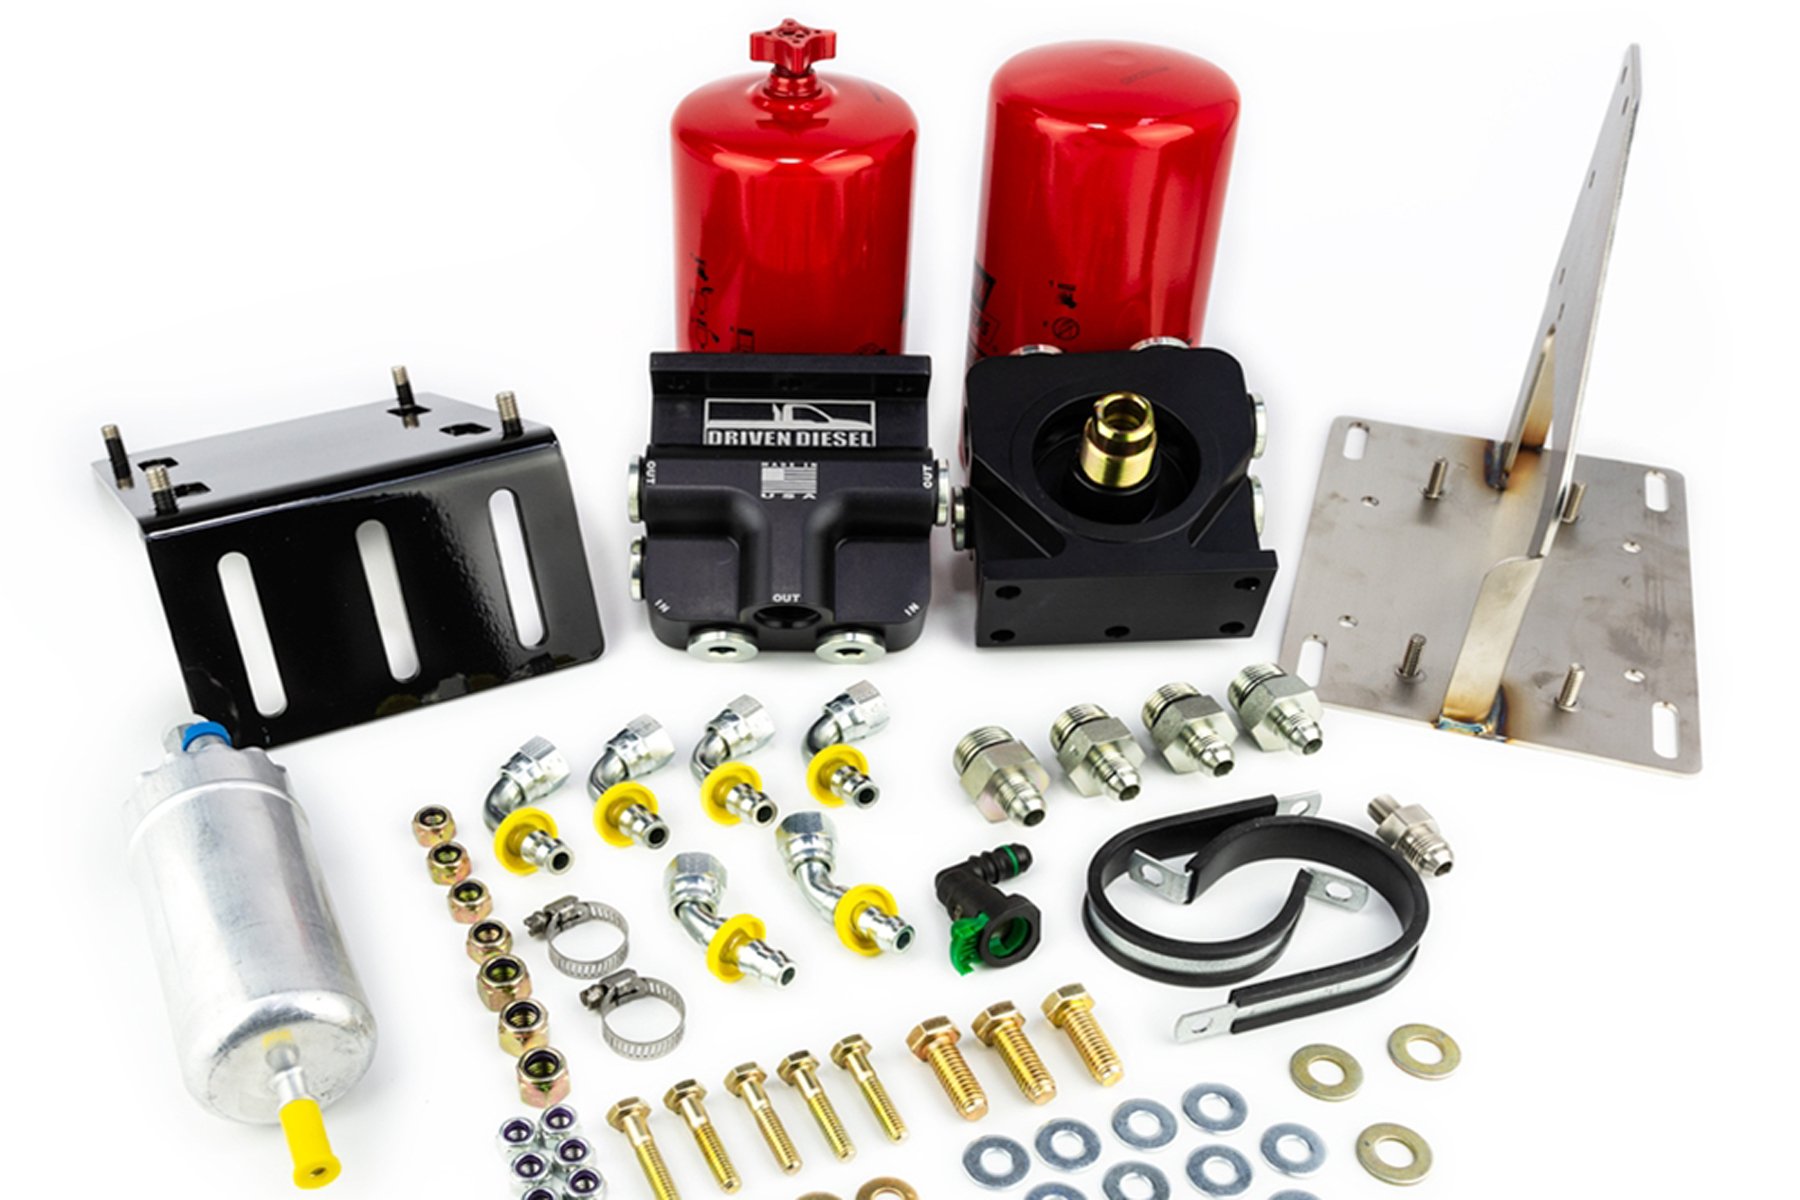
We reached out to Valair for help, and were pointed in the direction of the Quiet Dual Disc Clutch (PN NMU70NV56DDSN-ORG) and the Heavy Duty master/slave cylinder replacement kit (PN NMU70HYD-03). With these two items, we could bring the drivetrain back to normal, and bring the right feel to the clutch pedal, too.
We spoke with vice president Dan Vallance for more information on these parts and what they would do to our Cummins. Our first query revolved around the composition of the clutch, which is labeled “organic,” and what that meant.
Choosing the right clutch will depend on what the vehicle is used for, as well as driving characteristics. It’s a give and take depending on your needs. – Dan Vallance, Vice President, Valair

Another interesting feature of the clutch is its claim to quietness. Mind you, the clutch doesn’t work in total silence. However, according to Vallance, it does deaden some of the harsher sounds typically associated with dual-disc clutch. He said, “We called it ‘quiet’ because it uses a strap to hold the floater plate and prevent it from rattling. The strap is made out of spring steel.”
Lastly, as a dual-disc clutch, this clutch a departure from the single-disc versions that came from the factory on these trucks. We asked Vallance for some insight into the differences in dual- and single-disc clutches.
Our adjustable master/slave cylinder kit would allow us to adjust the feel of the clutch pedal until it was just right.
“We recommend a dual-disc clutch for builds exceeding 500 rear-wheel horsepower,” said Vallance. “Choosing the right one will depend on what the vehicle is used for, as well as driving characteristics. It’s a give and take depending on your needs.”
Installation
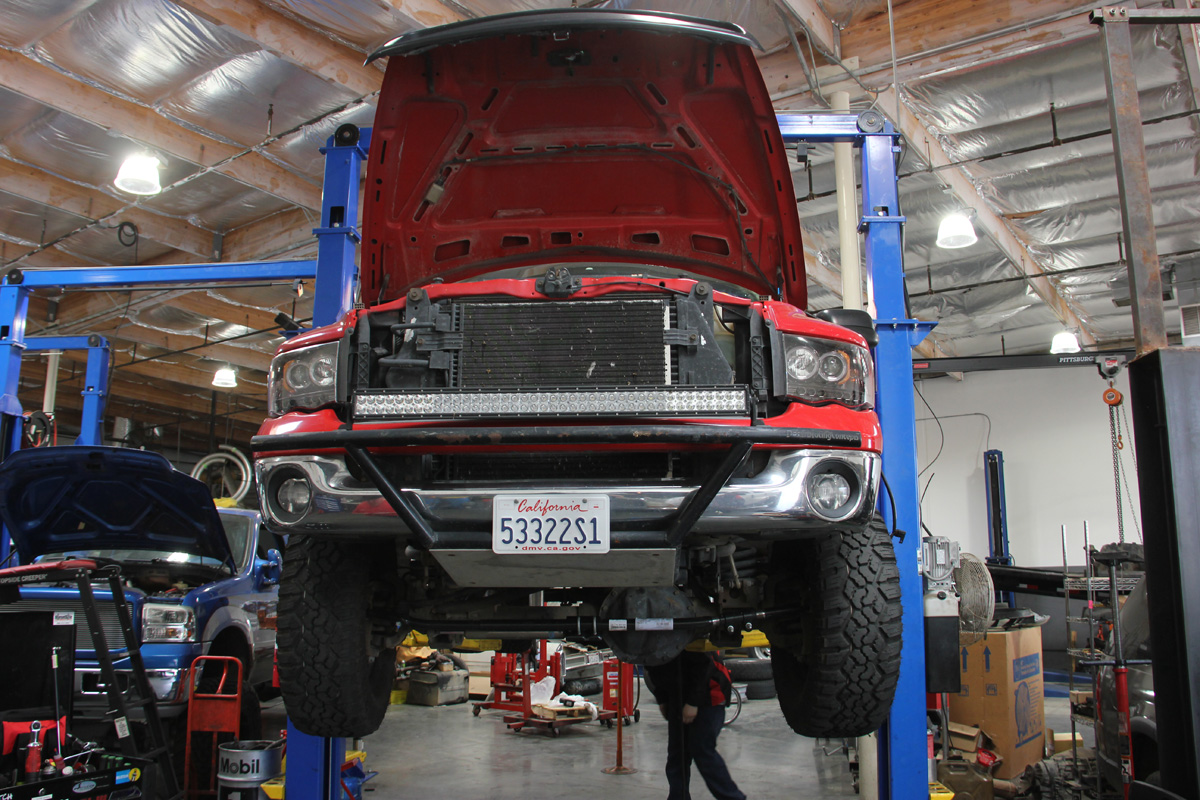
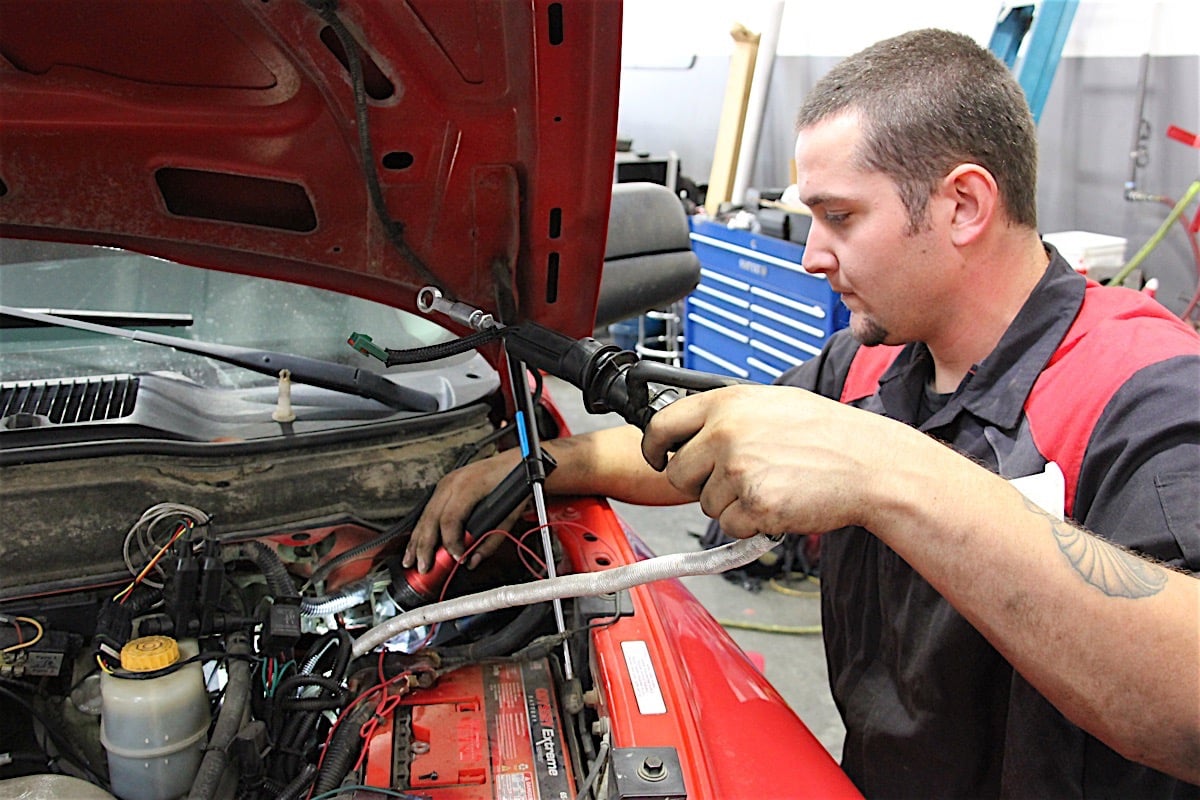
Along with our friends over at American Diesel, we got the truck delivered and up on a lift for the clutch. We unbolted the shifter from the transmission. We also undid the bolts on the front and rear driveshafts and removed the rear one; the front was held up and to the side with a tie-down.
Next, we removed the crossmembers holding the transmission up. We also took out the slave cylinder, which rests on the driver’s side of the bellhousing. The front driveshaft was held out of the way with a tie-down, and then we went after the bellhousing bolts.
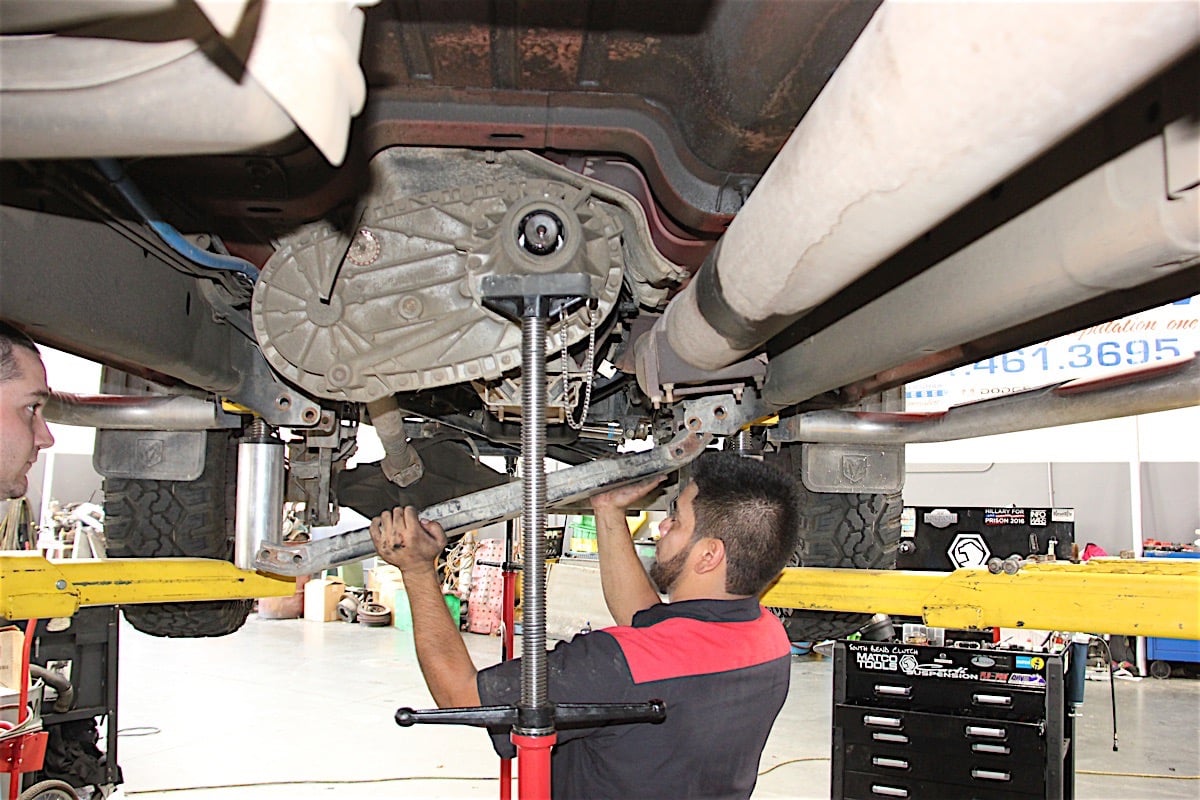

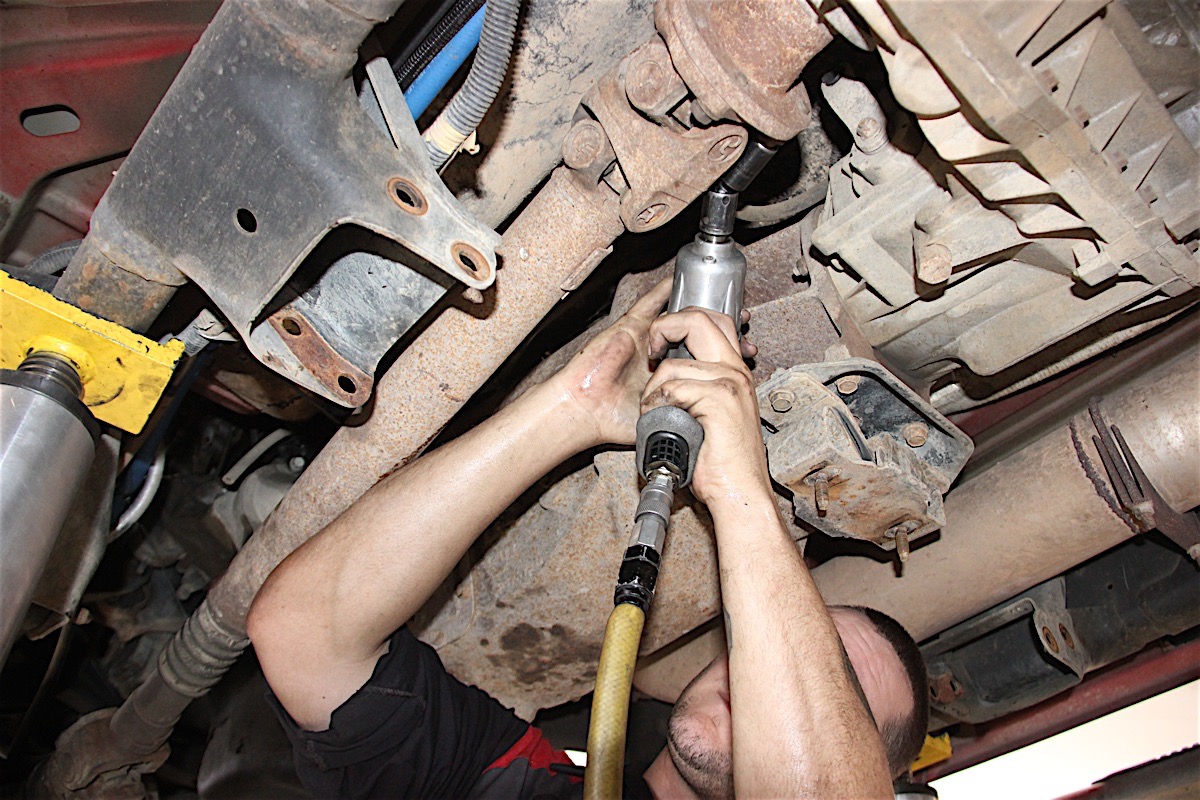
The crossmember under the transmission came out, as did the slave cylinder. The front driveshaft was unbolted on the transfer case side, and then held up out of the way with a tie-down. Finally, we could start removing bolts from the bellhousing.
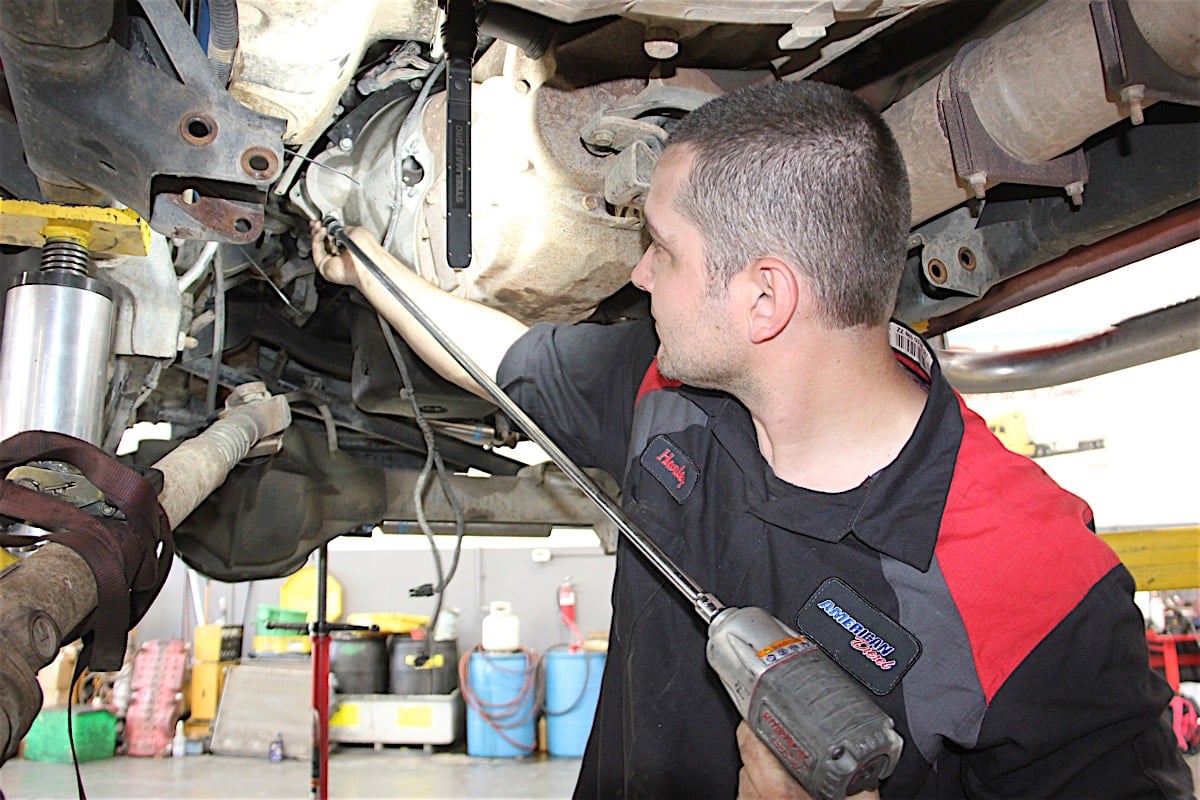
Using a transmission stand, we wrapped chains around the transmission and slowly guided it out of its home. We gently lowered the stand and voila! We could now see the clutch.
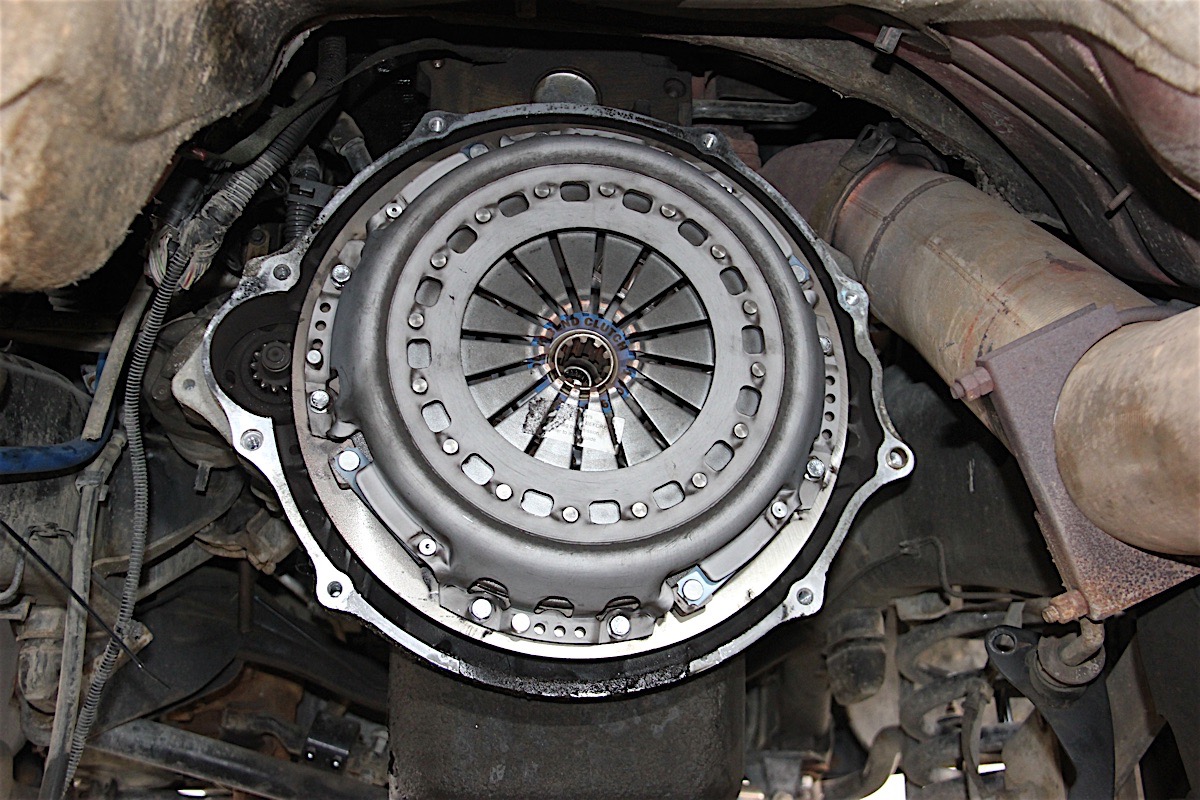
The old clutch, in all of its well-used glory.
We undid the bolts holding the old clutch in. This exposed the flywheel, which looked quite well-used. We noticed numerous scratches, as well as discoloration all over. This indicated the flywheel was on its way out, and needed to be replaced sooner rather than later. Fortunately, our Valair kit came with a brand new one.
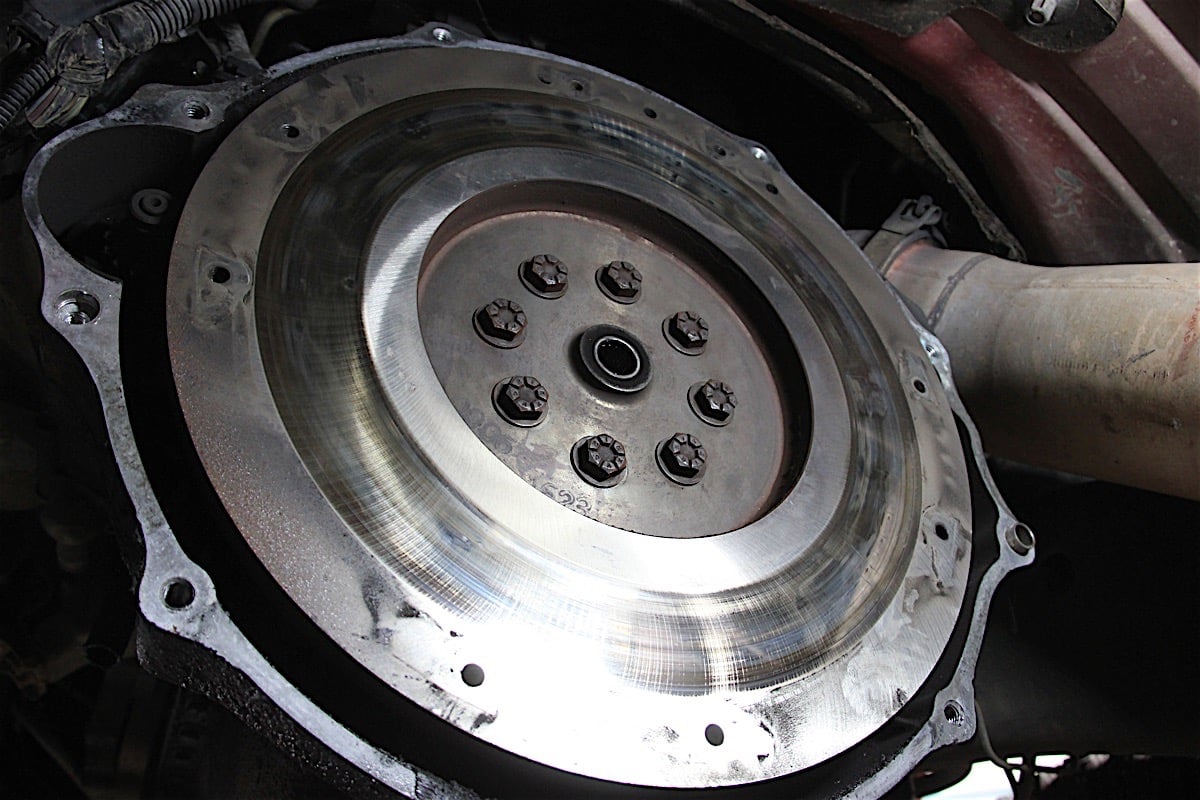
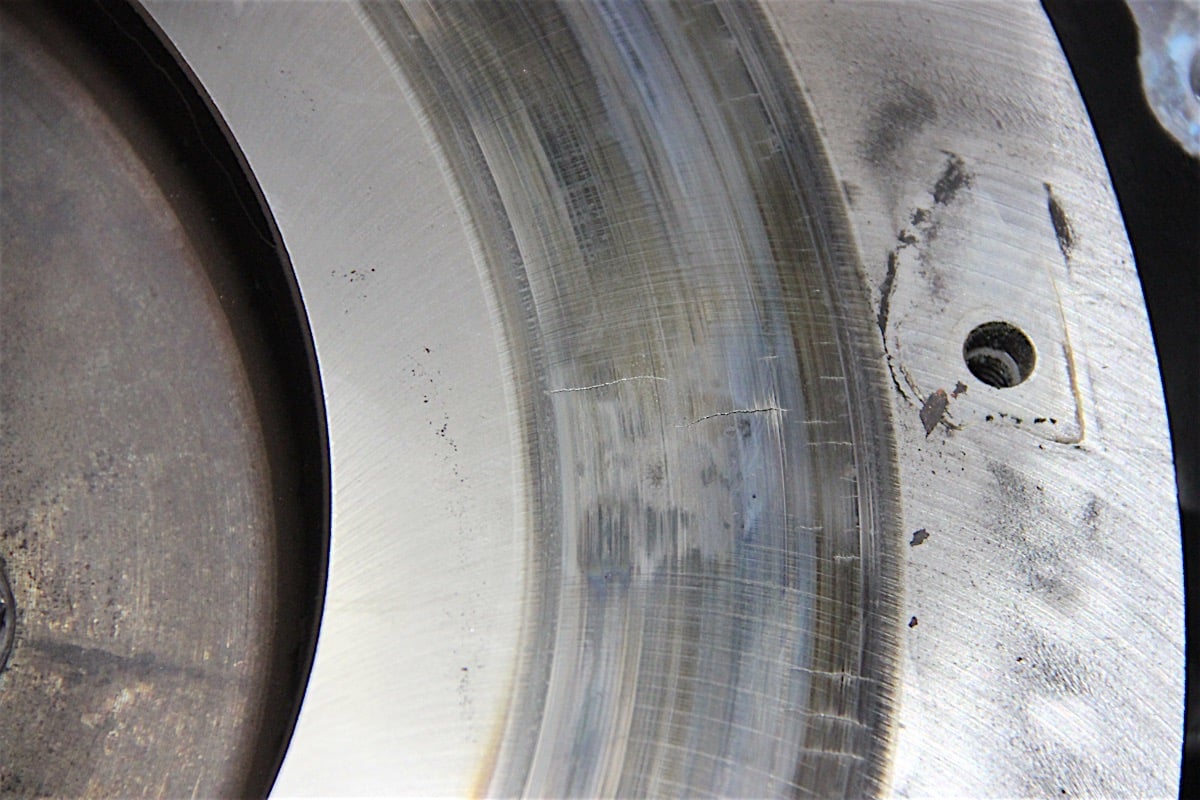
Heat marks and cracks in the flywheel told us everything at a glance. This flywheel had been used and abused, and needed to be replaced.
We removed all eight bolts and took out the flywheel. Next, we laid down the Valair clutch and began figuring out how this dual-disc clutch would get installed onto the truck.
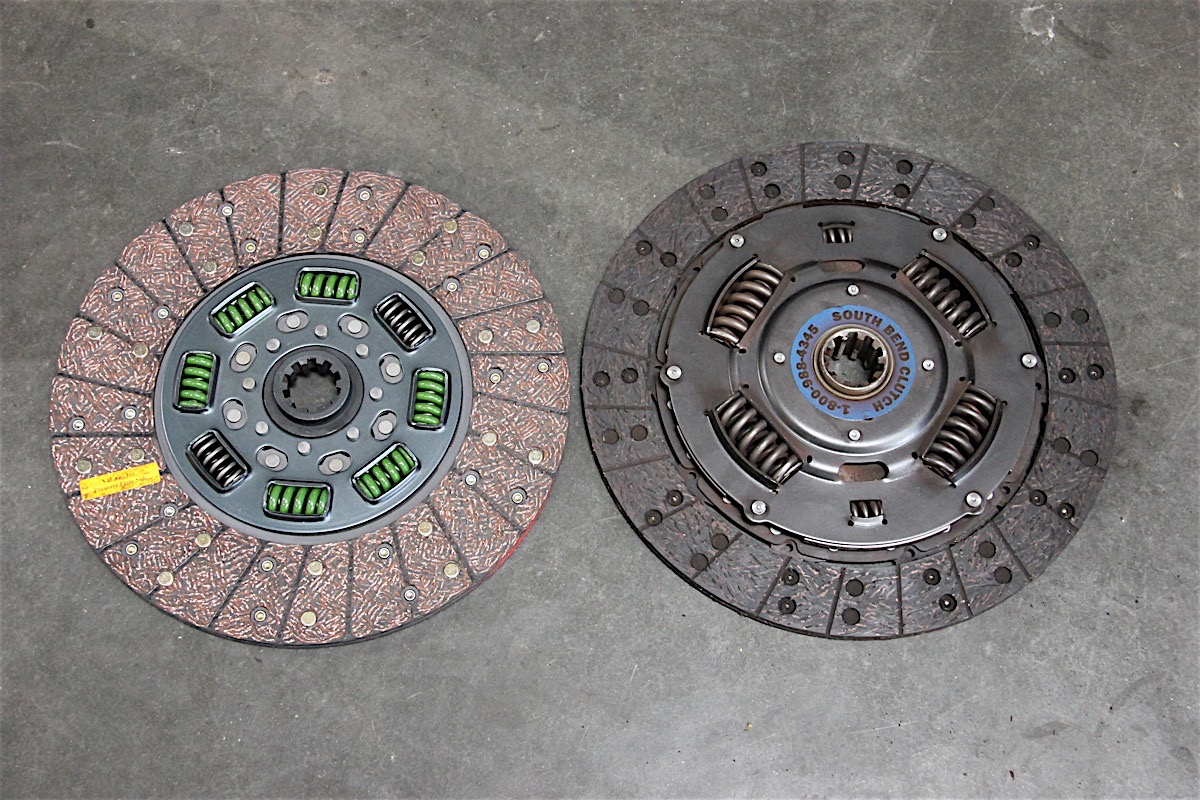
The new clutch disc (left) versus the old clutch disc (right). Truthfully, the old disc was still in decent shape, but it didn’t hurt to replace it anyway. We noticed that the new disc had a great deal more clutch face material than its predecessor, which would make for firmer shifts once we had the new clutch installed.
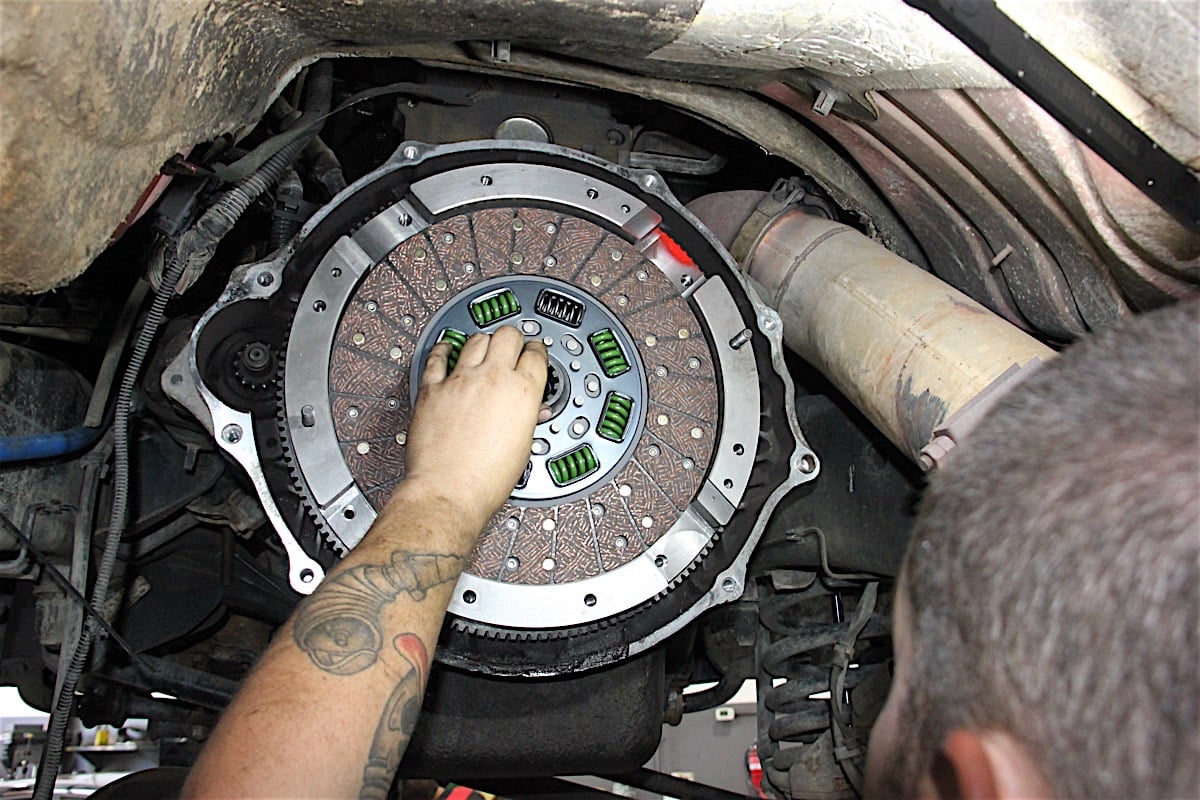
The clutch’s diaphragm cover was removed to expose the first of the clutch disks. This disk was removed, and we could see the mid-plate in between the disks. Everything looked precisely machined and well-made. A special paint marking on the edge made sure we could line everything up correctly as we proceeded.
We took the flywheel and mounted it back to the engine. Then it was just a matter of reassembling the clutch: the first disc, the mid-plate, the second disc, and finally, the diaphragm cover.
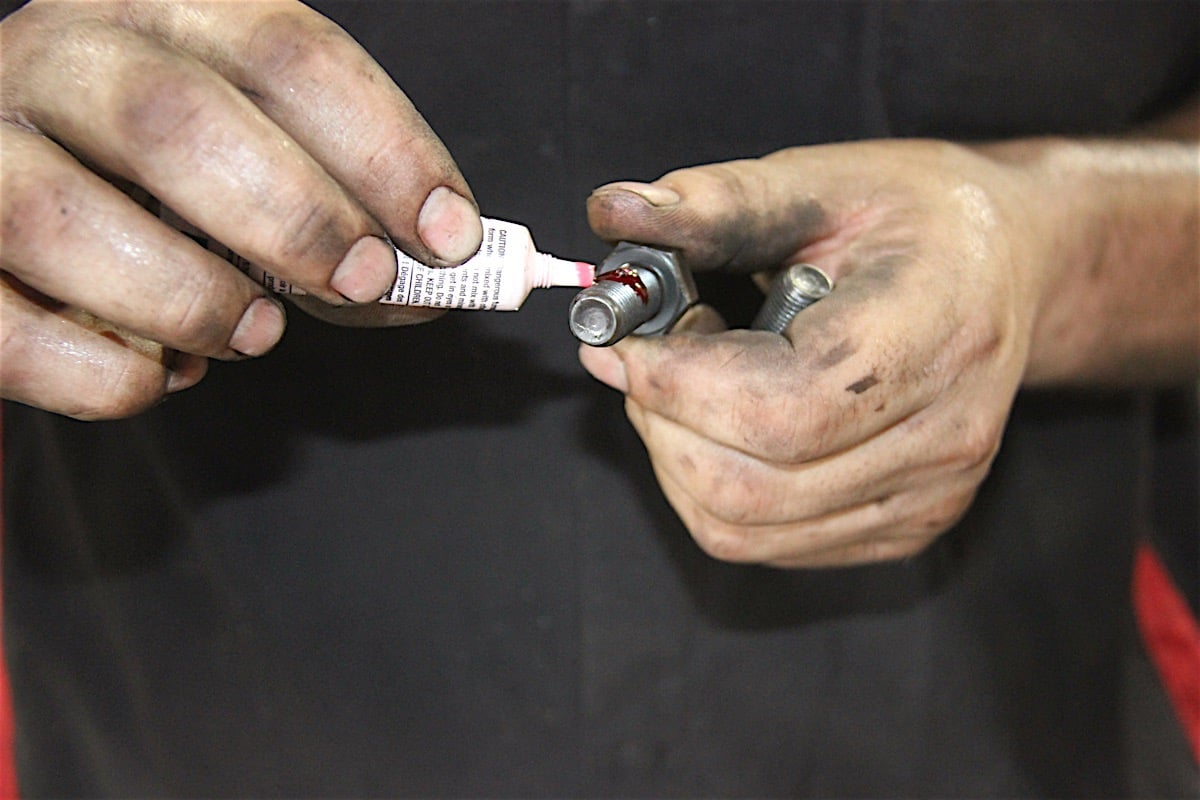
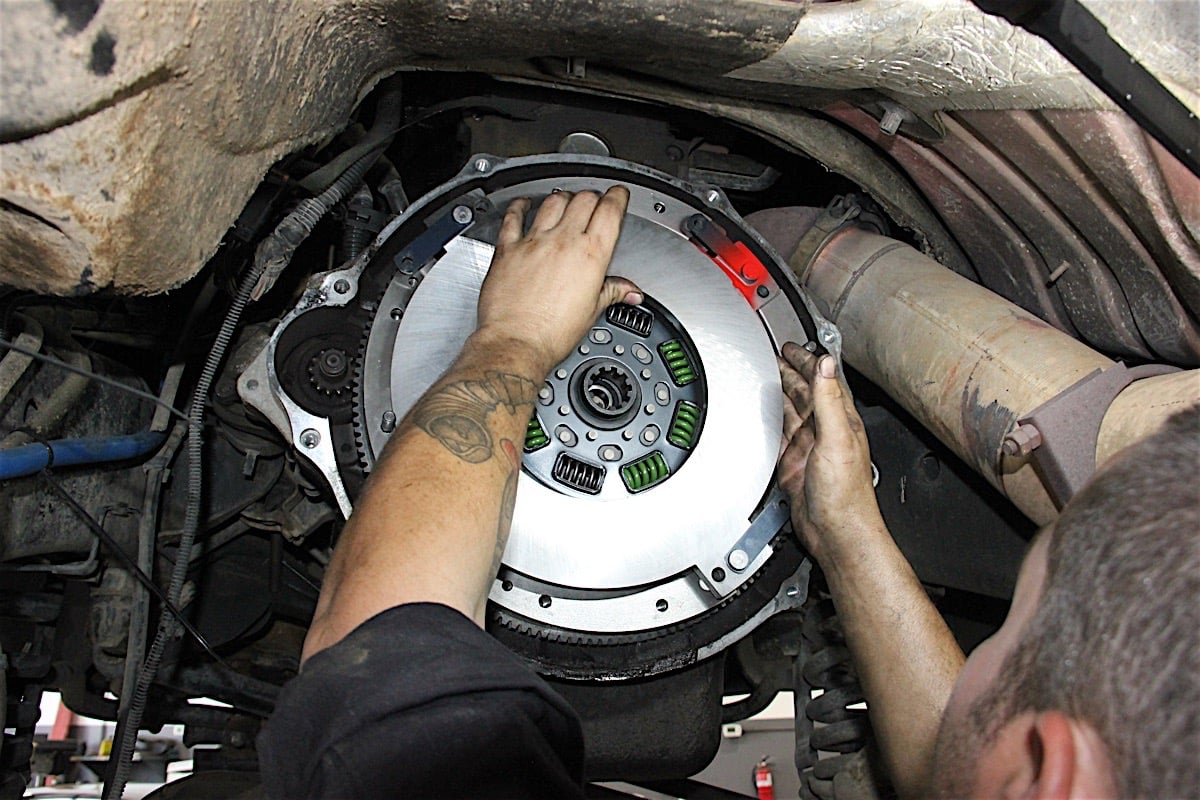

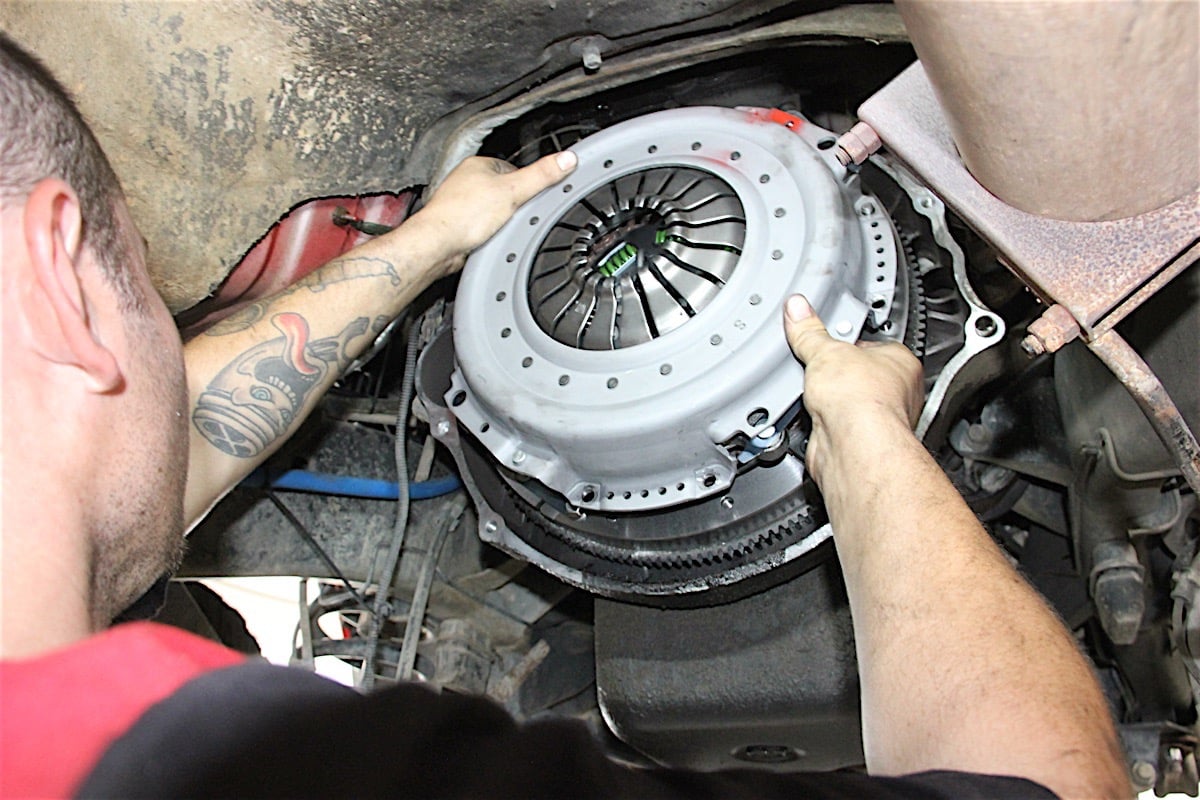
Thread lock was used on bolts whenever possible to keep them from backing out. Installing the clutch was rather simple, starting with the first disc, then the mid-plate, then the second disc, and finally, the diaphragm cover.
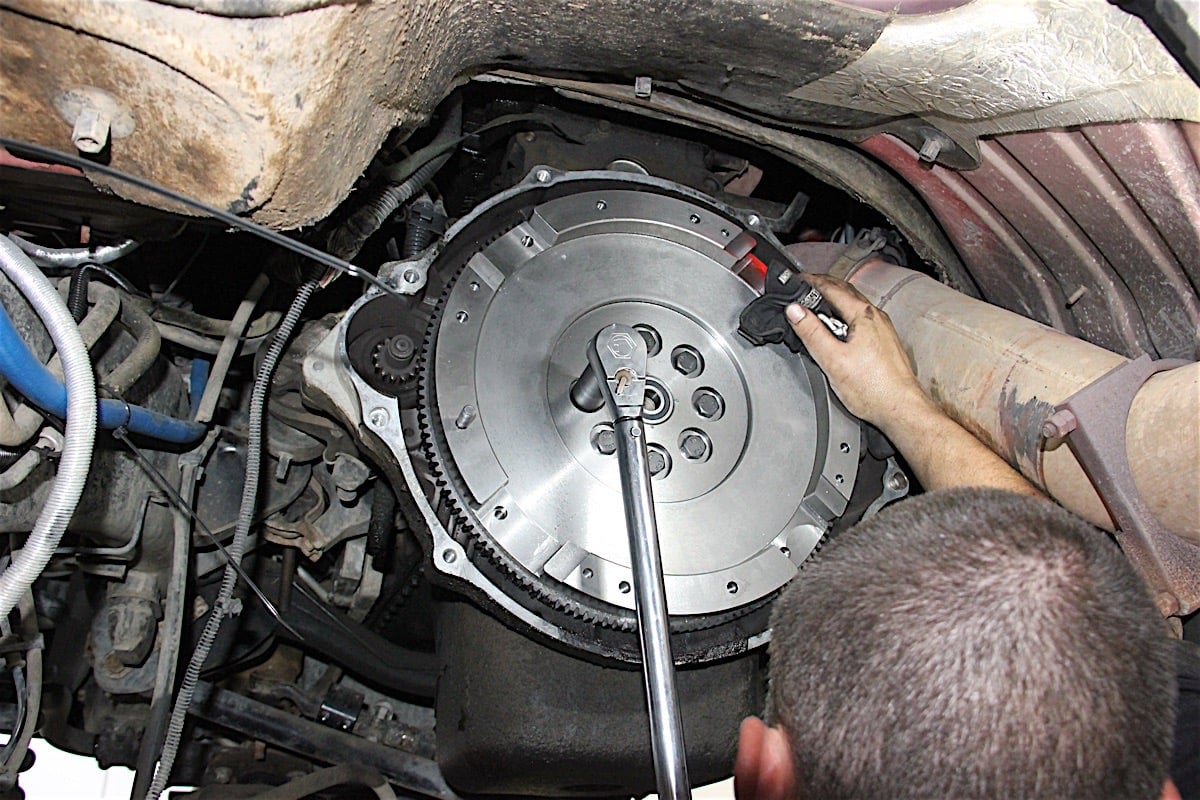
This clutch alignment tool kept the clutch assembly from spinning accidentally while we were installing everything. We removed it once we had installed the final bolts onto the diaphragm cover.
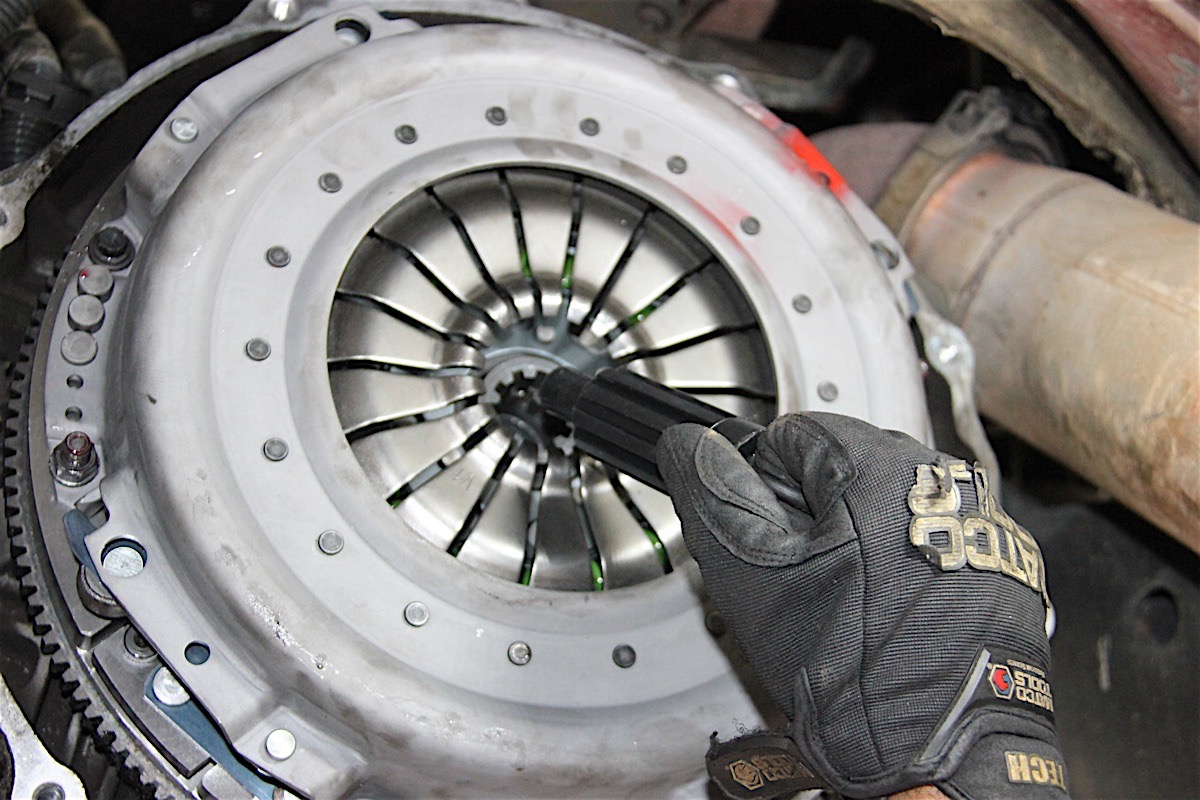
With our clutch installed, we now took care of the release fork and throwout bearing. The pieces snapped into place, and the release fork popped into its home on the transmission. We coated the input shaft with grease to help it accommodate the new throwout bearing more quickly.

The new throwout bearing glided back and forth over the input shaft with some fresh grease.
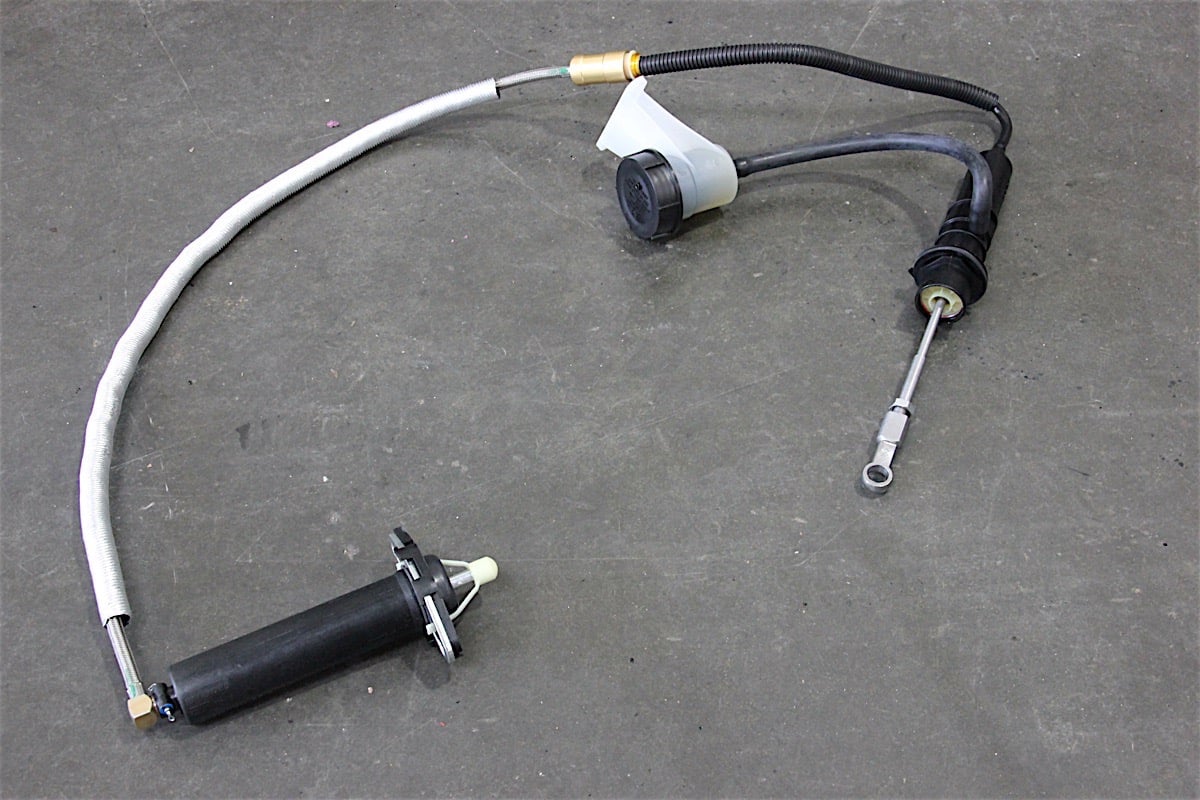
With that done, we put everything back together. Well, not everything; the old master/slave cylinder was still installed, and needed to be replaced, too.
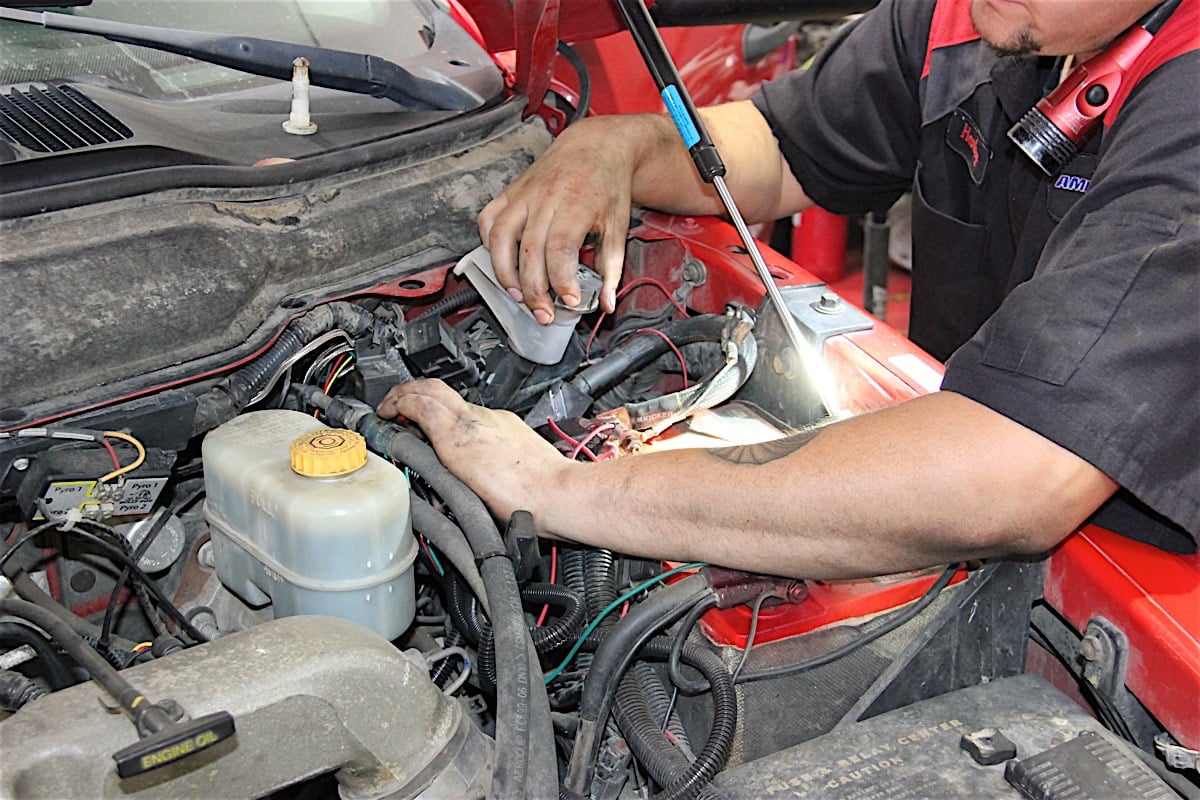
We started with the clutch pedal. A plastic piece that held the pedal to the linkage was removed, and the clutch safety switch was unplugged. We went back to the engine and located the old fluid reservoir under a mess of wiring, and took it out along with the master cylinder.
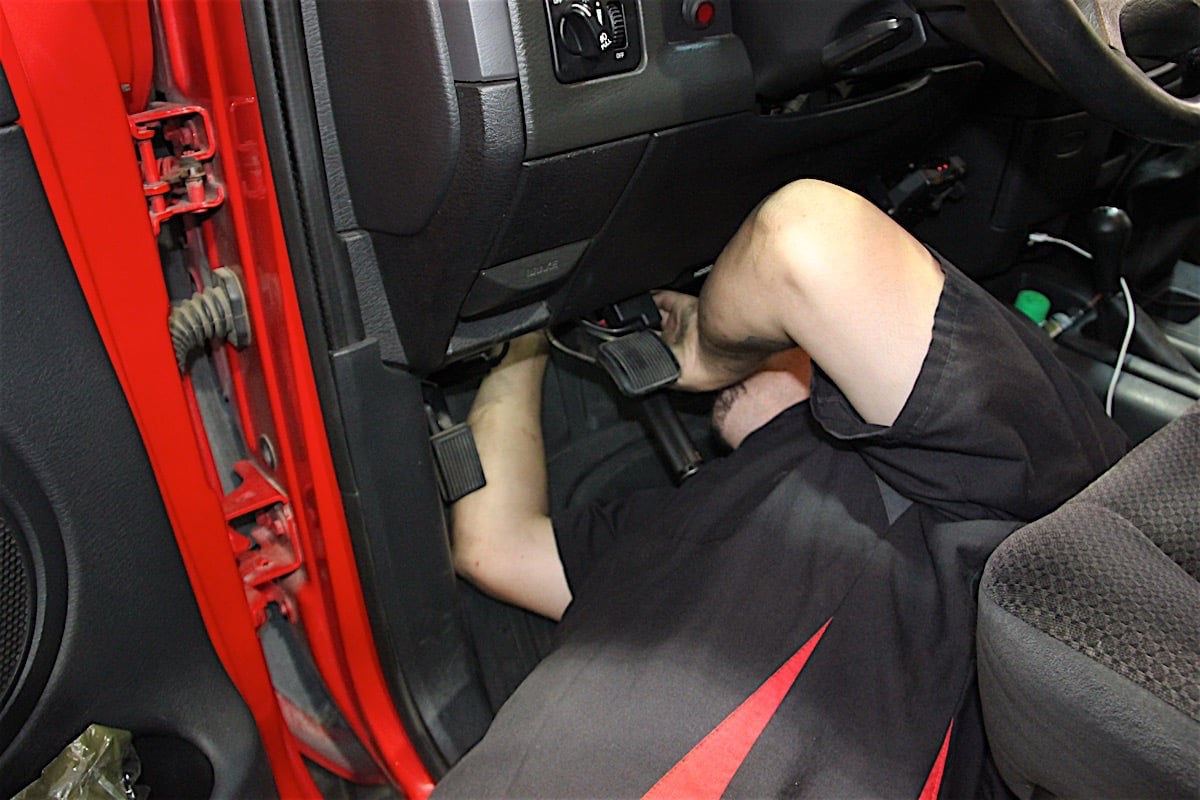
We had to swap between three different places to get the old master/slave cylinder out: the cabin, the engine bay, and the undercarriage.
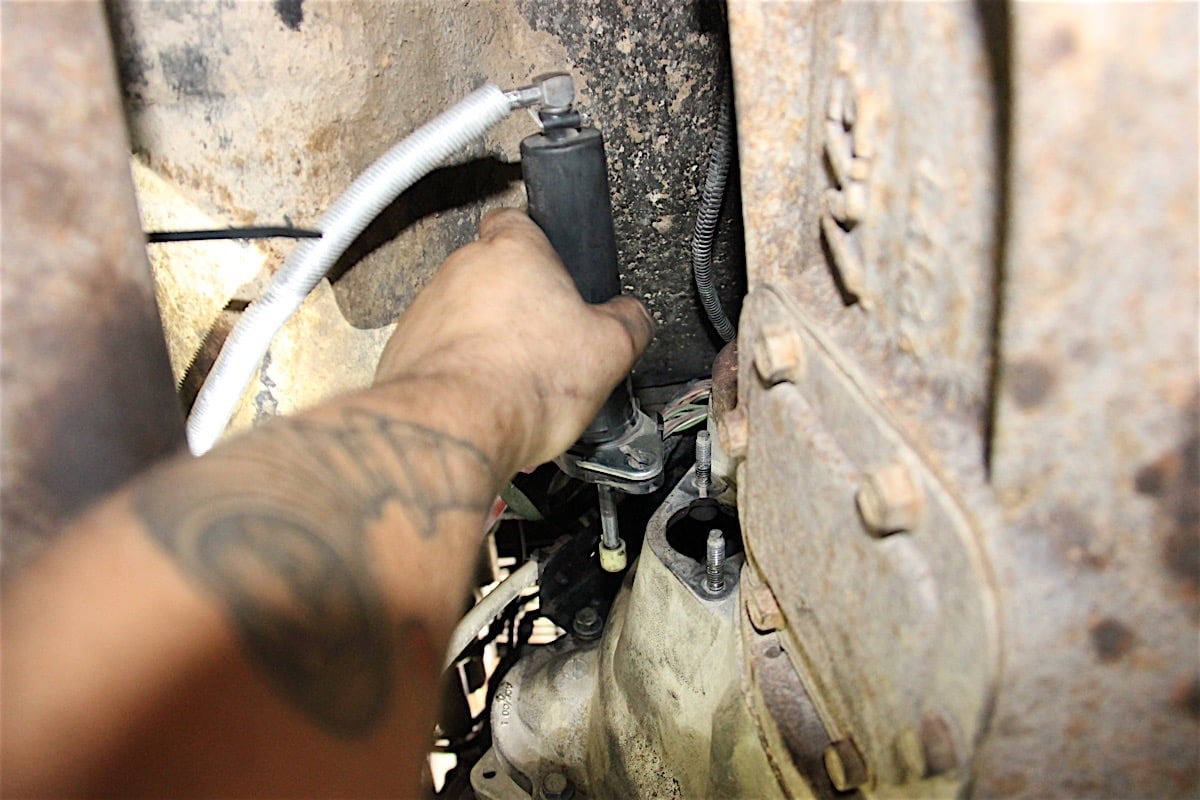
Underneath the truck, we located the old slave cylinder and removed it. We pulled the master and slave cylinder as one item up through the engine bay, fighting some wiring along the way.
Hidden inside the master cylinder was the neutral safety switch. Since our kit didn’t come with a new one, we had to gingerly remove it and install it onto the Valair master cylinder. This took some time as we fiddled with where and how it was inserted on, but we eventually figured it out.
The crazy bundle of wiring was a pain to get through, but we eventually managed to extricate the master/slave cylinder in one piece.
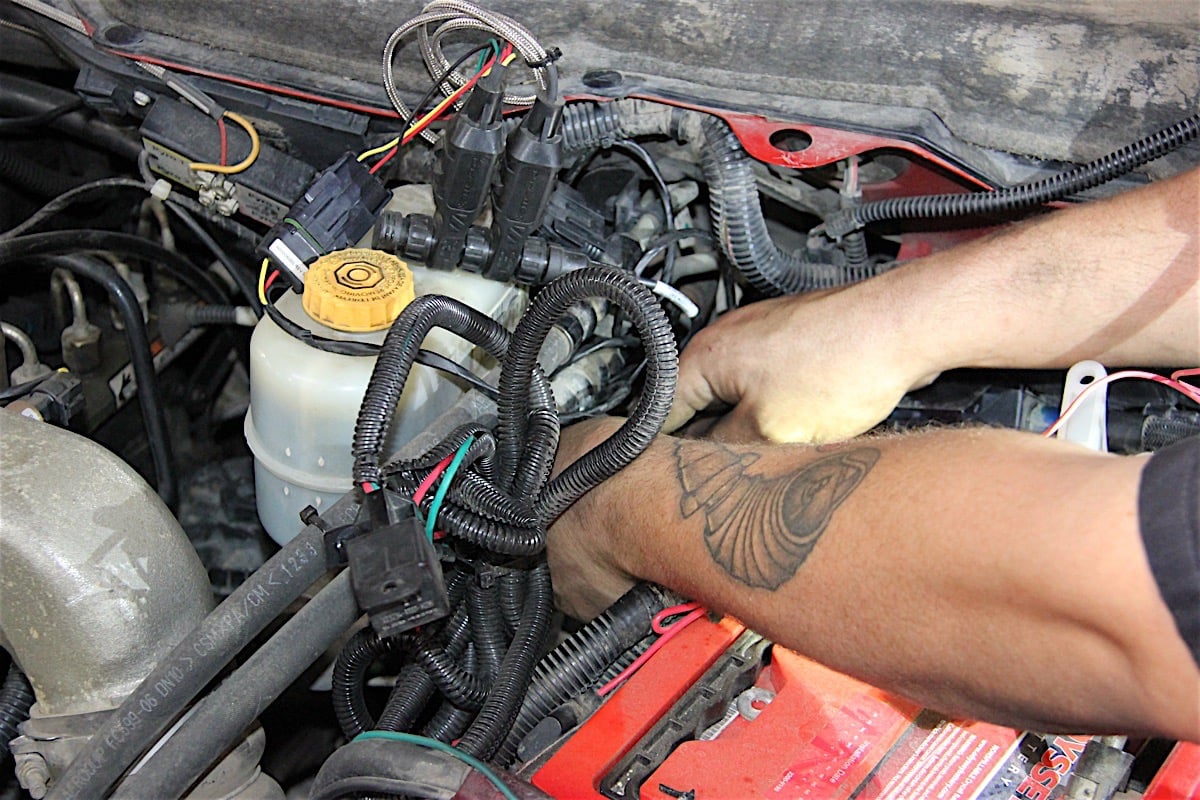
We snaked the slave cylinder back down to the transmission and installed it onto the transmission. The master cylinder’s pushrod was adjusted to a length that we felt was perfect. The master cylinder was installed into its home, as was the reservoir. Finally, the plastic piece for the linkage was replaced in its home.
All we had left to do was pour clutch fluid into the reservoir. We bled the system, making sure all air pockets were neutralized, and put the cap back on the reservoir.
The truck felt almost brand new with a new clutch and master/slave cylinder. Now, we have to get it back here and get it tested again before moving on with our compound turbo install. Stay tuned!
Our guess on the pushrod was right, as proven by the quick ride around town we took after the install. The clutch would reach full engagement about two inches from the floor (right where Valair recommends, 2-3 inches) and our shifts felt smoother, too.
Now that we know the truck’s transmission is ready to rock, we’re ready to rock as well. We’re still on track to get the compound turbo system installed, and can’t wait to bring you the results. In the meantime, check out the Valair website and Facebook page.