
Just because you bought a brand new truck off the assembly line doesn’t mean you’re done with it. It also doesn’t mean the truck is at its peak level of efficiency. In fact, after looking at some of these late-model trucks this past year, they are very constricted. Today, we’re going to look into the world of improving the efficiency of your engine with Pusher Intakes and their all-new Intake System, Hot Side Charge Pipe, and Coolant Reroute for the 2017 and up Ford Power Stroke-powered trucks.
The 6.7-Liter Power Stroke is already a pretty damn stout engine, but every one of us knows that it is never enough. We’ll always push it to the limit and try to get the most out of it we can. This big V8 engine makes 440-horsepower at 2,800 RPM and 925-lb/ft of torque at 1,800-RPM at the crank. After your 20% drivetrain loss, you’re in the area of 350-horsepower.

What’s The Truck?
Our subject in today’s surgery is Andrew Clark’s 2017 Ford F-250. This Ultimate/Platinum packaged Ford is enormous. It’s a big machine with even bigger 37-inch tires but its sole purpose is to tow. Clark has other “toys” to really crank up the power in but he needs something that can get those items to and from shows. While the power the truck makes is excellent and capable of such actions, we know that we can do this engine a solid by providing a better lung to breathe from.
For you to better understand the truck before we install these parts, let’s discuss what was done to the truck beforehand. Clark’s ’17 had your typical work done. With custom tuning and exhaust, this truck ran and sounded great. But, with the help of this Pusher Intake System, this truck will breathe better, sound better, and run cooler.

It’s time we slap these parts on here and see the physical difference. We have unboxed all of the supplied parts and that includes the Pusher Intakes Intake System, Hot Side Charge Pipe, and Coolant Reroute System. Once again, Pusher has gone out of their way to make even the packaging perfect. At a glance, the parts to the naked eye are precision cut, perfectly welded, and boxed up neat. The crew at Pusher gets yet another A+ from us.
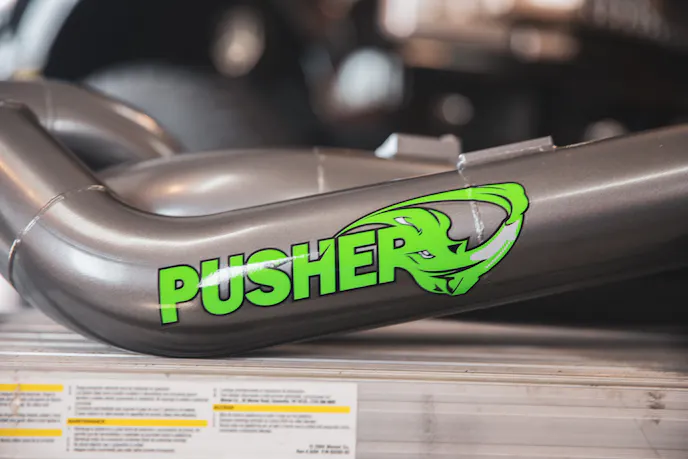
Out of the many color options we had to choose from, both Clark, Pusher, and I all decided that the best looking option for this engine bay was Titanium. This beautiful Titanium color was going to brighten up this engine bay with the bright green Pusher Intakes decals on them and as soon as they were removed from the boxes, we knew the choice was a good one.
Enough Writing, Let’s Wrench.
As you can see, with everything unboxed, each and every one of these parts was singled out and taken care of when manufactured. Everything looks meticulously cut, cleaned, and painted. This attention to detail makes installations go smoothly. We unlatched the hood and took our first look at this less than stellar sight. I mean, I get it. Ford isn’t out here to make them pretty in there but come on, you know?
That’s all going to change very soon. So, first up on the agenda was to remove the air intake box lid and plastic tube and then set the Mass Air Flow Sensor and Filter Minder aside. Once we got those few items out of the way, we then moved on to the removal of the rubber, cold-side charge tube. With that loose, we then removed the Intake Air Temperature sensor and sat it aside.
This was the part that took us the most time given the area of the bolts and the amount of them. Next on the to-do list is the loosening of the factory plastic intake manifold bolts that attaches it to the aluminum cold air intake and remove the MAP sensor. Once this is complete, you can move on to the CCV fitting and the turbo’s rubber coupler.


With the aluminum cold air intake free, slide it out from under the plastic intake manifold. I will warn you, this did take some time to maneuver it out from under there but it’s obviously doable. Keep in mind there are a few hidden bolt heads that are tough to reach so don’t try and pry it out until you’re sure you’ve got all of the bolts removed.
At this time, if you’re doing the Pusher Coolant Reroute kit and the Pusher Hot Side Charge Tube, now is when you are going to install those items.
Moving on to the upgraded Hot Side Charge Tube, we had to work with the finicky C-clip that the factory charge tube uses to attach to the turbo. A quick tip on the detaching of that is to take two flat head screwdrivers to open the C-clip and push the tube towards the turbo. This will force the dip in the C-clip out of the groove and will free up the original charge tube.


With all of these items out of your way, you can then reinstall the C-clip into the Pusher upgraded tube and install the supplied o-ring in the groove of the machined fitting. By using a silicone-based lubricant on the o-ring and the coupler, this made it easy for us to insert the charge tube onto the compressor outlet and ensure all three sections of the c-clip were engaged. Once positioned correctly, you can secure it with the supplied 3-inch t-bolt clamps.
Hot Side Charge Tube is on, our new intake system is underway. Up next, our coolant reroute. We don’t want to spend all this time cleaning up this engine bay with the titanium powder coating and then leave coolant hoses draped all over it all, you know? Enter Pusher Reroute Kit. To install this reroute kit, you need to drain at least a gallon of coolant from the system.
After we drained a good bit out, probably more than a gallon just to make sure we had enough out, we began removing the factory coolant hose assembly. You can set aside the lower coolant riser bolt that secures it to the bridge because you will reuse it. Then, find the 90-degree, quick-connect fitting at the firewall that is the plumbing for the heater core return hose and disconnect it. Beware, coolant will come out of this so have a bucket or a helper to plug it off with a finger.


Trim the 3/8-inch hose that’s draped over the engine bay and trace the other leg over to the coolant reservoir on the driver side and disconnect it.
Now, we’re ready for the last few steps. Place the supplied o-rings in the grooves of the coolant riser while also applying more silicone-based lube on them. Once properly lubed, secure it down with the hold-down bracket and riser bolts. Place the short leg of the 90-degree hose over the adapter and the long leg towards the heater core outlet. Make your connection at the heater core outlet and coolant reservoir and secure both points with the supplied clamps.
Refill with coolant.

Moving on, it’s time to complete this intake system. You need to take the removed MAP sensor and install it into the new intake manifold via the supplied M5 bolt. Once you’ve got the sensor properly attached, secure it to the engine with the provided hardware. Make sure when you’re installing the manifold to the engine you use the washers between the bolts and the flanges. All that’s left through this step is reinstalling the dipstick tube to the bracket on the manifold.
Once again, making coupler connections can be tough with new rubber. So, we used some extra lubricity to make these connections and adjustments easier. You have a 3-inch hump coupler that will go onto the intake manifold and a 90-degree coupler that will attach to the inlet of the intercooler that you want to face slightly backward. Both of these connections will be secured tightly with the clamps once the pipe is installed between them.
Find your removed IAT sensor again and install it into the cold side charge tube and plug off the two 1/8-inch holes unless you have other sensors or injectors to install.

Once you’ve got your couplers lubed and ready for the charge pipe, you can then install the charge pipe. Again, make sure you use the spray lube as it is crucial in making this process easier. Once you’ve got everything secure and aligned, you can tighten up your clamps and plug the harness back into the IAT sensor.
We’re nearing the end. Now, you need to take the custom Pusher intake lid and begin piecing the last few items together. It’s pretty self-explanatory. The pipe runs through the box, the pipe has a rubber coupler, the filter attaches to the box and everything gets clamped together.
First Drive
When you have one of these newer trucks that are covered in filters, boxes and draped with plastic under the hood, it leaves room for improvement. In fact, just starting the truck we could faintly tell there was a bit of difference in sound as this engine is already breathing better. After a quick leak check on our coolant connections, it was time to hit the road.
Excited that the truck sounded a little different upon first fire, there were already some changes. “Instantly, I could tell a difference in sound. The truck just rumbles a lot more from the get-go,” said Clark. “The truck didn’t sound bad to begin with but this certainly gives a more aggressive, fun sound to the truck just idling.” Once we hit the road, it’s true. The truck rumbled to life and we hit the road.
Once the accelerator was pressed, it was a treat. Oh, yeah, this V8 is definitely being heard now and this truck already runs better. It’s amazing what a breath of fresh air can do for one of these trucks. Almost instantaneously, the truck was more responsive.” Sound is a big part of these systems but not that isn’t all. In fact, the power change was big too.

“This truck, with 37-inch tires and the higher gears, always seemed to struggle with sixth gear. It would be way under boost or almost underpowered. Now, with the Pusher Intake system installed, it’s a different animal. As soon as the truck downshifts, it’s at full power and full boost. There is almost no lag at all anymore. It’s definitely making more torque.”

Another thing we noticed after the install was that the EGT’s had gone down considerably. We are using our EZ LYNK system to data log these tests to positively get data and track our changes. From the factory with the stock airbox, this truck would reach 1,500-degrees EGT’s in no time. Now, we can confidently say that that number has fallen quite a bit.
“I am beyond happy with this kit. I wanted the truck to offer a better sound, make better, usable power and torque, and I wanted to lower EGT’s. It’s done everything I’ve asked and more,” said Clark. “Also, the fitment and packaging of this Pusher kit was perfect. Fit and finish under the hood was perfect and it all fits as it should.”
A lot of us don’t really understand the research and development that go into creating something like this. We all know if we want air intake systems, add-a-turbo kits, or charge tubes, we can go to Pusher. But, what a lot of us miss out on is the fact that they pour so much time and effort into making them as good as they do. We appreciate companies like Pusher Intakes that take the time and go the extra mile to create such great products.
If you’re in the market to better take care of the engine in your truck, you need to head over the Pusher Intakes website here and see what they offer. They have a website where you narrow it down to your ride and select from the following. Get your truck in better shape, make it run better, make it look better, go see Pusher Intakes. Stay tuned and follow this 2017 build as we take it to the chassis dyno to just how much improvement this kit made.
For more installations and techy stories on the industry’s latest parts, stay tuned to Diesel Army.
You might also like
This 12-Valve 6BT Cummins-Powered Land Cruiser Trades Soccer Duty For Trails
This 1995 Toyota Land Cruiser is a one-off creation that's powered by a 12-valve Cummins turbodiesel engine resurrected from a pile of parts.

